Operation – Leica Biosystems VT1000 S User Manual
Page 24
22
Instructions for Use, V 2.0 RevD – 09/2013
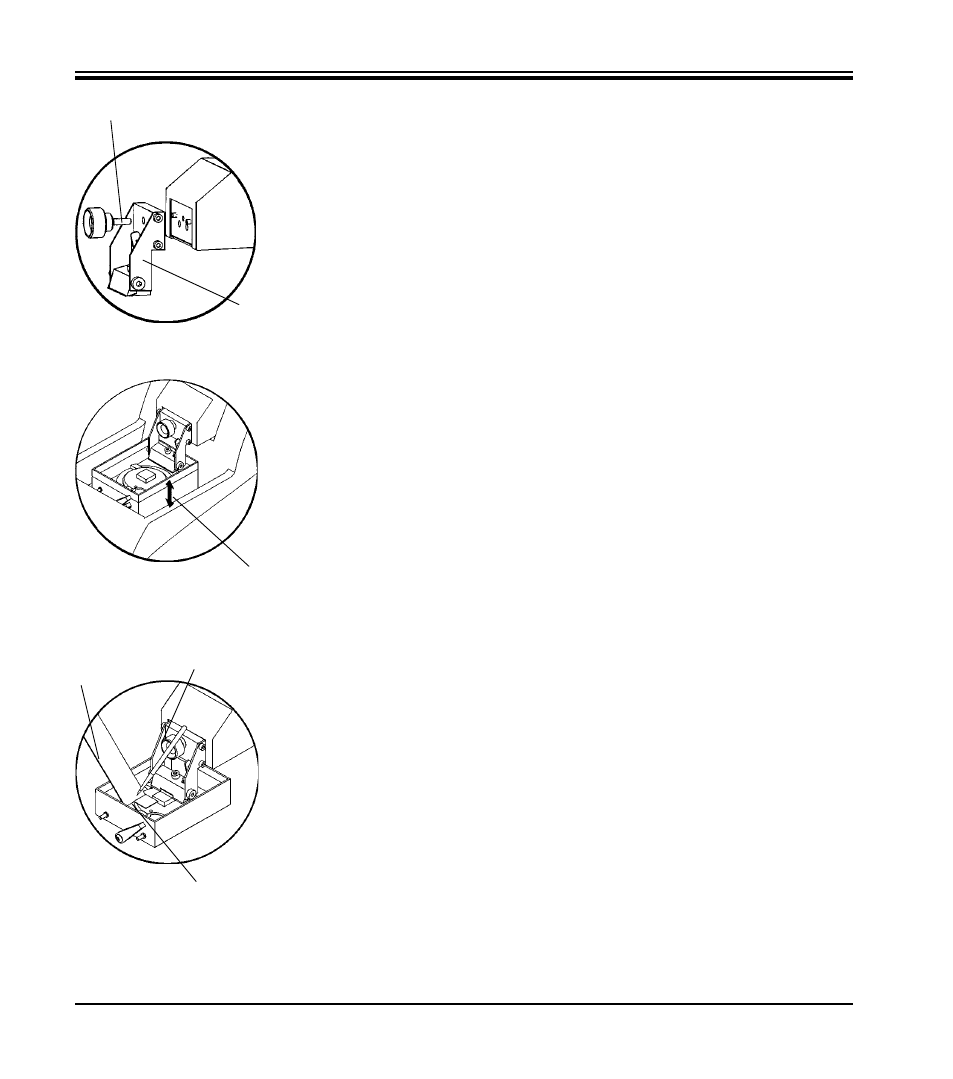
• Fix the knife holder (1) with the knife holder clamping screw (2).
• Use the REV/FORW rocker button to place the blade edge right behind
the rear edge (from user's view) of the specimen.
• Pull the UP/DOWN rocker button into the UP direction and keep it in the
UP position until the specimen surface is shortly below the level of the
blade edge (see arrow (3, Fig. 31)).
• Select sectioning speed and sectioning frequency with the rotary knobs
SPEED and FREQ.
• Use the +/- button to select a sectioning thickness for trimming.
• Select a sectioning range appropriate to the size of the specimen with
the SECTIONING WINDOW button.
• Switch the SINGLE/CONT button to CONT.
Push the START/STOP button.
The instrument will now trim the specimen at the selected trimming
thickness until you push the START/STOP button once more.
• Once you have reached the desired specimen plane for sectioning, use
the +/- button to select the desired thickness for sectioning.
For sectioning proceed as follows:
• Select the desired section thickness via the +/- button.
• Switch the SINGLE/CONT button to SINGLE.
• Push the START/STOP button.
The instrument will now produce a section (4). When the section is fin-
ished, the knife will automatically stop at the rear end position behind
the specimen (from the user's view).
• Pick up the section as shown on the left using a brush (5) to mount it on
a glass slide (6).
5. Operation
1
2
3
4
5
6
Fig. 30
Fig. 31
Fig. 32