Instrument setup – Leica Biosystems IPS User Manual
Page 38
36
Instructions for Use V 1.9 RevD - 05/2013
4. Instrument Setup
Running a test print
• Run a test print to verify whether the printing head works correctly.
• For that purpose, fill some specimen slides into a magazine and insert
the magazine into magazine position 1.
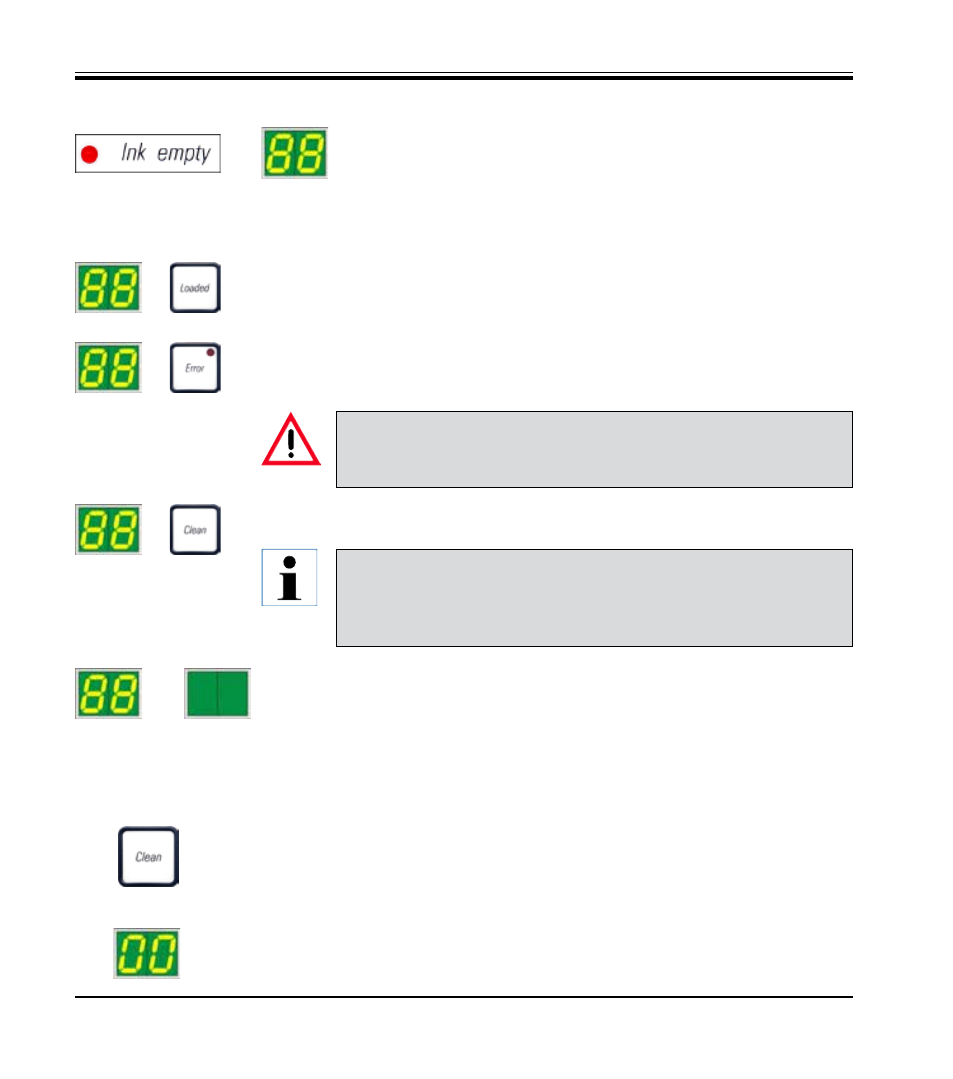
• Press and hold the CLEAN button until "00" is displayed, then release
the button. A specimen slide is imprinted with a test image stored in the
printer for that purpose. If the print result is not satisfactory, this step
can be repeated several times.
At this point, the instrument has to be "told" which type of cartridge has been
inserted.
There are three options:
1. New ink cartridge:
Press
LOADED; the printer sets the ink level meter to 'full'.
2. Used ink cartridge:
Press
ERROR; the printer resumes measuring at the ink level where it
previously left off.
• The sensor in the cartridge slot recognizes the presence of a
new cartridge.
• The indicator LED "Ink Empty" goes out, code "88" appears in
the display.
Exchanging the cartridge
(continued)
CAUTION!
NEVER press CLEAN while an ink cartridge is in the instrument! The
entire contents of the ink cartridge will spill into the printer.
The fill level of the cleaning cartridge is not monitored. Each use
should be noted on the cartridge. The cartridge can be used twice.
The cycle time when inserting a cleaning cartridge is 3.5 minutes
and is thus considerably longer than that of an ink cartridge.
3. Used or new storage fluid cartridge:
Press the key CLEAN; the current ink level is stored.
• After one of the three buttons has been pressed, the ink exchange software
routine starts; air is evacuated from the hoses and the system is refilled
with liquid.
• Display indication "88" is extinguished once the ink exchange has been
completed.
р
р