6 automated unload station (optional), Automated unload station (optional), Instrument setup – Leica Biosystems IPS User Manual
Page 29
27
Leica IP S
4. Instrument Setup
4.6 Automated unload station (optional)
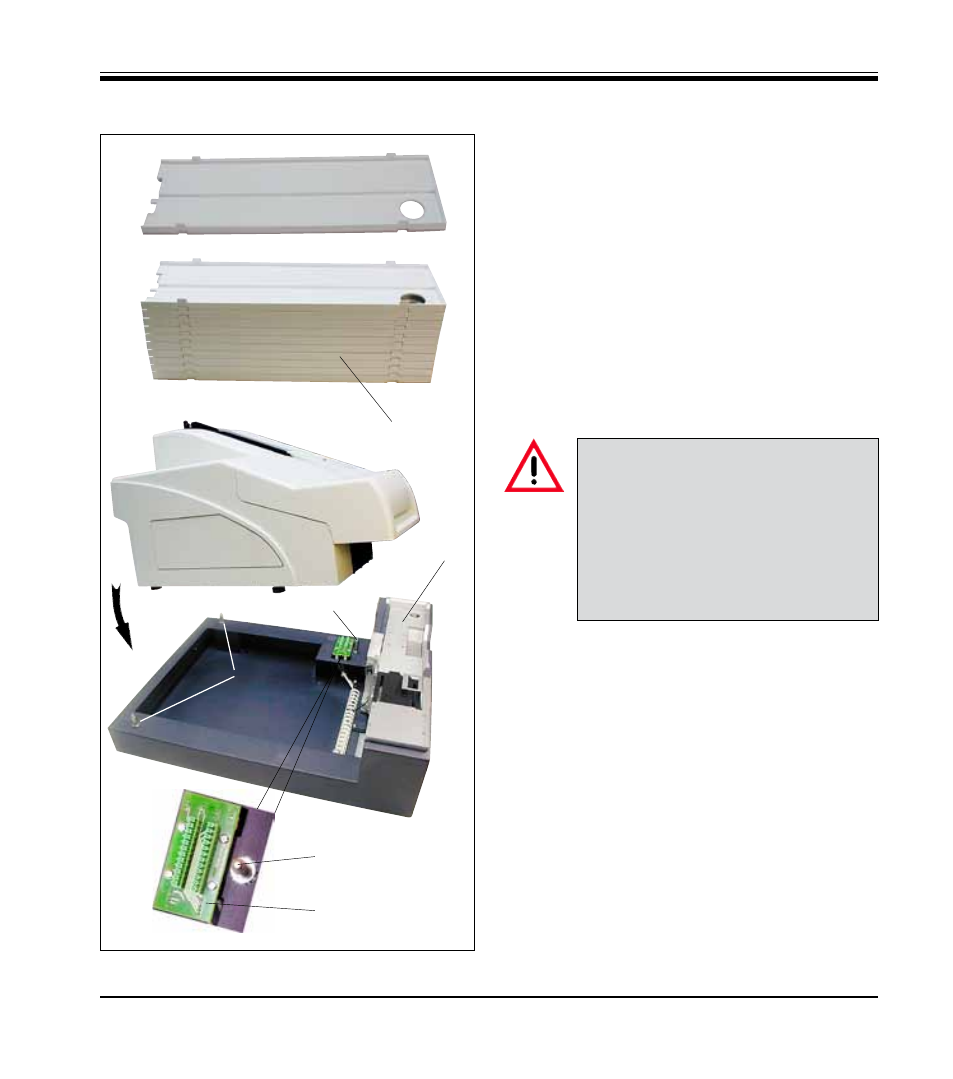
Optionally available for the printer is an auto-
mated multi-level cassette unload station, where
the imprinted specimen slides are collected on
individually removable and stackable trays (40)
in the order in which they were printed.
The multi-cassette unload station comes com-
plete with 10 trays, all of which can be inserted
simultaneously. Each tray holds up to 11 slides.
Installing the multi-cassette unload station:
• Unpack the unload station and place it on a
stable laboratory bench at the installation site.
35
36
37
38
39
Fig. 14
40
36
• Place the instrument onto the unload station.
2 persons are required to do this!
• Hold the printer on both sides (right and left)
and first insert the two rear bolts (35,
Fig. 14
)
of the unload station into the openings in the
base plate of the printer.
Then carefully lower the front part of the
printer unto the third bolt (36) so that the plug
connection (37) locks into place in the printer
base plate and the printer remains securely
fastened on the unload station.
• Place the stack of trays (39) onto the lifting table
(38) of the automated unload station. See
chap-
ter 5.2
for details on the lifting table controls.
Important!
Prior to installation, the printer must
be switched off and unplugged from
power supply.
The manual unload station (
chapter 4.5
)
The collar screws (30,
Fig. 13
) must also
be removed prior to placing the printer
onto the automated unload station.