Procedures for inspecting climbers and gaffs – Klein Tools Pole and Tree Climbers, Including Gaff Sharpening User Manual
Page 5
5
Procedures for Inspecting Climbers and Gaffs
(continued)
4.
Check gaff thickness with Klein Gaff Gauge.
For pole gaffs only, insert the gaff as far as
possible through the large opening in the gauge marked
“TH” (Figure 9). Make sure the top ridge is flush against
the gauge base. The point of the gaff should fall within the
limits formed by the last line and the edge of the gauge as
shown. If it does, the gaff is the proper thickness, as
measured approximately 1" (25.4 mm) from the point.
For pole and tree gaffs, insert the gaff as far as
possible through the small opening in the gauge marked
“TH” (Figure 10). Make sure the top ridge is flush against
the gauge base. The point should fall within the center two
lines, as shown. If it does, the gaff is the proper thickness,
as measured approximately 1/2" (12.7 mm) from the point.
5.
Check gaff width with Klein Gaff Gauge.
For pole gaffs only, insert gaff as far as possible through
the large square opening in the gauge marked “W” (Figure
11). Make sure the top ridge is flush against the gauge
base. The point should fall within the limits formed by the
last line and the edge of the gauge as shown. If it does,
the gaff is the proper width, as measured approximately 1"
(25.4 mm) from the point.
For pole and tree gaffs, insert gaff as far as possible
through small opening in the gauge marked “W” (Figure
12). Make sure the top ridge is flush against the gauge
base. The point should fall within the center two lines as
shown. If it does, the gaff is the proper width, as measured
approximately 1/2" (12.7 mm) from the point.
6.
Check gaff profile/contour with Klein Gaff Gauge.
For pole and tree gaffs, place the side of the gaff along
the front edge of the gauge with the gaff point resting in
the notch. The point should follow the configuration of the
gauge to assure the proper “rounding off” of the tip within
1/4" (6.4 mm) of the point (see Figure 13).
Minimum safe length for a pole-climbing gaff is 1-7/16"
(37.5 mm), measured on the underside of gaff. Minimum
safe length for a tree-climbing gaff is the greater of the
following: (a) 2-1/4" (57 mm),
measured on the underside of the
gaff, or (b) long enough to penetrate
the core of the tree.
Before
climbing, always test the
penetration of tree gaffs at the base
of the tree to be sure gaffs extend
through the bark and properly
penetrate the wood.
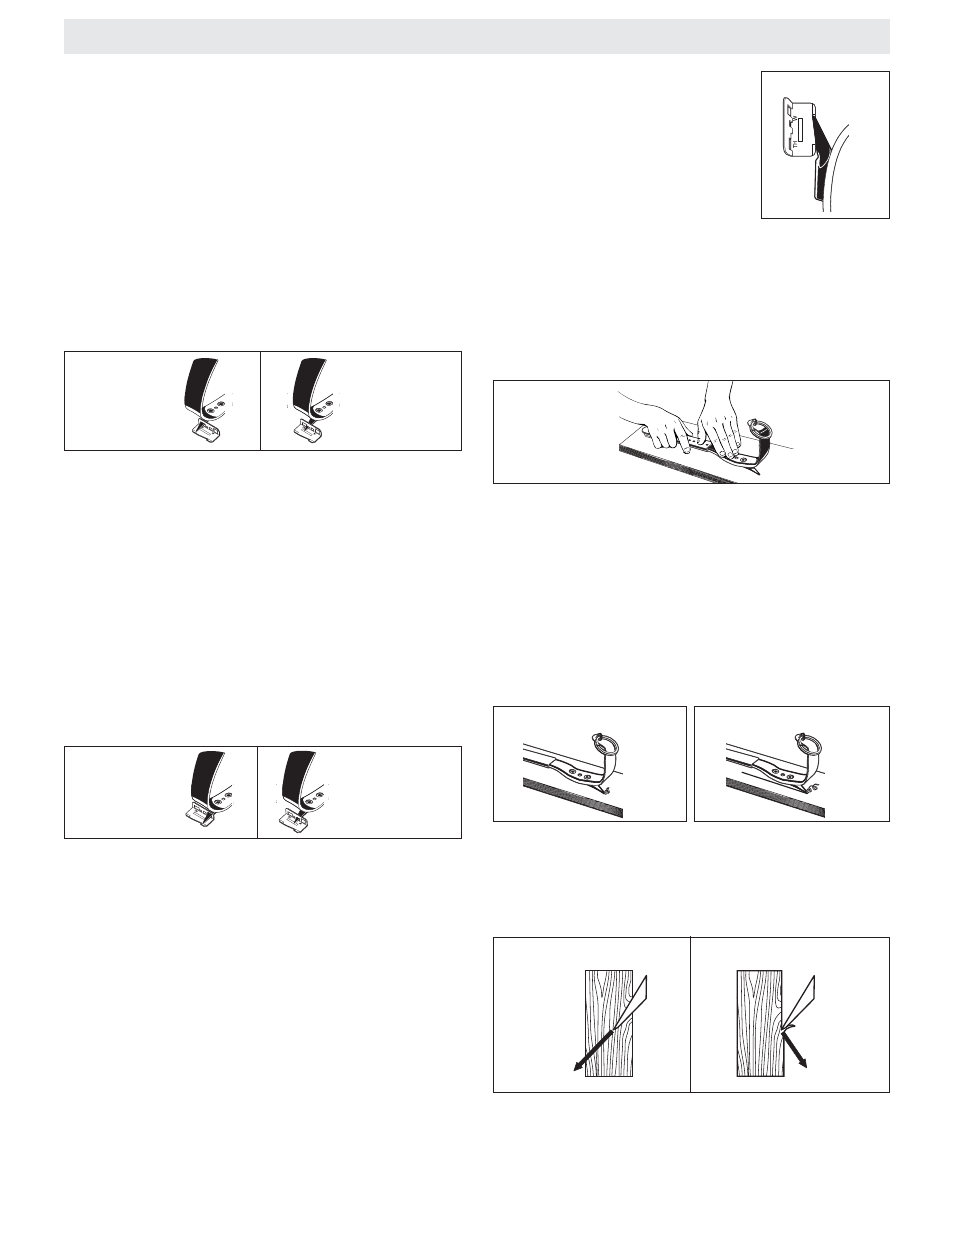
7.
Check gaff sharpness with the “plane test”.
Step 1: Place climber with gaff pointing downward and
upper strap loop resting against a horizontal board or
pole. Hold the leg iron parallel to the wood surface, with
the stirrup vertical. Push the climber horizontally in the
direction of the gaff without any downward pressure
except the weight of the climber (see Figure 14).
Step 2: The gaff is properly sharpened if it buries itself in
the wood within a few inches of its starting position and
can no longer be moved forward (see Figure 15). The gaff
is not properly sharpened if it merely slips, slides, or
plows a shallow groove in the wood (see Figure 16). In
this case, either replace the gaff following the “Gaff
Assembly and Ordering Instructions” or resharpen the
gaff following the “Gaff Sharpening Instructions”, both
contained in this booklet. A resharpened gaff must be
tested for proper width, thickness, and point profile, and it
must also pass the “plane test” before use.
The “plane test” reveals possible penetration prob-
lems not noticeable to the naked eye. Figure 17 shows
how a properly sharpened gaff cuts its way into the
pole for proper support. Figure 18 shows how an
improperly sharpened gaff can “cut-out”.
Figure 11
Figure 12
Figure 9
Figure 10
Figure 13
Figure 15 - Right
Figure 16 - Wrong
Figure 18 - Wrong
Figure 17 - Right
Figure 14