Final calibration, Calibration – right side of saw blade – INCRA TS-LS Table Saw Fence User Manual
Page 9
FINAL CALIBRATION
Important: As with any table saw fence,
accurate calibration and alignment require
that the saw blade be aligned parallel to the
miter slot. If you are uncertain about your saw
blade/miter slot alignment, consult your table
saw’s owner’s manual for information on how
to check and set this important alignment.
Calibration –
Right side of saw blade
Align fence parallel to
miter slot and tighten
LS Base mounting screws
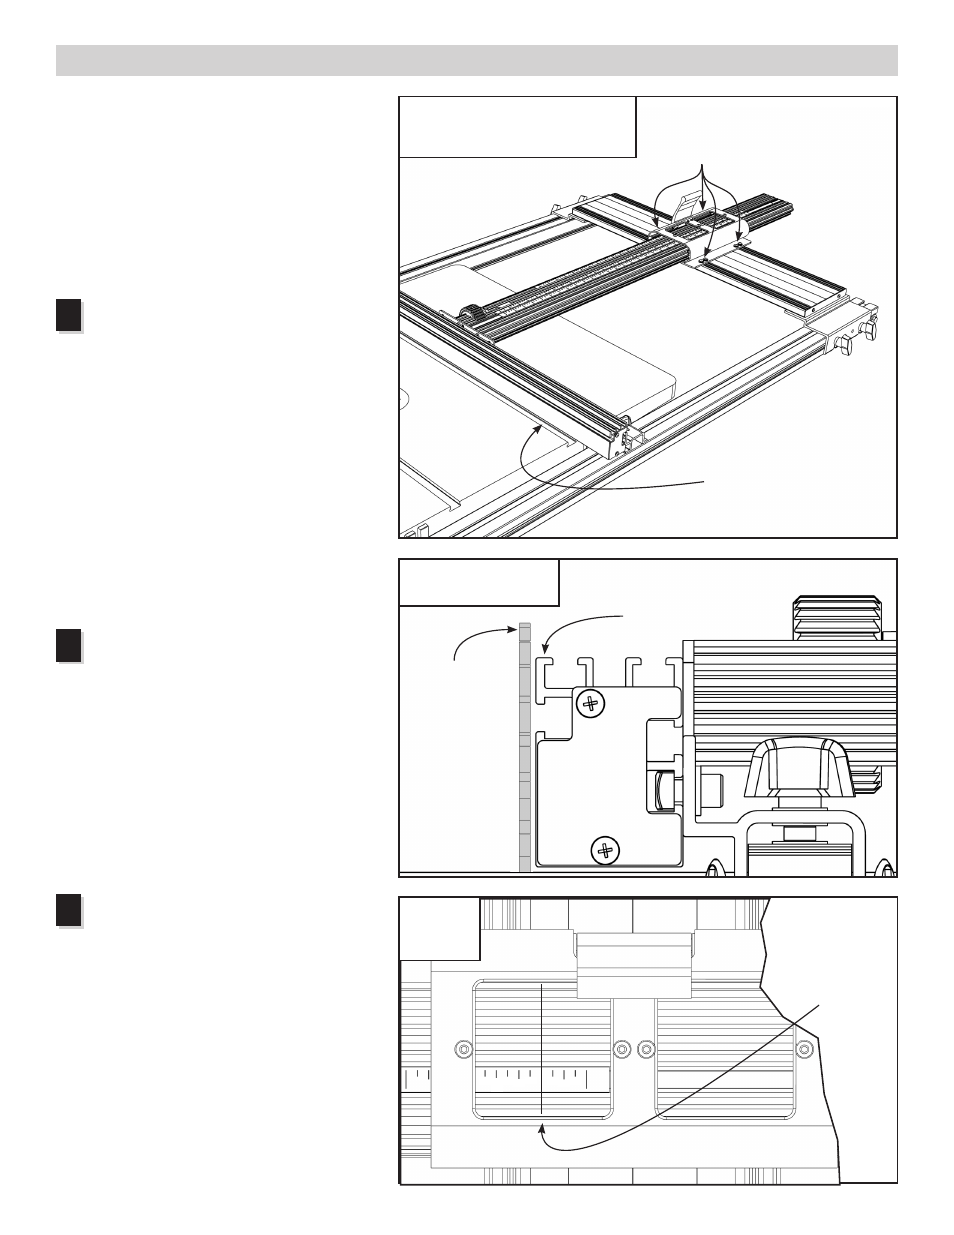
Unlock the carriage clamp, then slide the fence
up to the nearest miter slot and clamp in place.
Loosen the (4) screws that secure the LS
Positioner’s red sub-base to the base support
panel and align the fence parallel to the miter
slot. See Fig. 19. Make sure during this
alignment that the fence glides remain flush
with the rails. Now tighten all (8) fasteners to
secure the red sub-base to the base support
panel.
Important: If it becomes necessary to realign
the fence in the future, make sure to loosen all
(8) base mounting screws.
Zero fence to saw blade
With the table saw unplugged, raise the
saw blade about 2” and slide the fence forward
until just before it contacts the blade (to within
less than
1
/
32
”). Place your LS Positioner in
the micro adjust mode as described in your
LS owner’s manual and micro adjust the fence
forward until it “kisses” the saw blade, Fig. 20.
Lock the carriage in place.
Note: After micro adjusting, re-zero the
scale on the micro adjust knob by rotating the
scale (not the knob) to move the zero back to
alignment with the red pointer.
Set scale position
With the LS still locked at the “zeroed”
position set above, lift one end of the stainless
steel scale from the magnetic track and slide
the scale to position 0” under the hairline
cursor, Fig. 21. Lower the scale back onto the
magnetic track. If you want, you can also slide
the lexan scale to agree with the stainless steel
scale.
1
2
fig. 19
Align fence parallel to miter slot and
tighten LS Base mounting screws
Mounting
screws
Second: Loosen all
LS Base mounting
screws, align fence to
slot, then retighten
screws
first: Slide fence up to
nearest miter slot and clamp
in place
fig. 20
Zero fence to saw blade
first: Slide fence forward to within
less than
1
⁄
32
” from saw blade
Second: Micro
adjust fence
forward until
fence “kisses”
the saw blade,
then lock the
carriage in place
With fence zeroed
to the blade, slide
the stainless steel
scale to position
the 0” mark under
the hairline cursor
3
INCRA TS-LS Owner’s Manual
9
fig. 21
Set scale
position
Saw blade
Fence
0
1
24
24
16
8
8
16
8