Preliminary setup – INCRA IBOX User Manual
Page 2
INCRA IBOX OWNER’S MANUAL
Manufactured by Taylor Design Group, Inc. P.O. Box 810262 Dallas, TX 75381
W W W . I N C R A . C O M
Page 2
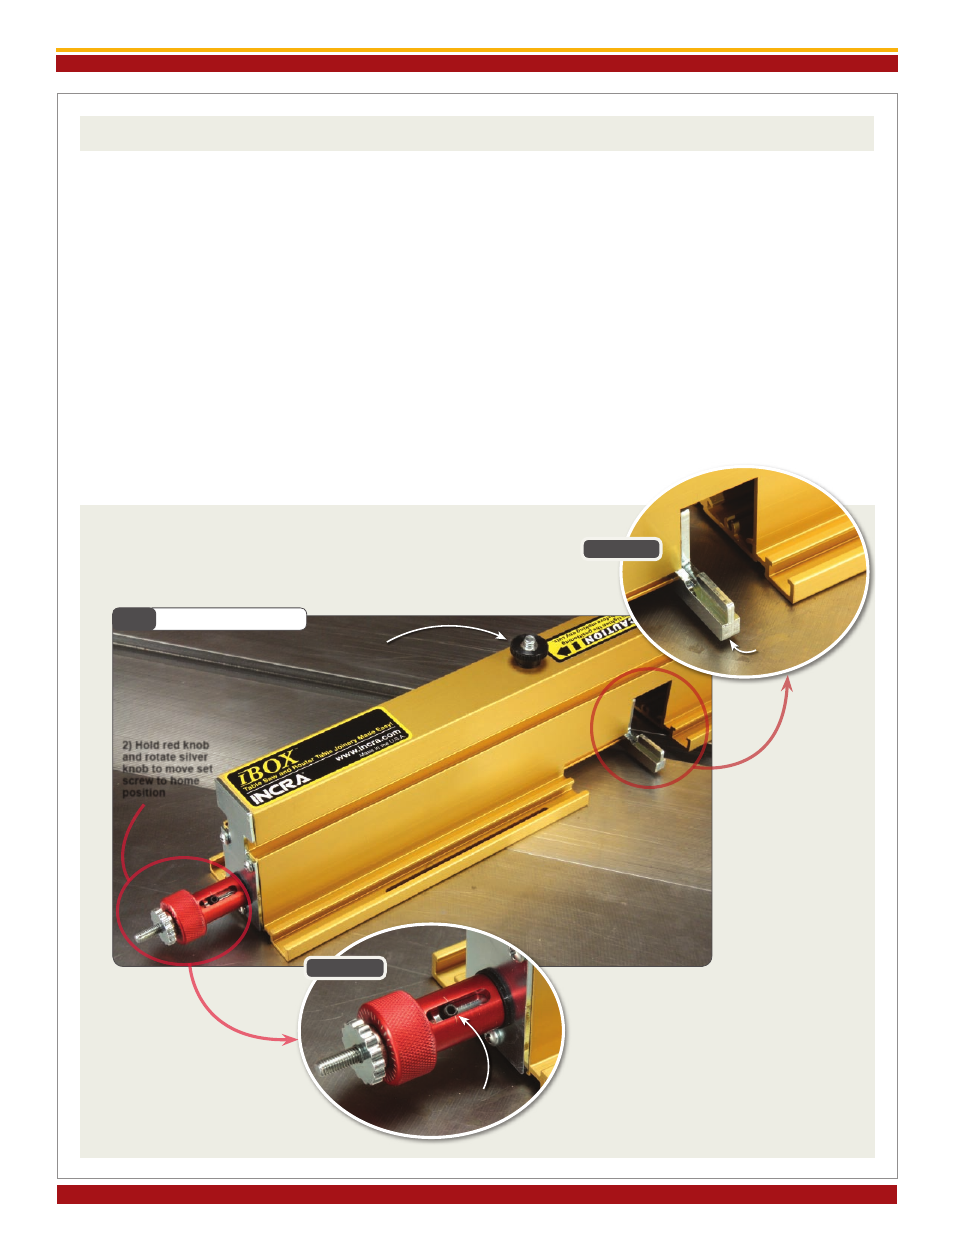
PRELIMINARY SETUP
Before beginning setup at the table saw or router
table, make sure that the silver micro-adjust knob is
adjusted so that the set screw in the slotted hole on
the red knob is aligned approximately centered on the
engraved line. This is the “home” position and while
not every setup may require this “home” position, it
is a good place to start when moving the IBOX to a
new station. To reset, first loosen the black positioning
lock knob located on the top of the IBOX. Hold the
red knob in place as you rotate the silver micro-adjust
knob until you see the set screw aligned as shown in
Detail 1A. While the black positioning lock knob
is still loose, rotate the red knob to bring the (2) pin
plates together as shown in
Detail 1B. You’ll see the
pin plates located just inside the fence cutout.
After
adjusting, tighten the black positioning lock
knob, Fig. 1.
Now let’s get set up at your work station. If you are
setting up at the table saw, read the “Setting up at
the Table Saw” section that follows. For the router
table, jump ahead to “Setting up at the Router Table”
beginning on page 4.
Fig. 1
Preliminary setup
2) Hold red knob
and rotate silver
knob to move set
screw to home
position
1) Loosen lock knob
Detail 1A
Detail 1B
Set screw at home
position
Bring pin
plates
together