INCRA IBOX User Manual
Page 11
INCRA IBOX OWNER’S MANUAL
©2012 by Taylor Design Group, Inc. All rights reserved.
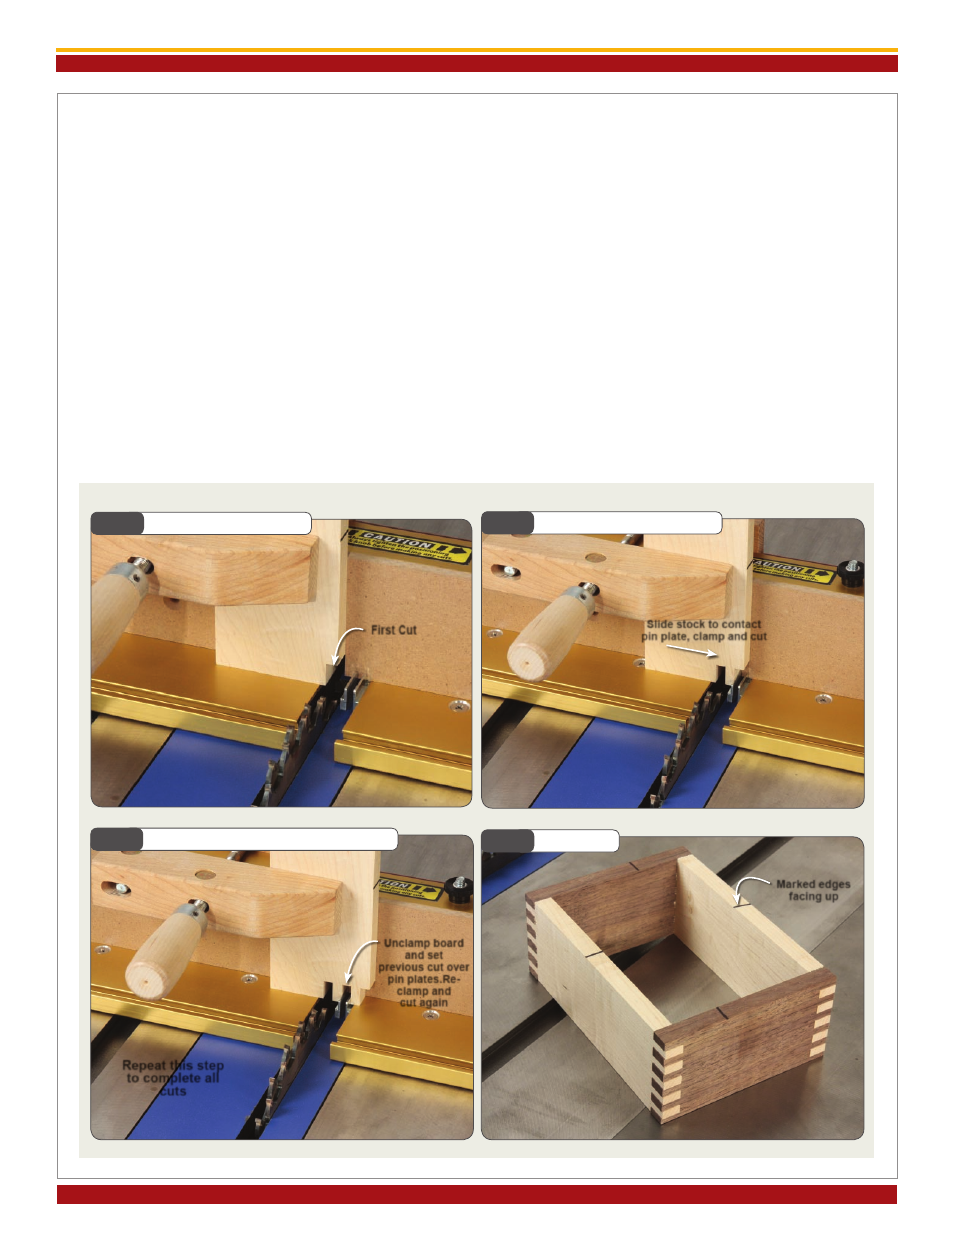
4. First Cut - side Parts
Remove the previously cut board from the pin plate
side stock ledge and set aside. Make the cut,
Fig. 25.
5. second Cut - side Parts
Slide the IBOX clear of the cutter then unclamp and
advance the board on the blade side stock ledge to
contact the pin plates, clamp in place and make the
cut,
Fig. 26.
6. step, Cut and Repeat - side Parts
Slide the IBOX clear of the cutter then unclamp and
move the board to set the groove previously cut
over the pin plates. Re-clamp and cut again,
Fig. 27.
Repeat this step until you have completed the cuts
across the width of your board. Repeat steps 3-6 on
the remaining ends of the final 2 boards.
7. Assemble
Assemble the box with all marked edges facing up,
Fig. 28.
Fig. 25
First Cut - side Parts
Fig. 27
step, Cut and Repeat - side Parts
Repeat this step
to complete all
cuts
First Cut
Fig. 26
second Cut - side Parts
Slide stock to contact
pin plate, clamp and cut
Unclamp board
and set
previous cut over
pin plates.Re-
clamp and
cut again
Page 11
Fig. 28
Assemble
Marked edges
facing up