Gamber-Johnson MCS-1TMRS-CV User Manual
Page 3
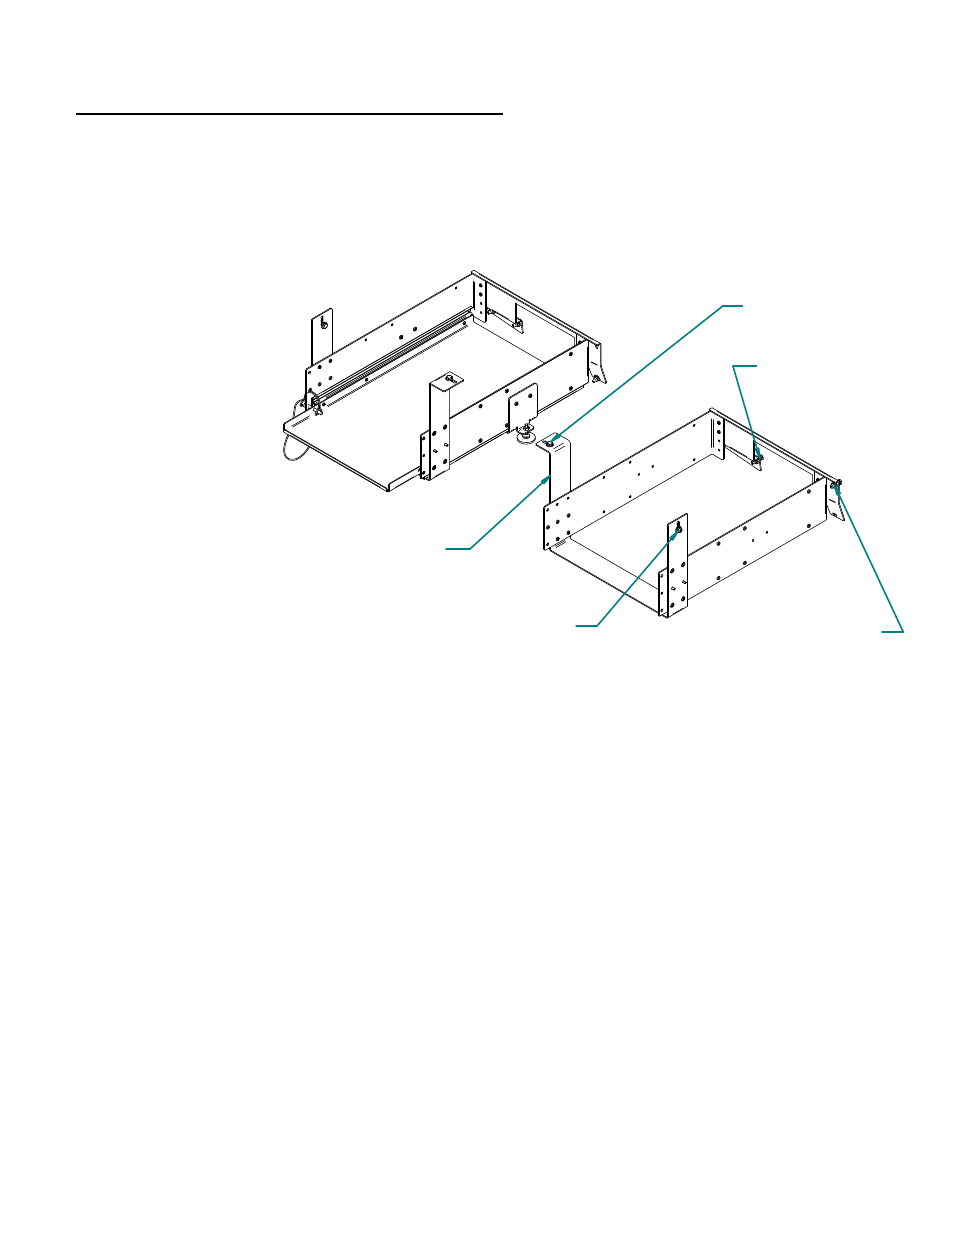
Installing Shelf Assembly on Right Side of Trunk
Fig. 5 - Assembly
of shelf is the same
as described in
figures 1 & 2,
except place front
bracket with bent
leg toward center
of vehicle.
Remove & relocate the spare tire.
Insert one .25-20 x 1.00 long hex head screw thru existing hole in trunk wall. Install one .25-20
hex nut onto screw from trunk side and tighten in place forming a stud.
Place the assembled shelf bracket inside the trunk.
Position the obround hole in the upper right corner of the back bracket onto the screw just
installed, hold in place with .25 flat washers and .25-20 nylok nut.
Attach the front bracket to the trunk hinge bracket with one .25-20 x 1.00 hex head screw, two .25
flat washers and one .25-20 nylok nut.
Hold the shelf assembly in a level position and mark the location of the obround hole in the front
bracket on the trunk roof and the location of the obround hole in the back bracket on the trunk
wall.
Drill two 5/16" dia holes at points marked.
Insert one .25-20 x 1.00 long hex head screw thru hole drilled in trunk wall and add one .25-20
hex nut from trunk side forming stud as decribed above. Hold back bracket in place with two
.25-20 flat washers and one .25-20 nylok nut.
Insert one .25-20 x 1.00 long hex head screw thru hole drilled in trunk roof and attach the front
bracket with .25-20 flat washer and .25-20 nylok nut.
FRONT BRACKET
BENT LEG TOWARD
CENTER
DRILL 5/16" HOLE THRU
TRUNK ROOF AT THIS POINT
DRILL 5/16" HOLE THRU
TRUNK WALL AT THIS POINT
ATTACH TO TRUNK
HINGE BRACKET
ATTACH TO .25-20 x 1.00 SCREW
MOUNTED IN EXISTING
HOLE IN TRUNK WALL
SH 3 OF 4
FIG. 5