Gamber-Johnson MCS-1TMRS-CV User Manual
Page 2
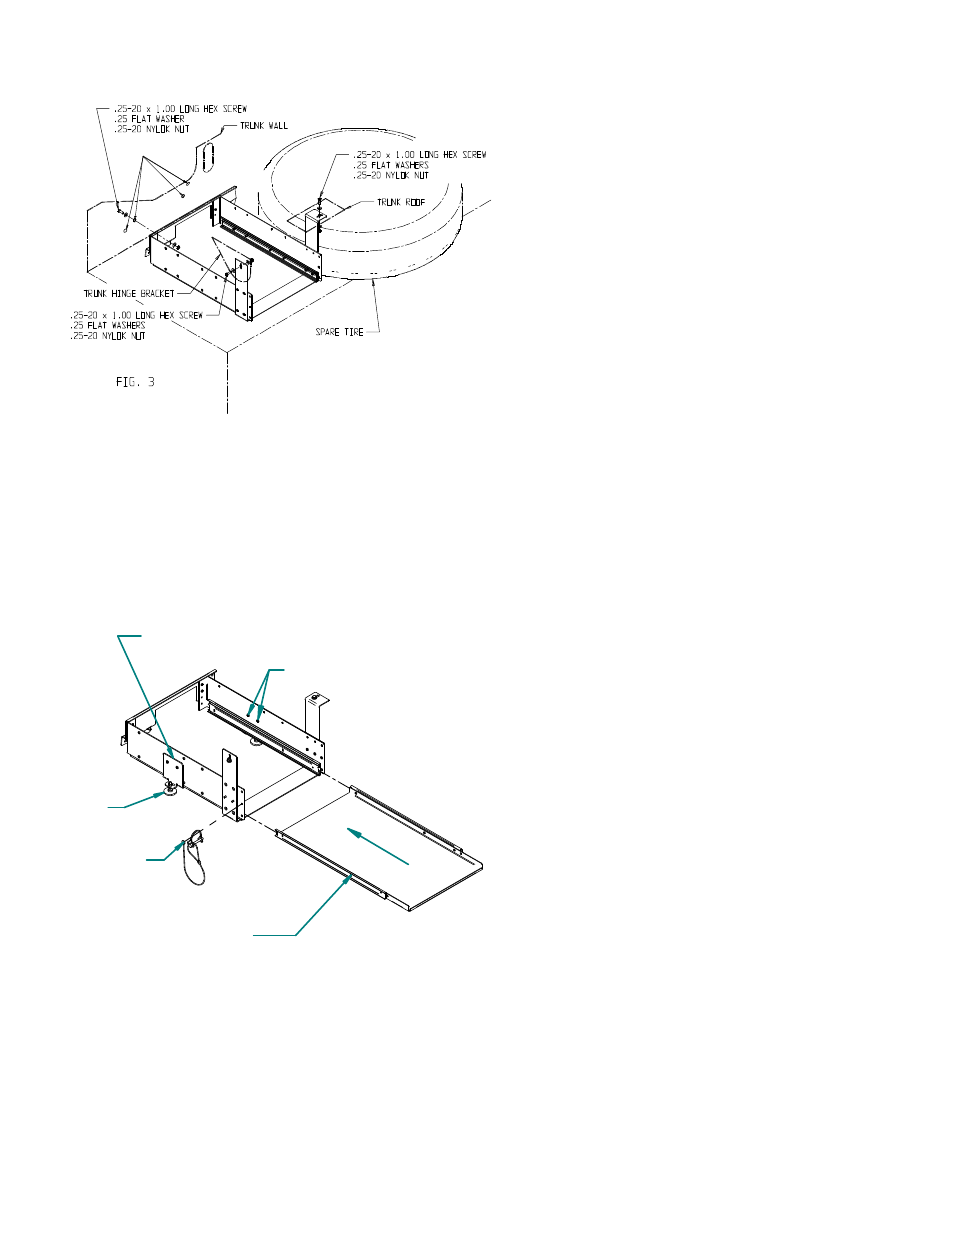
Fig. 3 - Place the assembled shelf
bracket inside the trunk, on the
left side of the spare tire.
Using the existing holes in the
vehicle body.
Loosely attach the back bracket
to the trunk wall and the front
bracket to the trunk hinge bracket
and the trunk roof, with one
.25-20 x 1.00 long hex head
screw, two .25 flat washers and
one .25-20 nylok nut in each of
the places shown.
Fig. 4 - Slide the shelf straight
into the slides.
If needed, each shelf can be removed
by pushing the release latches on
each side and pulling the shelf out of
the slides.
Each shelf can be turned
up-side-down when installing to gain
extra height if needed.
With the shelf in position tighten down
all nuts and screws attaching the
shelf assembly to the vehicle.
Attach the safety snap pin and
lanyard to the side bracket with one
8-32 x .38 long phillips screw.
Install a shelf support bracket to each
side of the shelf assembly with two
10-32 x .38 phillips screw installed
from the inside surface.
Using a 9/16" wrench turn the
levelers down against the trunk
surface until snug and the weight of
the trunk shelf assembly is supported
by the levelers. Tighten the jam nuts.
RELEASE LATCHES
8-32 X .38 SCREW
SAFETY SNAP PIN
LANYARD
10-32 x .38 SCREWS
LEVELER &
JAM NUT
SUPPORT BRACKET
SH 2 OF 4
FIG. 4
4 PLACES