Flint & Walling 4 (10 cm) Stainless Commander S Series User Manual
Page 4
6
Copyright © 2014 Flint & Walling. All rights reserved.
7
Copyright © 2014 Flint & Walling. All rights reserved.
ASSEMblY INSTRuCTRIONS
Torque
Arrestor
Approx. 4 ft.
3
3. Firmly clamp the torque arrestor to the pipe
approximately 2 to 4 ft. above the pump, using
the two clamps provided with the torque arrestor.
(Fig. 3)
4. Typical installations include the following
components. Purchase these items separately
depending on your need.
(Fig. 4)
Discharge pipe - delivers water to home
Well seal or pitless adapter - keeps debris out of
well
Safety rope - prevents pump from falling
Check valve - keeps water in pipe
Electrical cable - connects to house electricity
Torque arrestor - keeps pump stable
Drop pipe - connects pump to discharge
Well casing - holds all components
Discharge Pipe
Spring-Loaded Check Valve
(Recommended every 100 ft.)
Safety Rope
Well Seal or Pitless Adapter
Well Casing
Torque Arrestor
Drop Pipe
Electrical Cable (Secured to drop
pipe with tape or clamps every
10 ft.)
Pump
4
ElECTRICAl HOOKuP AT THE PuMP
Submersible Cable Splicing
Pump is equipped with a lead wire assembly. The length of wire needed to attach to this lead wire assembly is
equal to the distance from the pump in the well to the top of the well. Additional wire will be needed to run from
the top of the well to the house.
CAuTION: Follow instructions carefully to make a watertight splice. A leak in the splice can result in pump
damage, blown fuses, overload protector tripping or electric shock hazard.
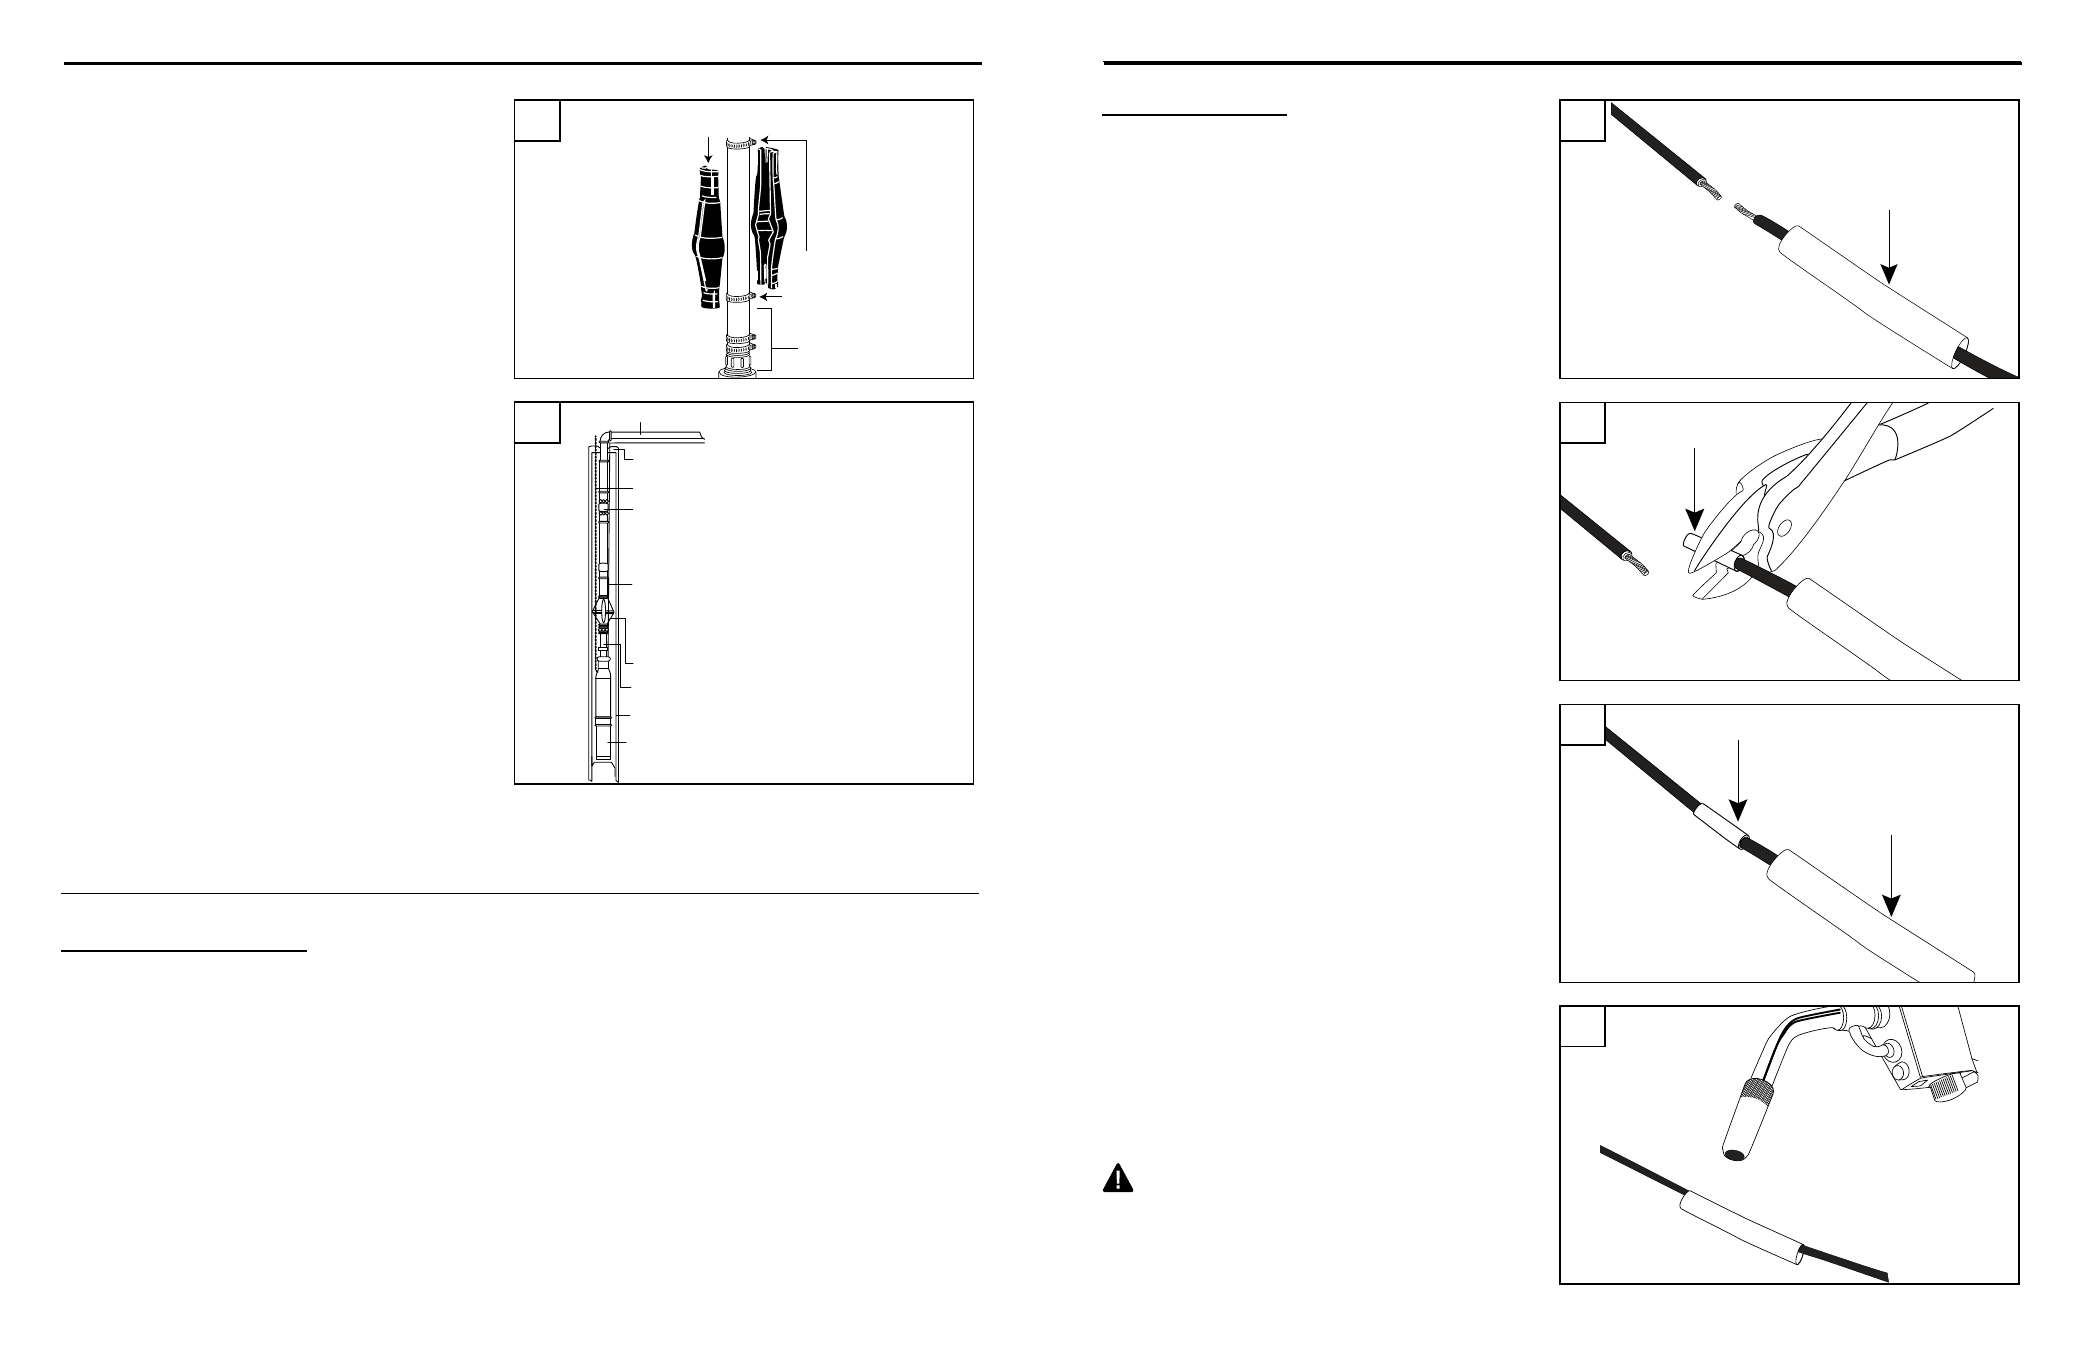
Shrink tube
Metal Connector
1
2
Splicing instructions
1. Slide one black shrink tube from a heat shrink
splice kit over each wire (including the green
ground wire) coming out of the pump.
(Fig 1)
2.
NOTE: For each wire coming out of the pump ,
including the green ground wire, slide the wire
from the pump into one end of a metal connector
from the splicing kit. Then slide stripped end of
wire from electrical cable into other end of metal
connector. Connector should be centered over
both wires. Squeeze metal connector until it
closes tightly over both wire ends.
(Fig 2)
ElECTRICAl HOOKuP AT THE PuMP
IL1145
Shrink tube
Metal Connector
ON
OFF
IL1146
3
4
3. Slide one shrink tube over each crimped joint.
(Fig 3)
4. Hold a torch approximately 6 in. from the center
of the tubing and move it back and forth. Heat
one set of wiring tubing at a time until seal is
completed. During the heating process, keep
all other wires/tubing away from heat to prevent
melting together. Avoid overheating, as this may
make the tubing brittle. When liquid oozes from
end of tube, seal should be complete.
(Fig 4)
CAuTION: Do not lift pump by power cable or
motor leads! Damage to cable or leads will result.