Operating instructions, Installation, Operation – FasTest CalMate Series User Manual
Page 2
OPERATING INSTRUCTIONS
Roseville, MN
Ph: 1-800-444-2373
Fax: 651-645-7390
www.fastestinc.com
WP018 10/14/2010
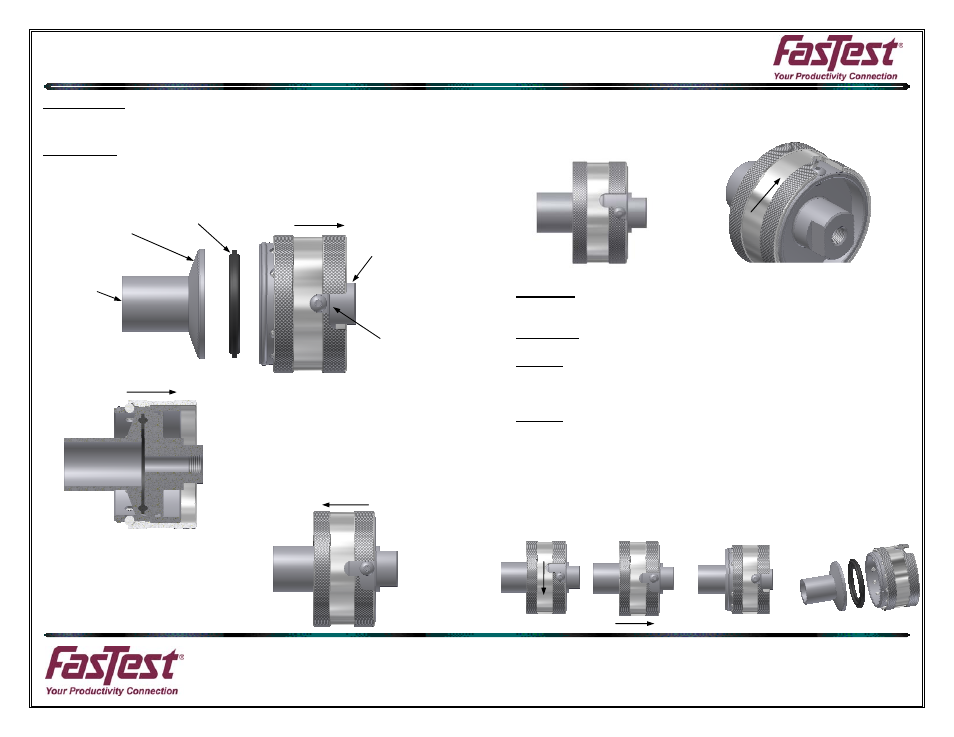
Sleeve Back
Test Piece
Wrench Flats
Sleeve Notch
Gasket
Sleeve Forward
Back Side Face
of Test Piece
Clockwise
Rotate Sleeve CCW
Sleeve Back
Sleeve Back
Installation:
Connect securely to the 1/8” NPT termination port of the connector.
Operation:
Connecting Action:
1. Move the sleeve back to disengage the connector. Holding the wrench flat
end of the connector push the connector onto the test piece and gasket.
2. Slide sleeve completely forward.
This will collapse the gripping balls.
3. Rotate the sleeve clockwise until hand tight for locking engagement.
(NOTE: NOTICE LOCATION OF SCREW HEAD) The connector will be
properly engaged when gripping balls are tight against the back side face
of test piece.
•
CAUTION: The maximum rated pressure is stamped on the connector
sleeve. Before using, verify that this pressure rating is within your working
pressures.
•
WARNING: Tug on the connector to assure proper engagement and
gripping before introduction of pressurized media.
•
DO NOT force connector onto test part when connecting. The insertion
into the part and the forward motion of the sleeve should easily mate with
the test piece. Forcing the connector will result in poor sealing and
possible leakage.
•
DO NOT turn or rotate connector after the engagement to test piece.
Damage to the test part and the connector’s internal parts may result.
4. Activate test media through connector test port.
Disconnecting Action:
1. Deactivate test pressure.
2. Rotate sleeve counter-clockwise about ¼ turn, then pull the sleeve all the
way back. Separate connector from test piece and gasket.