Replacement instructions – FasTest ST Series Seal Replacement User Manual
Page 2
REPLACEMENT INSTRUCTIONS
www.fastestinc.com
Roseville, MN
Toll Free at 1-800-444-2373
Fax 651-645-7390
WP026 10/6/2010
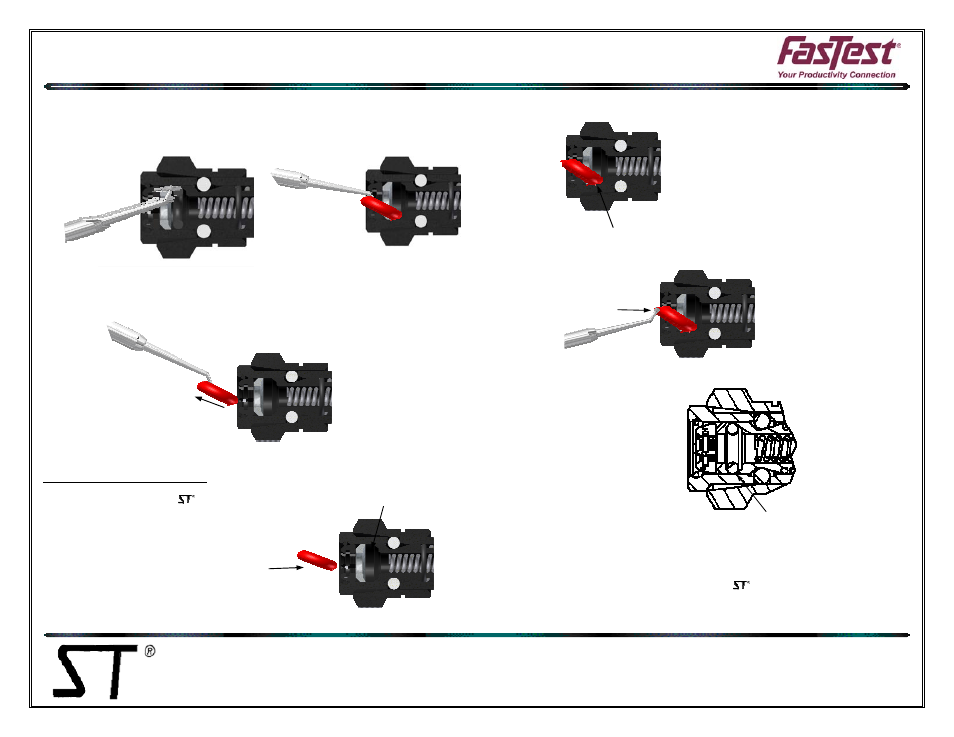
GROOVE AREA
SEAL PROPERLY IN GROOVE
SEAL NOSE INTO GROOVE
PUSH PICK AGAINST
O-RING PEAK
PINCH AND INSERT
3. Push knobbed end between seal and washer until repair pick touches connector wall. Roll
pick 180° between thumb and fingers to get the curved portion of the pick behind the seal.
By placing your other thumb over the edge of collet opposite the pick, you can work at one
point on the seal. Do not rotate the pick around the I.D. of the connector as this may cause
loosening of the gripping collets.
4. Using the knobbed end as a hook, dislodge the seal and pull it slowly out the connector
throat.
To Install Replacement Seal:
1. Liberally coat the new replacement seal with lubrication. White petroleum is used during
initial assembly of standard connectors.
2. Begin replacement of seal by manually starting the
seal into the groove area. Pinch with fingers and
install into opening.
3. The knobbed end of the pick will assist in positioning the seal nose into the groove. This
starting position is important for successful installation of the seal.
4. After nose of seal is in place, slowly press down on the back part (peak) of the seal using
the knobbed end of pick.
5. The seal will slide into the groove area. If the nose of the seal slides out of position, re-
install and repeat steps 1 thru 4.
6. When the new seal is in place, it will fit clearly into the groove area. If a portion of the seal
in inverted or can be seen as not in the groove, use the knobbed end of the pick to assist in
pulling the seal into the groove. If this is unsuccessful, remove the entire seal and start the
installation procedure again.
7. After the replacement seal is in place, actuate the connector sleeve once to make sure
the connector action is correct.