Seal replacement instructions, Zn1 dis-assembly, Zn2, 3 & 4 dis-assembly – FasTest EZ Series Seal Maintenance User Manual
Page 2: Zn1 re-assembly, Zn2, 3 & 4 re-assembly
SEAL REPLACEMENT INSTRUCTIONS
Roseville, MN
Ph: 1-800-444-2373
Fax: 651-645-7390
www.fastestinc.com
WP129 Rev A 5/2/2014
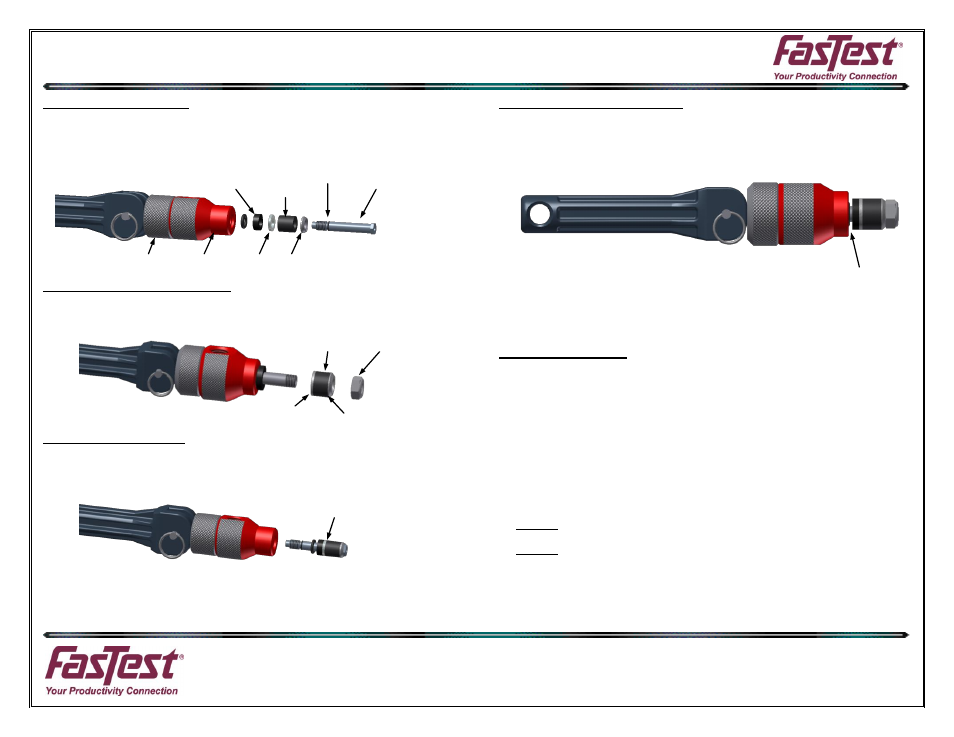
ZN1 DIS-ASSEMBLY:
1. ZN1 Connectors utilize a hex bolt shaft. Thread washer cap forward (ALL
SIZES) until it touches body.
Using a ¼” wrench or socket remove bolt.
Hold handle from spinning as bolt is loosened and removed. Remove
small o-ring in groove on bolt. Discard washers and main seal.
ZN2, 3 & 4 DIS-ASSEMBLY:
2. These three ZN sizes utilize the hex nut to retain seal sets. Hold handle
from spinning as nut is loosened and removed. Discard washers and
seal(s).
ZN1 RE-ASSEMBLY:
3. Load bolt with new seal kit parts, tapered washer, main seal and flat
washer. Then slide the spacer back onto bolt and place o-ring back in
groove on bolt. (DISCARD C-CLIP RETAINING RING FROM KIT).
4. Loaded Bolt, threads into an internal shaft.
Using same ¼” wrench or
socket. Tighten until you feel a hard stop. Bolt threads into a hard stop
inside the internal shaft.
ZN2, 3 & 4 RE-ASSEMBLY:
5. Load shaft with new seal kit parts, flat washer, main seal(s) and tapered
washer. Thread nut back on shaft and tighten with wrench or socket.
Tighten nut until you feel a hard stop. (DISCARD E-CLIP RETAINING
RING FROM KIT).
6. When nut is in proper position on shaft the gap between red body and
spacer should be .06”-.08”.
FUNCTIONAL CHECK:
Prior to applying pressure to the termination port rotate handle in both direc-
tions. Make sure connector draws shaft back and compress’s seal(s) as it did
prior to dis-assembly.
CAUTION NOTES;
CAUTION: The maximum rated pressure is stamped on the connector body. Be-
fore using, verify that this pressure rating is within your working pressures.
WARNING: Tug on the connector to assure proper engagement and gripping
before introduction of pressurized media.
DO NOT force connector onto test part when connecting. Forcing the connector
will result in poor sealing and possible leakage.
DO NOT spin test piece on seal once lever has been rotated 90° degrees.
O-RING
MAIN
SEAL
WASHERS
BOLT
LOADED
BOLT
SPACER
MAIN
SEAL
NUT
FLAT
WASHER
TAPERED
WASHER
GAP
BODY