Finish up, Verify the retrofit, Configure the cem3 – ETC Sensor+ Touring Rack CEM+ to CEM3 Retrofit User Manual
Page 19: Reinstall the left, N o t e
2
The Retrofit
17
Finish Up
Step 1:
Remove the CEM baffle from the spare CEM slot (if available). It is held by two
screws, one in each upper side corner, similar to the backplane screws. You
must bend the baffle to get it out of the spare module slot.
Step 2:
Install the new CEM3 baffle into the spare module slot using the screws and
collars provided in the kit.
Step 3:
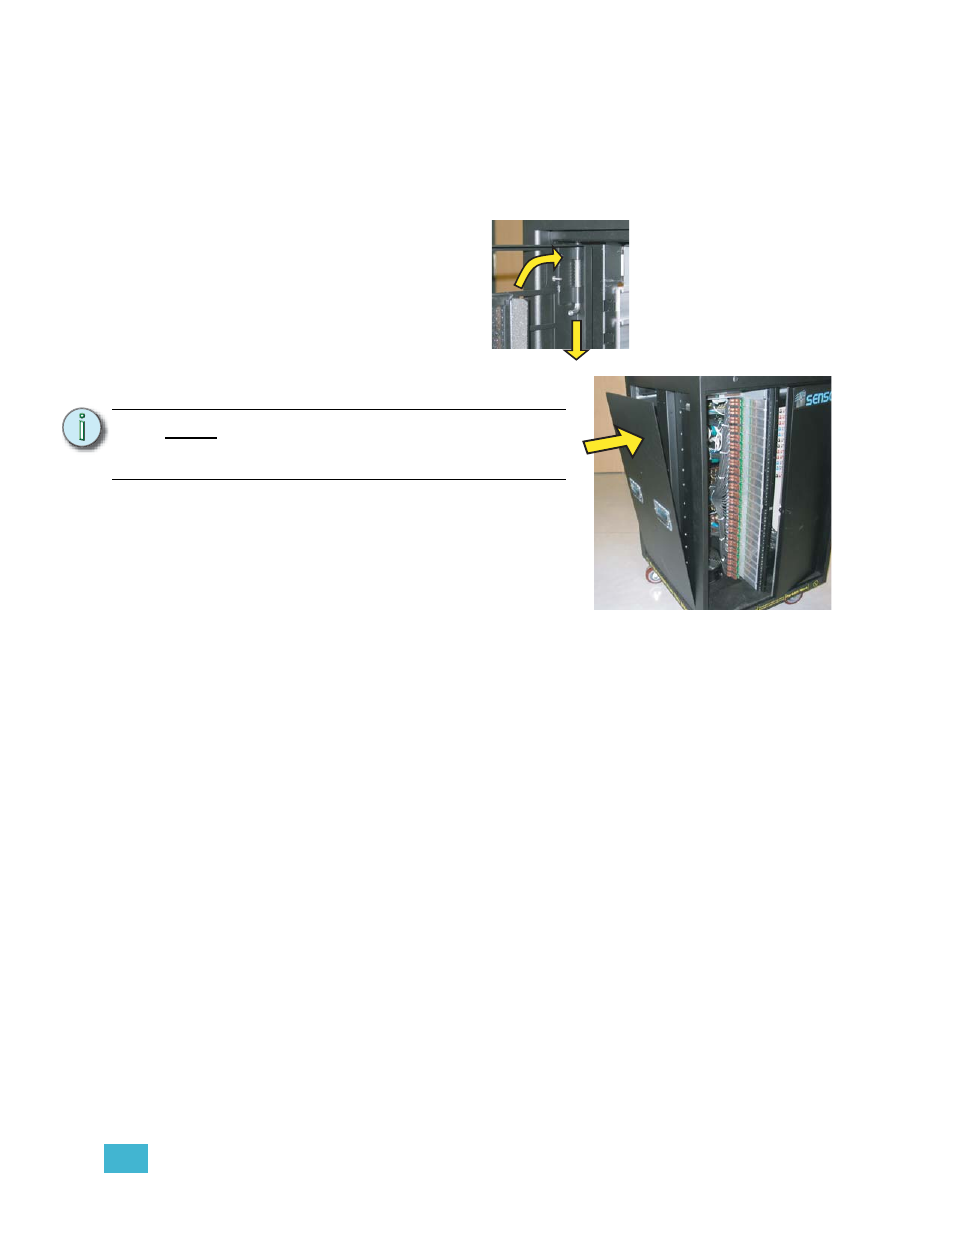
Install the rack filter
door(s) on the rack by
pushing down on the tab
in the hinged corner and
sliding the door back in
place.
Step 4:
Reinstall the left side of
the rack with the original 10 screws.
Step 5:
Remove the old Sensor sticker from the
appropriate door.
Step 6:
Apply the new Sensor3 sticker to the
door.
Step 7:
Dispose of all waste materials in a safe
manner per local ordinances.
Verify the Retrofit
Step 1:
Put the dimmer modules back in the rack in the correct/original order.
Step 2:
Put the CEM3 in the rack making sure it is fully seated.
Step 3:
Power up the rack.
Step 4:
Check that the CEM3 powers up and the rack fan turns on. (The only rack errors
should be a lack of DMX on the ports if the DMX source is not present.)
Configure the CEM3
Step 1:
Configure the rack to reflect the dimmer module types installed. Verify that the
rack type is correct (CEM3 should have determined this from the DIP switch
settings - see
) Configuration of the CEM3 is done
using the front face panel interface. See the CEM3 Quick Guide that ships with
the CEM3 for more information.
Step 2:
Configure the data types that will be used (DMX and sACN) including the rack
patch.
N o t e :
Use caution when starting the six screws
along the outer edges, being careful not
to damage the spring retaining clips.
1-
P
u
s
h
2
-R
ei
ns
tall
Reinstall