Time – CCTV Camera Pros iDVR-RT16 Real Time Stand Alone Surveillance DVR User Manual User Manual
Page 63
62 DIGITAL VIDEO RECORDER
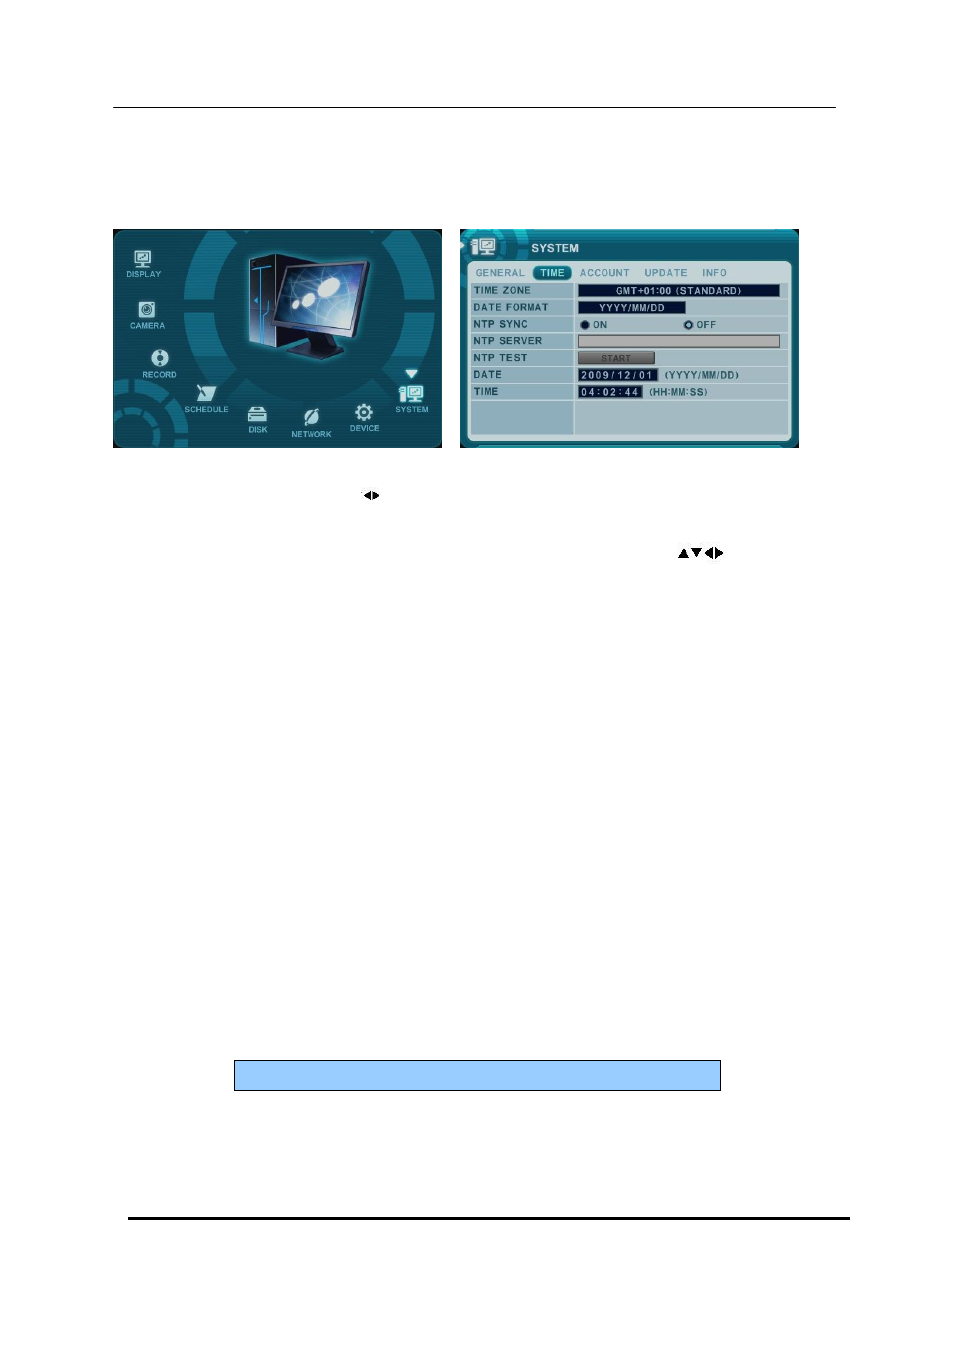
8.2. TIME
Make sure to set up your Date and Time prior to start Recording.
1. Use Left/Right buttons [
] to select on TAP menu “Time”. The menus are displayed
with options on the left-hand column and settings in the right hand column. A cursor
(highlighted menu) can be moved using the Direction buttons [
] . Press [-, +]
button to change the values.
1) Time Zone : Refer to
Selects the time zone in which the DVR is located. Time Zone contains DST (Daylight
Saving Time) On. If you choose Time Zone with DST, there is no change in the
system time stamp for recorded data. When the Daylight saving End date and time
occur, the DVR‟s time goes back one hour.
2) Date Format: Select Date display format.
[ MM/DD/YYYY DD/MM/YYYY YYYY/MM/DD ]
3) NTP SYNC: The internal time of DVR can be synchronized with an external time
source using NTP (Network Time Server) Configuration. If the NTP option is ON, the
DATE and Time option is inactivated.
4) NTP Server: Allow you to use a public or private NTP server. Enter the IP address of
sever or domain. The default setting is public
“pool.ntp.org”.
5) Date & Time : Set current time and date.
2. Save changes and exit the menu, press [MENU] button.
Exit the menu without making changes, press [CANCEL] button.