3 push mail example – AirLive ES-6000 User Manual
Page 172
171
8.3 Push Mail Example
Below is an example for your reference: (Mobile phone: Nokia E65; Telecom provider: Chunghwa
Telecom).
Confirm the support for Internet access on your mobile phone.
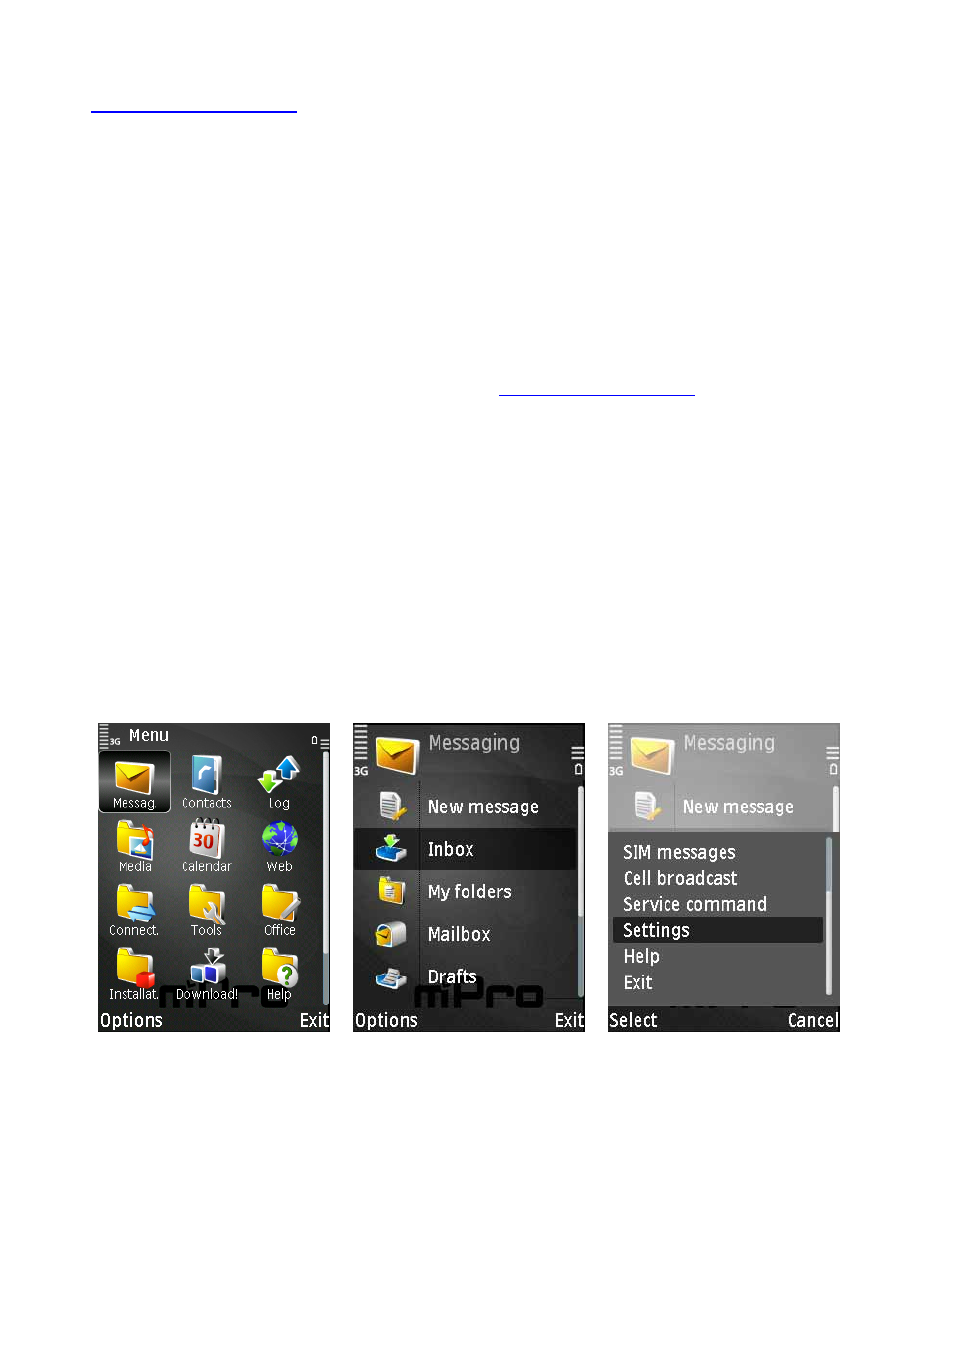
Go to the e-mail setting screen, in this case, it is Menu Æ Messag. Æ Inbox, press Options at
left-corner of screen, and select Settings function. (Figure 8-15, Figure 8-16, Figure 8-17)
Enter
function and press Options to select New mailbox. Press any key to start the
Mailbox setup wizard
as following setting: (Figure 8-18, Figure 8-19, Figure 8-20)
1. Select IMAP4. (Figure 8-21)
2. Fill in the IP address. In this case we input
. (Figure 8-22)
3. Fill in the IP address or domain name of Incoming mail server. Ex. airlive15.dyndns.org.
(Figure 8-23)
4. Fill in the IP address or domain name of Outgoing mail server. Ex. airlive15.dyndns.org.
(Figure 8-24)
5. Specify the mailbox name, and finish the setting. (Figure 8-25)
Select
Mailbox
Æ
Connection settings Æ Incoming e-mail to fill in user name and password.
(Figure 8-26, Figure 8-27, Figure 8-28, Figure 8-29)
Select
Mailbox
Æ
Connection settings Æ Outgoing e-mail to fill in user name and password.
(Figure 8-30, Figure 8-31)
Start the connection to receive mail from ES-6000. (Figure 8-32, Figure 8-33)
Figure 8-15 Select Messag. on Menu Figure 8-16 Press Options
Figure 8-17 Select Settings