Battery charger removal/installation, Battery charger removal/installation -31 – JLG 10MSP Service Manual User Manual
Page 63
SECTION 3 - BASE COMPONENTS
3121228
– JLG Lift –
3-31
Battery Charger Removal/Installation
1. Remove the front cover (carry deck) from the
machine.
2. Remove the carry deck support bracket from the
base frame.
3. Disconnect the positive (+) battery cable at the left
side battery.
4. Remove the two (2) screws and washers from the
top bracket securing the charger to the base frame
mast mount. Only loosen the two (2) screws on the
bottom bracket of the charger enough to slide the
charger out.
5. Lift charger up and lay on it’s side to disconnect the
wiring connectors from the bottom of the charger
assembly. Move the charger to a suitable work sur-
face.
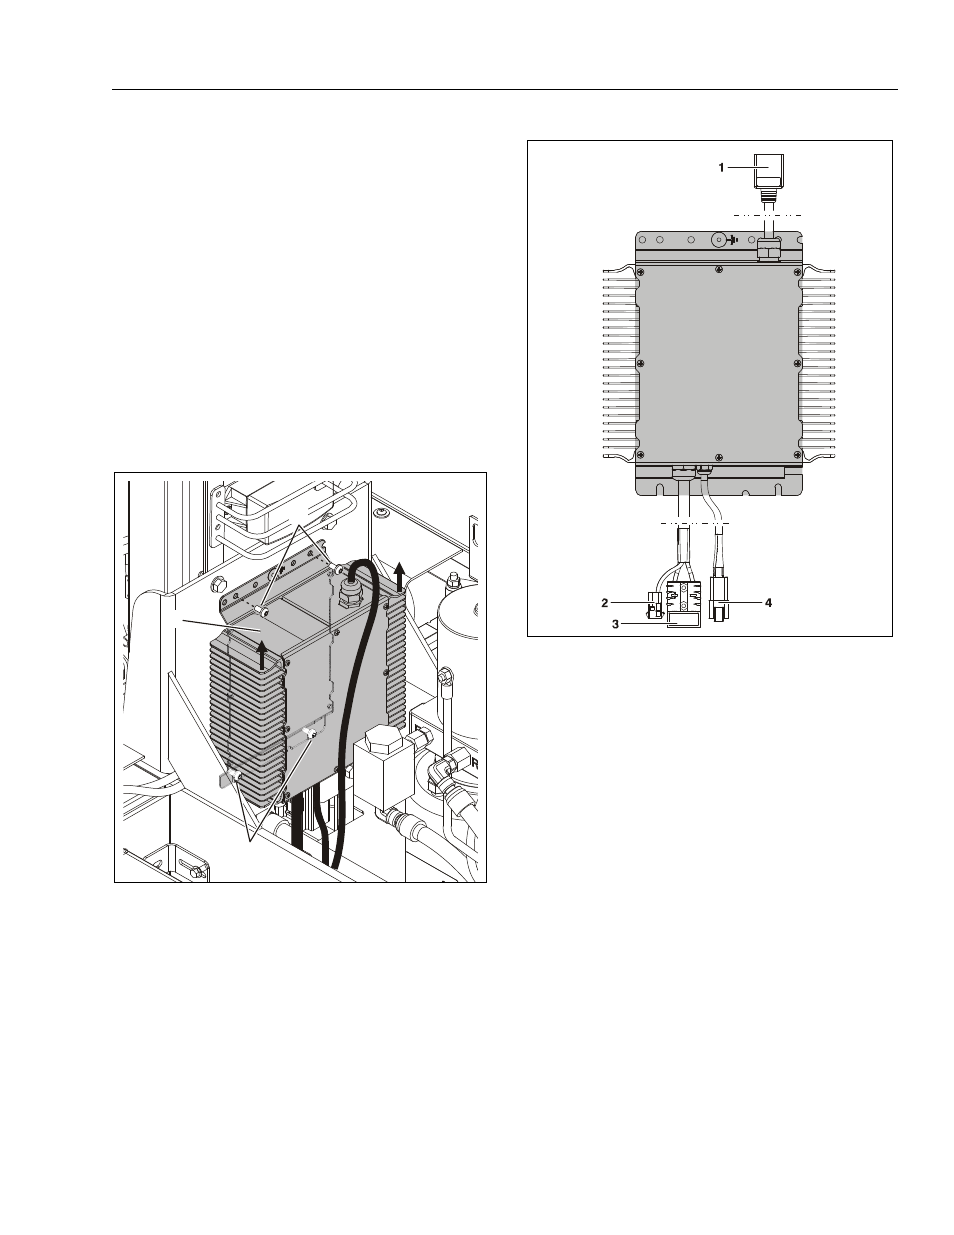
Battery Charger - Remove/Install
1. Battery Charger Assembly.
2. Charger Attach Screws (4), remove the two on top, loosen
the two on bottom of bracket.
2
1
2
Battery Charger - Connections
1. To AC 120/220Volt Input Socket (On Rear Bumper)
2. Drive Cut-Out Interlock Harness to P2 Connector on Ground
Control Module
3. DC Voltage Output to Battery +/– Posts
4. To Charging Status LED Indicators (On Rear Bumper)