JLG G6-42A Service Manual User Manual
Page 49
3-11
G6-42A, G9-43A, G10-43A
Boom
4. Lower the third boom section onto a suitable
support, relocate one sling and insert the third boom
section assembly approximately 75% into the
second boom section.
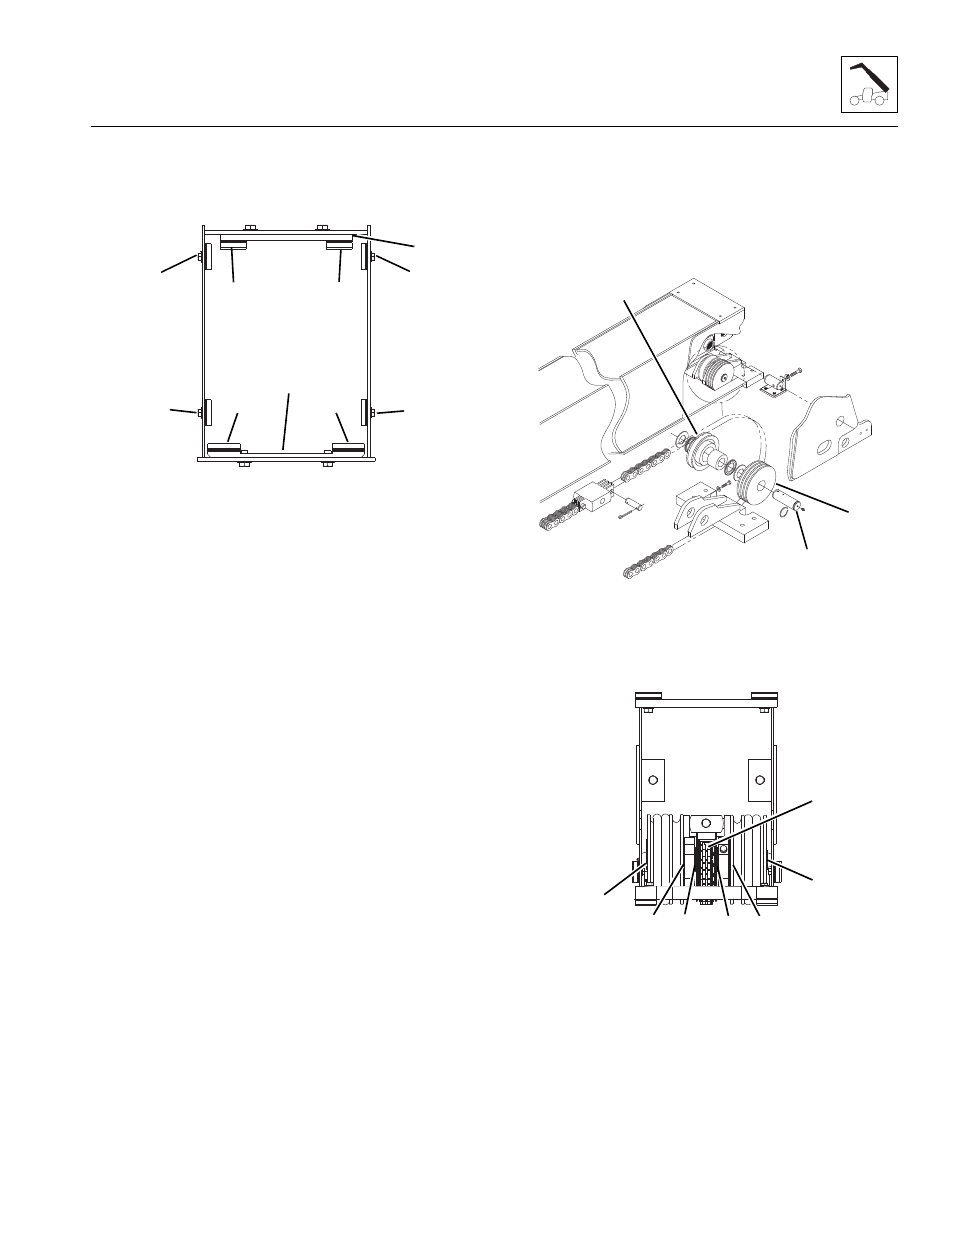
5. Install the previously removed wear pad mounting
plate (1) with existing hardware at the bottom front of
the second boom section. Torque as required
6. Install the previously removed wear pads, shims and
spacers (2) with existing hardware at the bottom
front of the second boom section. Torque as
required.
7. Install the wear pad mounting plate (3) with existing
hardware at the inside top front of the second boom
section. Torque as required.
8. Install the previously removed wear pads, spacers
and shims on each side at the front of the second
boom section (4). Snug mounting bolts. Shim as
needed AFTER boom section is installed. Refer to
Section 3.11.2, “Wear Pad Installation and
Lubrication,” for detailed information.
9. Install wear pads, spacer (5) using bolts and
washers at the top front of the second boom section.
Snug mounting bolts. Shim as needed AFTER boom
section is installed. Refer to Section 3.11.2, “Wear
Pad Installation and Lubrication,” for detailed
information.
10. Feed the tilt cylinder hoses and if equipped, auxiliary
hoses through the access holes at the rear of the
second boom section.
11. Push the third boom section the remainder of the
way into the second boom section.
12. Feed the retract chain through the access holes at
the rear of the second boom section.
13. Connect the retract chain to the chain clevis at the
rear of the second boom section using the existing
pin and retaining clips.
14. Secure the retract chain, tilt cylinder hoses and if
equipped, auxiliary hoses to the bottom of the boom
head with rope or wire.
Note: Keep the retract and extend chain free of any dirt
and/or contaminates.
15. Remove the Temporary Extend Chain Bracket.
16. Install the previously removed pin (6), chain roller
(7), tilt hose sheave (8) and if equipped, auxiliary
hose sheave assemblies at the rear of the second
boom section with existing hardware and shim as
required.
17. Thrust washers (9) are to be used as required to
shim the hose sheave and retract chain sheave
within 0.0625 in (1,6 mm) of a tight fit. At least one
thrust washer (9) is required at each noted location.
18. Center the retract chain sheave (10) between the
mounting plates.
19. Feed the tilt cylinder hoses and (if equipped) the
auxiliary hoses over and around the hose sheaves.
MY3870
5
5
2
2
3
4
4
4
4
1
MY3960
7
8
6
MY3970
10
9
9
9
9
9
9