4 extend chain installation, 7 boom section separation adjustment, Boom section separation adjustment – JLG G12-55A Service Manual User Manual
Page 52: Extend chain installation, O section 3.7, “boom section separation adjustment
Boom
3-18
G10-55A, G12-55A
2. Place a Do Not Operate Tag on both the ignition key
switch and the steering wheel, stating that the
machine should not be operated.
3. Properly disconnect the battery.
4. Secure the boom sections together to prevent
uncontrolled boom run out when the extend chains
are removed.
5. On the chain being removed, loosen and remove the
jam nut from the rear chain clevis and back off the
adjusting nut on the chain clevis to the end of the
threads. Do not completely remove the nut.
6. Remove the chain clevis pin and retaining ring to
free the chain.
7. Install the nylon tie wrap through the holes in the
chain, making a loop with the tie wrap and tie a rope
to the loop.
8. Pull the slack to the chain clevis at the front of the
boom.
9. Remove the clevis pin and the retaining ring from the
chain and chain clevis.
10. Install a nylon tie wrap through the chain holes,
forming a loop and tie a rope to the loop.
11. Carefully pull the chain out of the boom.
12. Untie the rope and leave it in place for reinstallation
of the chain.
3.6.4
Extend Chain Installation
The following section explains the installation of the
retract chains without removing the boom assemblies.
Inspect and lubricate chains thoroughly before
installation.
1. Fasten the previously used rope to the end of the
extend chain.
2. Carefully pull the chain into the boom to the chain
clevis anchor.
3. Fasten the chain to clevis with a pin and cotter pin.
4. At the other end of the chain, connect the chain to
the clevis fastening the chain to the clevis with a pin
and retaining ring.
5. Install the chain clevis fastening and adjusting
hardware on both ends.
6. Remove any clamping devises being used to keep
the boom sections from moving.
7. Properly connect the battery.
8. Adjust the extend chains as needed. Refer to
Section 3.7, “Boom Section Separation Adjustment.”
9. Remove the Do Not Operate Tags from both the
ignition key switch and the steering wheel.
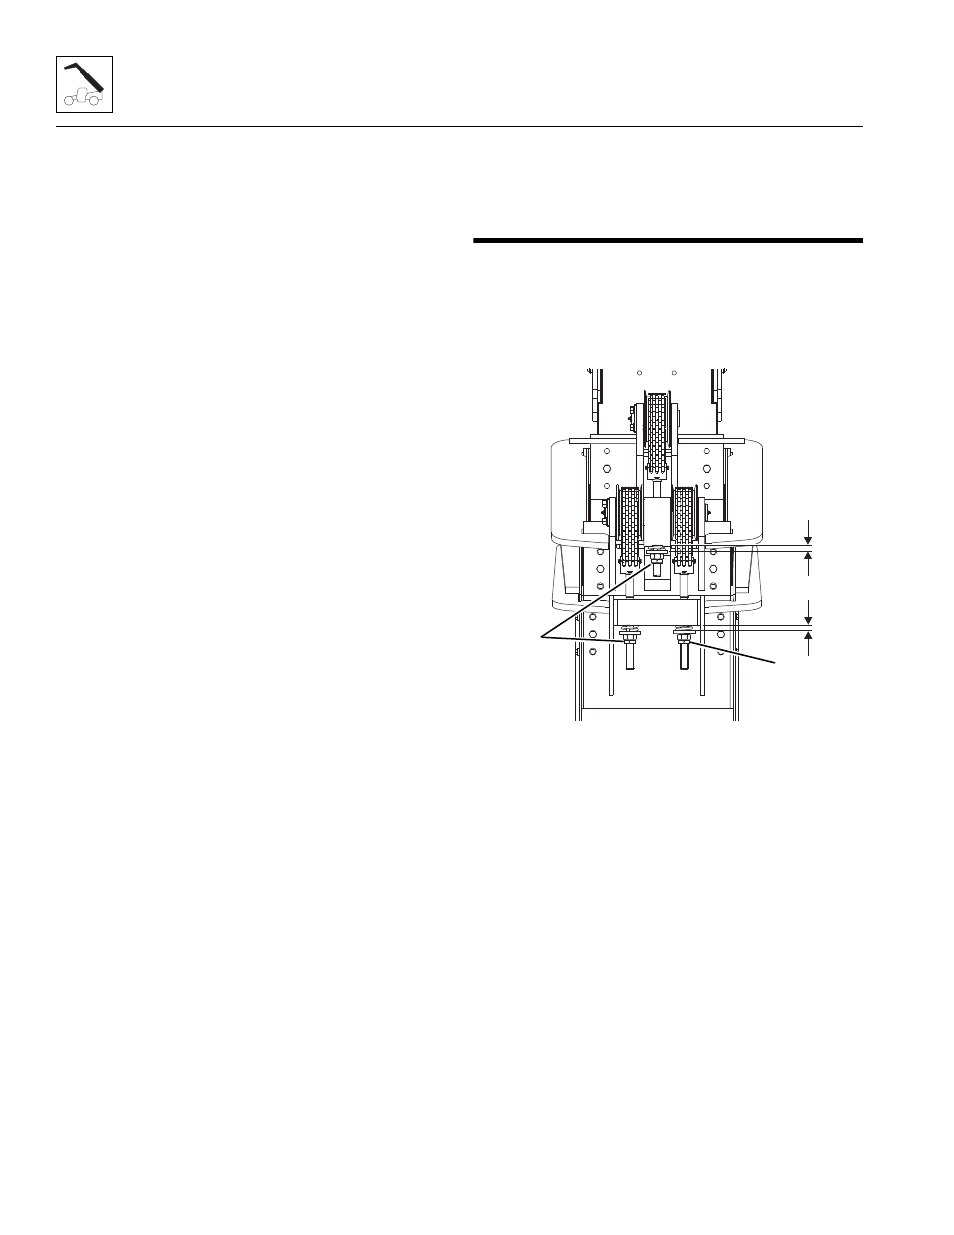
3.7
BOOM SECTION SEPARATION
ADJUSTMENT
1. Start the machine and verify the boom is in a
horizontal (level) position.
2. Extend the boom 4-5 ft (1,2-1,5 m), then fully retract
the boom.
3. Shut machine OFF.
4. Measure the gap (D) between the flat washer at the
extend chain anchor on the top front of the first boom
section and the second boom section. If the gap is
greater that 0.375 in (9.52 mm), the boom chains will
need to be adjusted.
Adjust the extend chain as follows:
1. Loosen the lock nut (1) on each of the extend
chains.
2. Tighten the adjusting nuts on the first boom section
until the gap (D) between the flat washers and boom
is 0.375 in (9,52 mm) maximum. The gap must be
equal on both chains. Torque the lock nut to 100 lb-ft
(135 Nm).
Note: Verify the exposed threads on both extend chain
clevises are kept equal.
3. Tighten the adjusting nut on the second boom
section until the gap (D) between the washer and
boom is 0.375 in (9,52 mm) maximum. Torque the
lock nut to 100 lb-ft (135 Nm).
MY3800
D
1
1