6 hose carrier installation, Hose carrier installation – JLG G12-55A Service Manual User Manual
Page 45
3-11
G10-55A, G12-55A
Boom
3.5.6
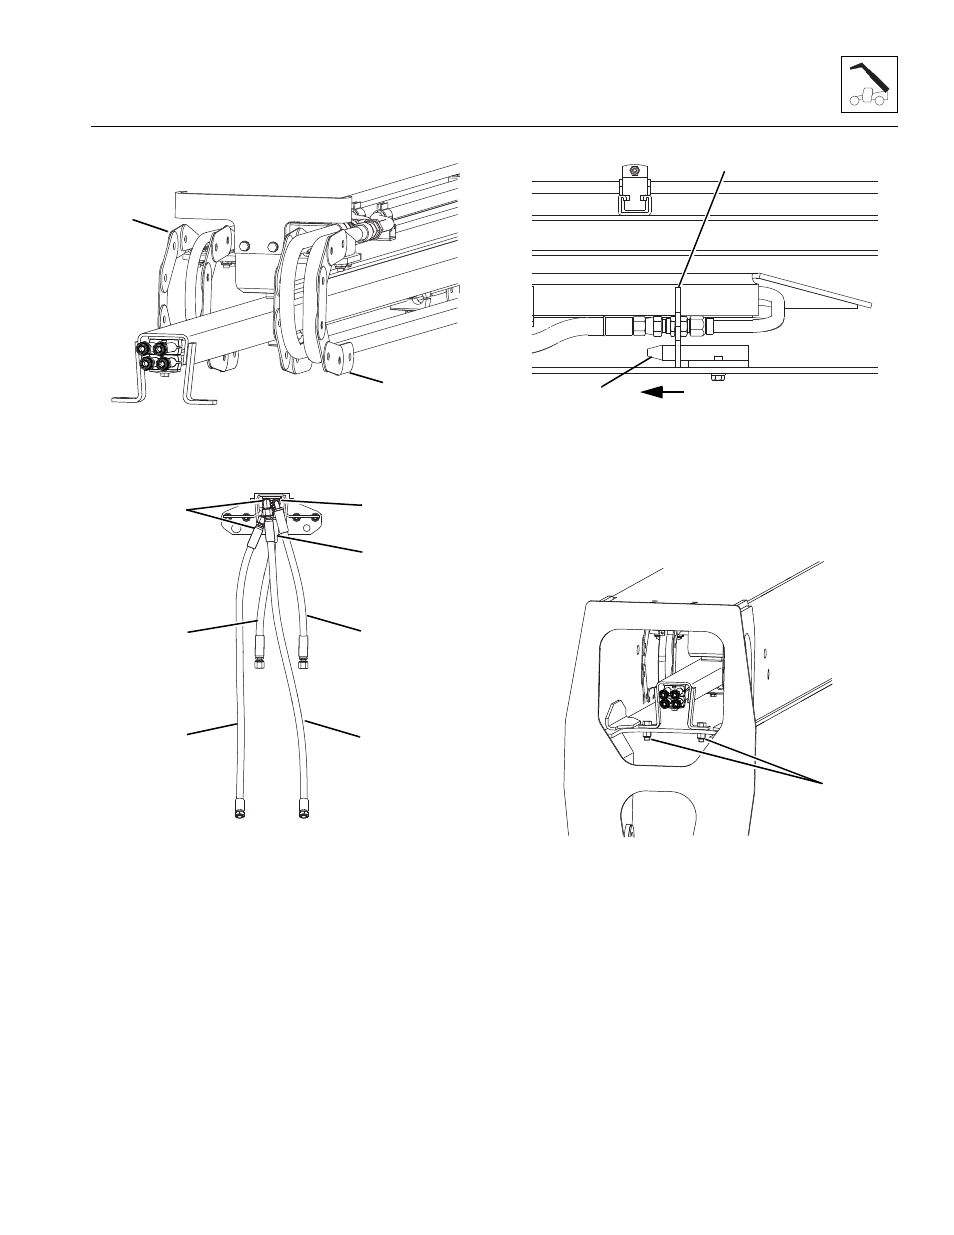
Hose Carrier Installation
1. Inspect the hose carrier track (6) for any broken or
missing clips. Repair or replace as needed.
2. Remove the caps from the tubes on the hose carrier.
Note: Connect the tilt cylinder hoses and the auxiliary
hoses to the hose carrier bulkhead before installing the
hose carrier in the fourth boom section.
3. Install tilt cylinder hose (7) to the bottom left fitting on
the hose carrier tube (8).
4. Install tilt cylinder hose (9) to the top left fitting on the
hose carrier tube (10).
5. Install adaptors (11) to each auxiliary tube at the
front right of the hose carrier.
6. Install auxiliary hoses (12) to each adaptor (11) no
the auxiliary tubes at the front right of the hose
carrier.
7. Orient each auxiliary hose (12) as shown above.
8. Torque each fitting and hose as required.
9. Install the previously removed hose carrier guide
bracket (13). Torque as required.
10. Install the hose carrier (14) into the front of the fourth
boom section. Remove each nylon tie or nylon strap
as the hose carrier is installed.
11. Align the hose carrier (14) to the hose carrier guide
bracket (13).
12. Align the hose carrier mounting bracket and install
the previously removed hardware to mounting
bracket at the front of the fourth boom section (15).
Torque as required.
MY3480
6
6
MY3750
7
8
9
10
11
12
12
MY3610
14
13
FRONT OF BOOM
MY3470
15