Advance Adapters SATURN User Manual
Page 8
Step 6
Planetary gears & bearings
may be replaced by driving out
the pins. (On some early
model units, these pins were
held in place by a small roll
pin). By pushing the planetary
pins out with a 5/16” drift
punch, the roll pins will shear.
Inspect the thrush washers,
needle bearings, planetary
pins and gears for wear.
Units produced today do not
use the planetary pins re-
tained by a roll pin. To keep
these planetary pins in place
we use a snap ring retainer
that fits underneath the syn-
chro-teeth.
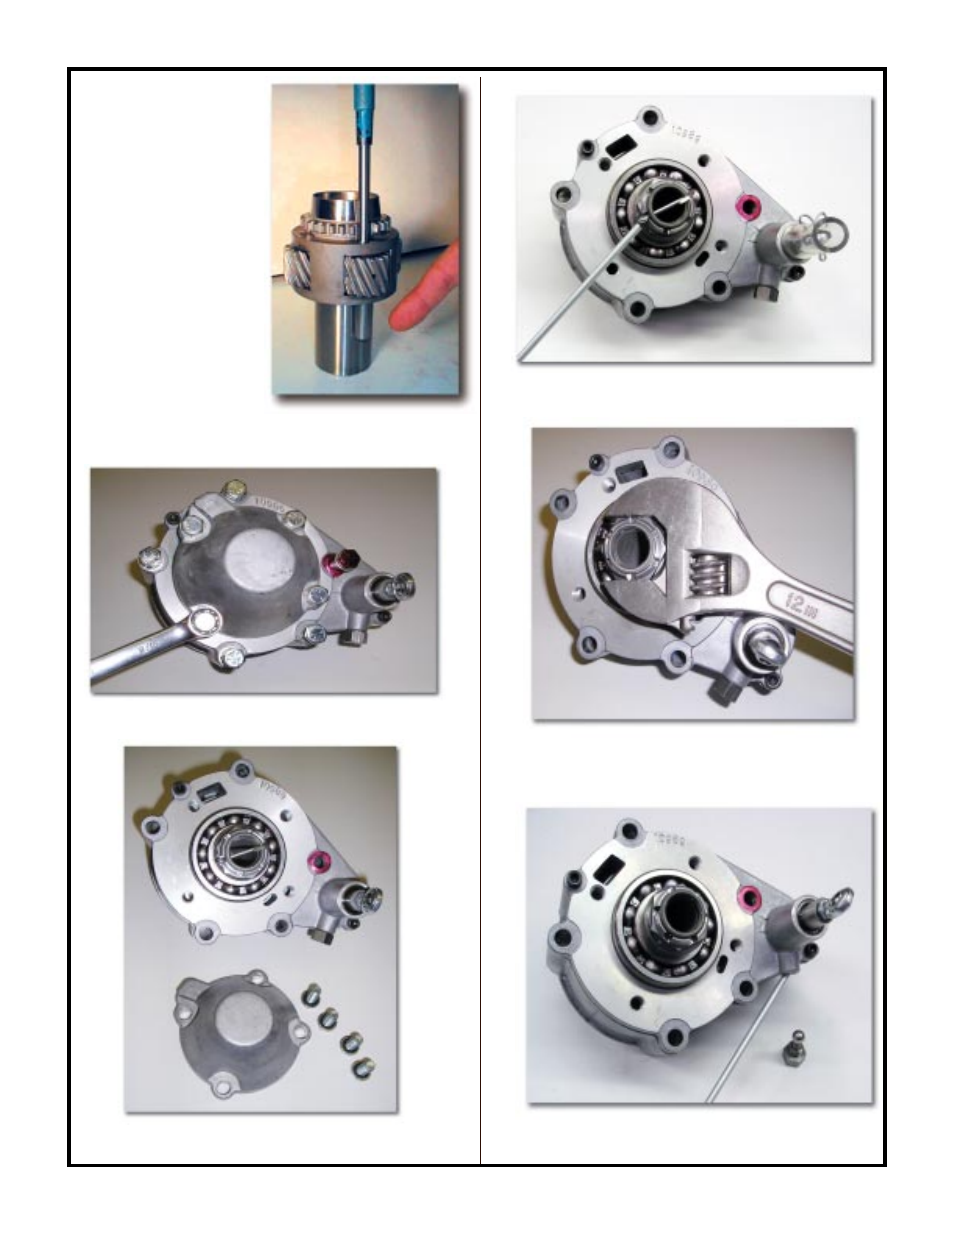
Step C1
Using a 9/16” wrench, remove the 4 cap screws holding the
bearing cap.
DISASSEMBLY OF THE CASE
Bearing cap & screws removed. (During the reassembly,
the 4-3/8” cap screws should be torqued to 19 ft./lbs., and
the 1/4” cap screw to 6 ft./lbs. of torque)
Step C2
Remove the cotter pin that locks the nut to the spline shaft.
Step C3
Remove the nut using a 12” adjustable wrench. The shift fork
must be at the rear of the case, locking the unit in the over-
drive position before the nut can be removed.
Step C4
Remove the shift detent screw, ball and spring.