Advance Adapters 303009A User Manual
Page 3
ASSEMBLY
Transfer Case End:
1 . Bolt the twin stick base to the transfer case with the 3/
8"-16 socket head cap screws.
2 . Thread the 1/2"-13 all thread completely into the twin
stick base. Install the 1/2"-13 jam nut. Tighten the jam
nut against the twin stick base.
2A. Thread the shift rail adapters completely onto the shift
rails
3 . Slide the extension tube and the extension tube bracket
over the all thread and fasten with the 1/2"-13 serrated
lock nut.
4 . Insert the shift cable through the extension tube bracket
and fasten by sandwiching the bracket between the two
jam nuts. Repeat for second cable.
5 . Thread the cable's inner rod completely into the threaded
adapter that fits on the shift rails. Tighten the jam nut.
Repeat for second cable.
Shifter End:
1 . Remove 1 of the 5/8" jam nuts and the lock washer from
each cable and discard.
2 . Slide the Barrel Retainer plate over both shifter cables.
Then thread both cable barrels onto the shift cables.
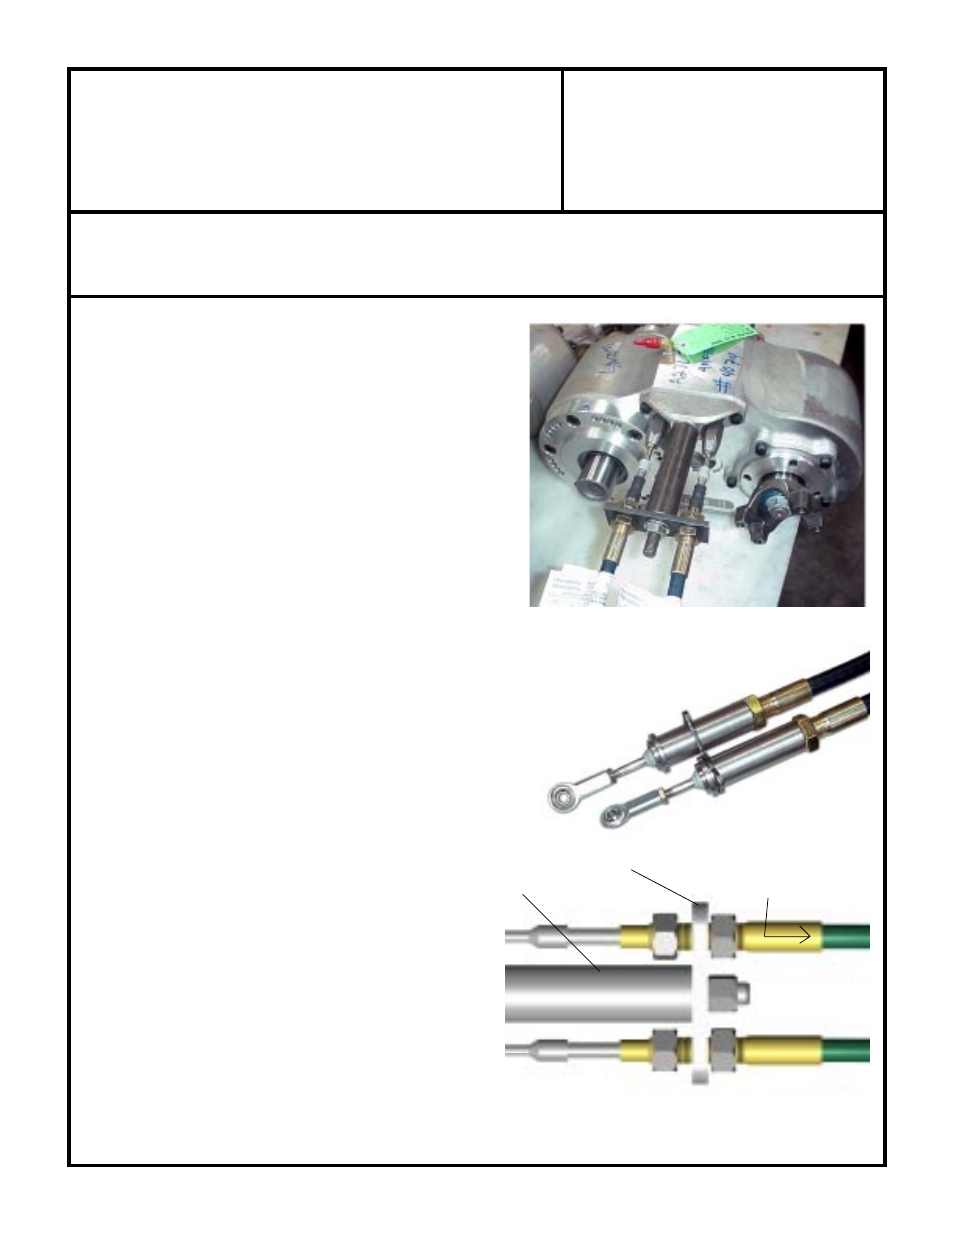
3 . Now thread the heim joints onto the shift cables inner
rod , and tighten the jam nuts. (This should look like the
photo to the right.)
4 . Using a mallet, hammer the pivot bushings into the
shifter handles. Start the bushing into the handle, hold
the handle with the bushing side down on the table, hit
the top side of the handle with the dead blow hammer to
install the bushing. Repeat for the remaining bushings.
ATLAS TRANSFER CASE CABLE SHIFTER
SOLD WITHOUT AN ATLAS
SPECIAL NOTE:
The components packaged in this kit have been assembled and machined for specific type of conversions. Modifications to any of the components
will void any possible warranty or return privileges. If you do not fully understand modifications or changes that will be required to complete your conversion, we strongly
recommend that you contact our sales department for more information. This instruction sheet is only to be used for the assembly of Advance Adapter components. We
recommend that a service manual pertaining to your vehicle be obtained for specific torque values, wiring diagrams and other related equipment. These manuals are normally
available at automotive dealerships and parts stores.
ADVANCE ADAPTERS INC.
P/N: 303009A
P.O. Box 247, 4320 Aerotech Center Way
New Item: (05/04)
Paso Robles, CA 93447
PAGE 3 OF 5
Telephone: (800) 350-2223
Fax: (805) 238-4201
Page Rev. Date:
06-29-11
Adjustments *IMPORTANT STEP: Shift the Atlas into low range.
Next loosen the 1/2"-13 jam nuts to the far thread ends of the cable
assembly. Pull the cable housing away from the Altas. The forward
nut should have an INITIAL GAP of 1/8" (SEE FIGURE BELOW).
Next tighten the same nut up until it contacts the plate. With the
nut flush against the plate, tighten 1/2 turn more. Then tighten the
rear nut against the opposite side of the plate (REPEAT PROCESS
FOR BOTH CABLES). NOTE: If step this not completed properly
the Atlas will not fully shift into gear.
p u l l c a b l e h o u s i n g
away from bracket
extension tube
extension tube
bracket