Wheel installation, Outrigger installation – Snorkel U Drive 25-sn1001+ User Manual
Page 3
3
3.
Plug
connector
from
rear
wheels
into
connector
from chassis wiring.
Wheel
Installation
1.
After
outriggers
have
been
installed,
turn
screwjacks
clockwise
until
wheels
can
be
installed.
2.
Install
rear
wheels
into
rear
outriggers.
P
in
wheels
in
place
using
pins
provided.
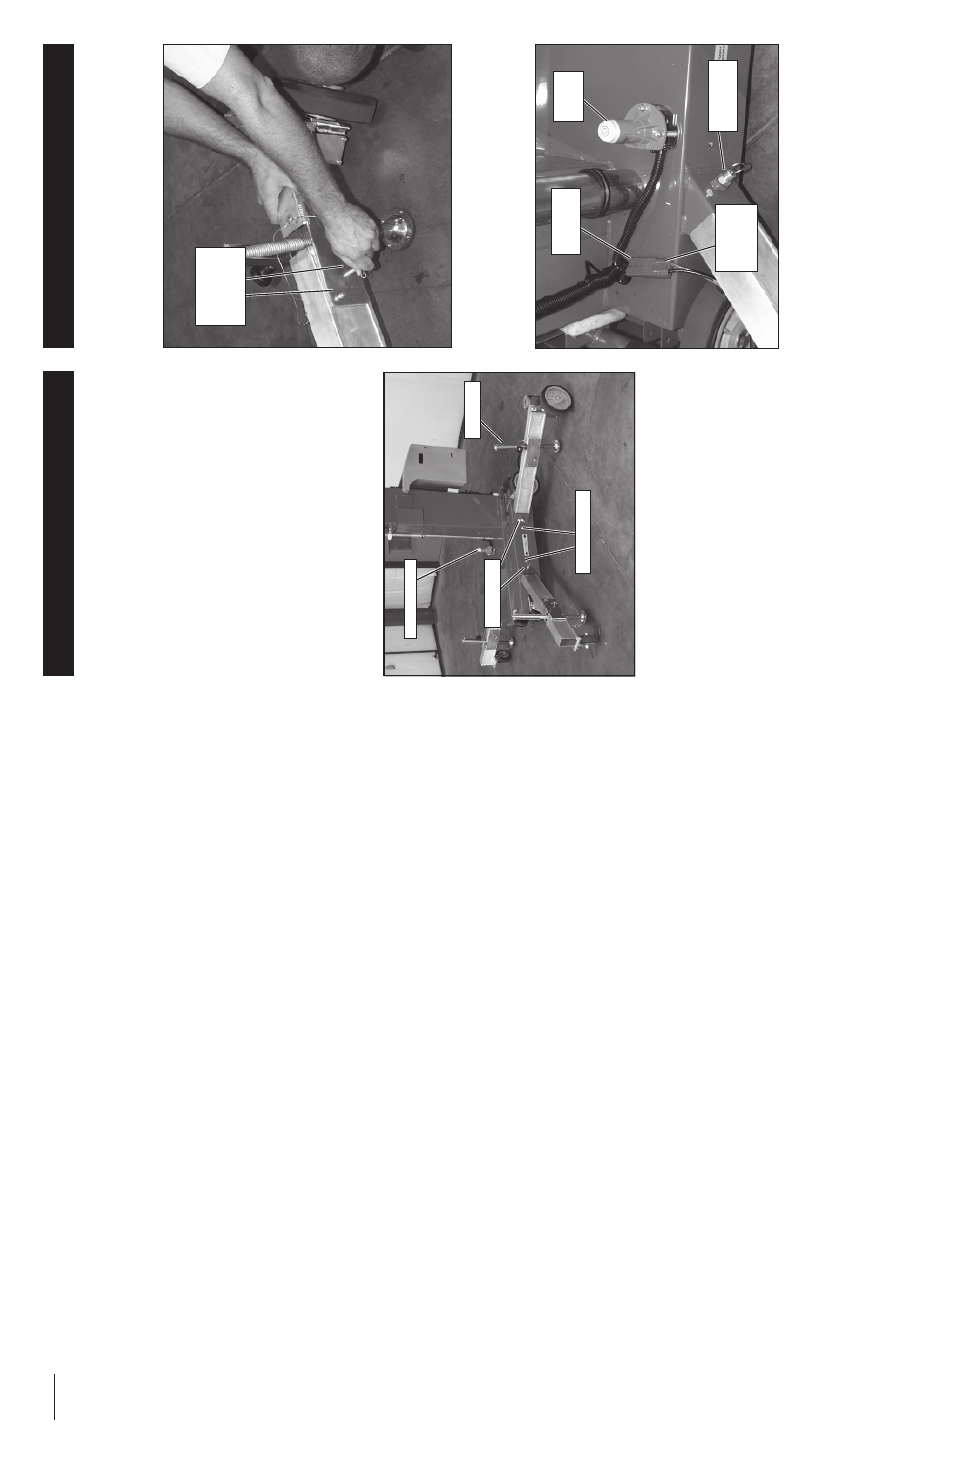
Figure
2:
Installing
wheels
Outrigger
Installation
1.
Remove
the
outriggers
from
storage
locations
on
sides
of
m
ast.
2.
Insert
into
outrigger
socket
in
base
(Figure
1).
3.
Push
in
until
locking
pin
engages
hole
in
end
of
outrigger.
Pull
outward
on
outrigger
to
ensure
engagement.
4.
Repeat
the
above
steps
for
all
other
outriggers.
Make
sure
all
four
(4)
locking
pins
are
engaged.
5.
Level
the
base,
centering
the
bubble
in
the
orbit
level
on
the
base
by
adjusting
the
screwjacks
at
the
end
of
each
outrigger
(Figure
1).
DO
NOT
release
the
tension
on
an
outrigger,
by
turning
counterclockwise,
to
level
base.
IMPORTANT:
All four (4) screwjack pads must be
in
solid
contact
w
ith
a
firm
surface
and
each
outrig-
ger
indicator
light
m
ust
be
lit
before
the
platform
is
elevated.
Figure
1:
Installing
outriggers
Indicator
Light
Level
Sensor
Locking
Pin
Screwjack
Figure
3:
Connecting
rear
wheel
cables
Wheel
connecting
pins
Rear Wheel
Connector
Level Sensor
Outrigger Lock
Pin
Base
Connector
42
NOTES: