Secure the system in the rack or cabinet, Secure the system in the rack or cabinet 35 – Apple Xserve RAID User Manual
Page 34
Mounting Xserve RAID in a Rack
35
3
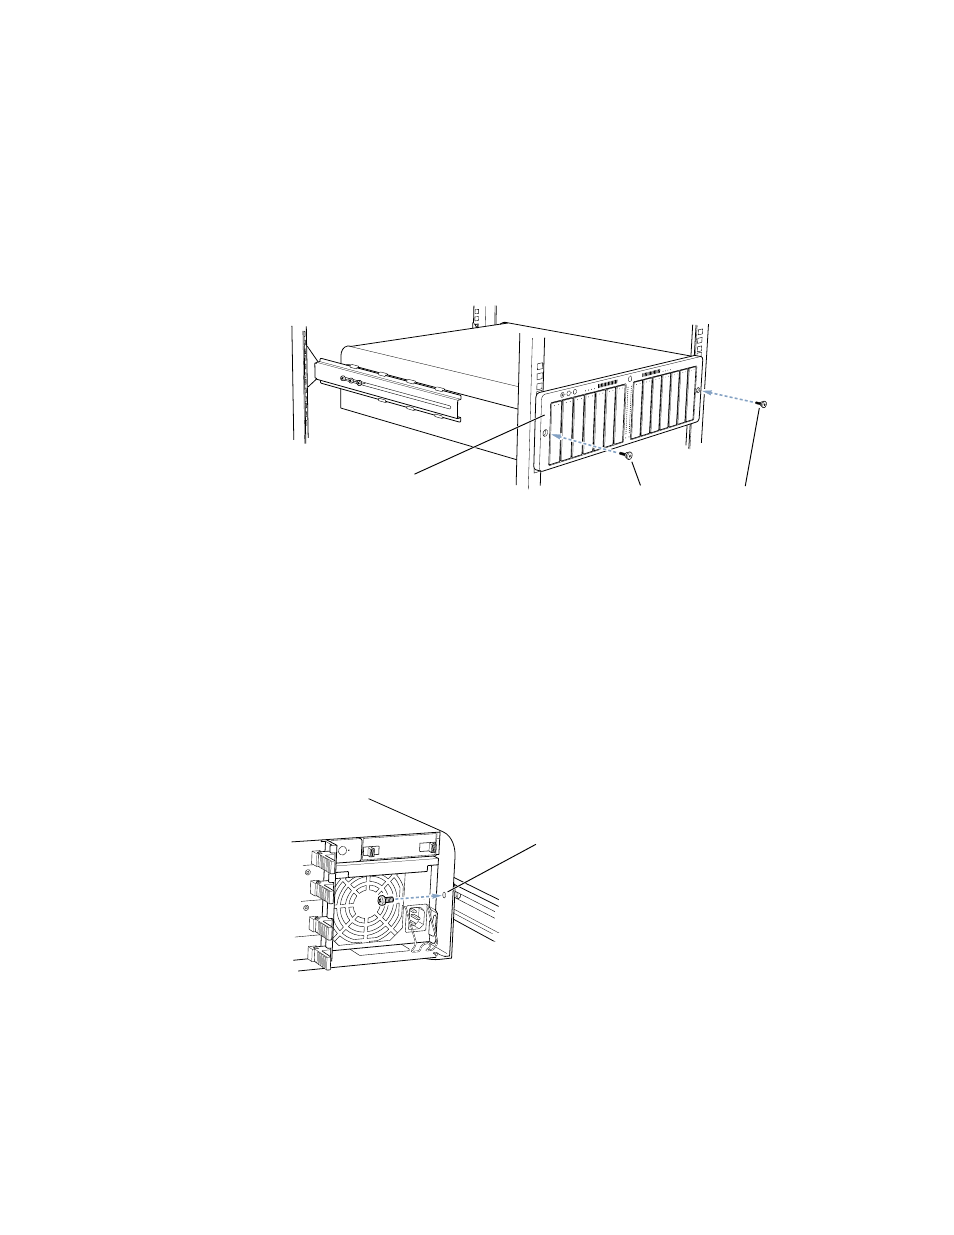
Use the two rack screws to secure the system to the front rail of the rack.
You can use the Phillips screwdriver to tighten these screws.
Secure the System in the Rack or Cabinet
Once you have mounted the system and attached it to the front of the rack, you must secure
it at the back.
Follow these steps to secure the system at the back.
1
At the back of the system, locate the small hole in the lip that extends beyond the back panel
on the side of the enclosure.
This hole is next to the mounting bracket.
2
Insert a small, rear-securing screw on the inside of the lip, guide it into the threaded hole in
the mounting bracket, and tighten the screw.
3
Insert and tighten a small screw on the other side of the system.
Important
Be sure to tighten the rack screws so that the system is firmly attached
to the rack.
Insert and tighten the two mounting
screws to secure the unit to the rack.
Parts of the unit may be
covered by clear plastic film that
protected it during shipment. Remove the film.
Secure the unit to the rack by inserting a small screw through
each of the holes located on both sides on the back
of the unit. Tighten the screws to attach the
unit to the L-bracket assembly.