Prepare the system for installation, Installing the system, Prepare the system for installation 26 – Apple Xserve RAID User Manual
Page 25: Installing the system 26
26
Chapter 3
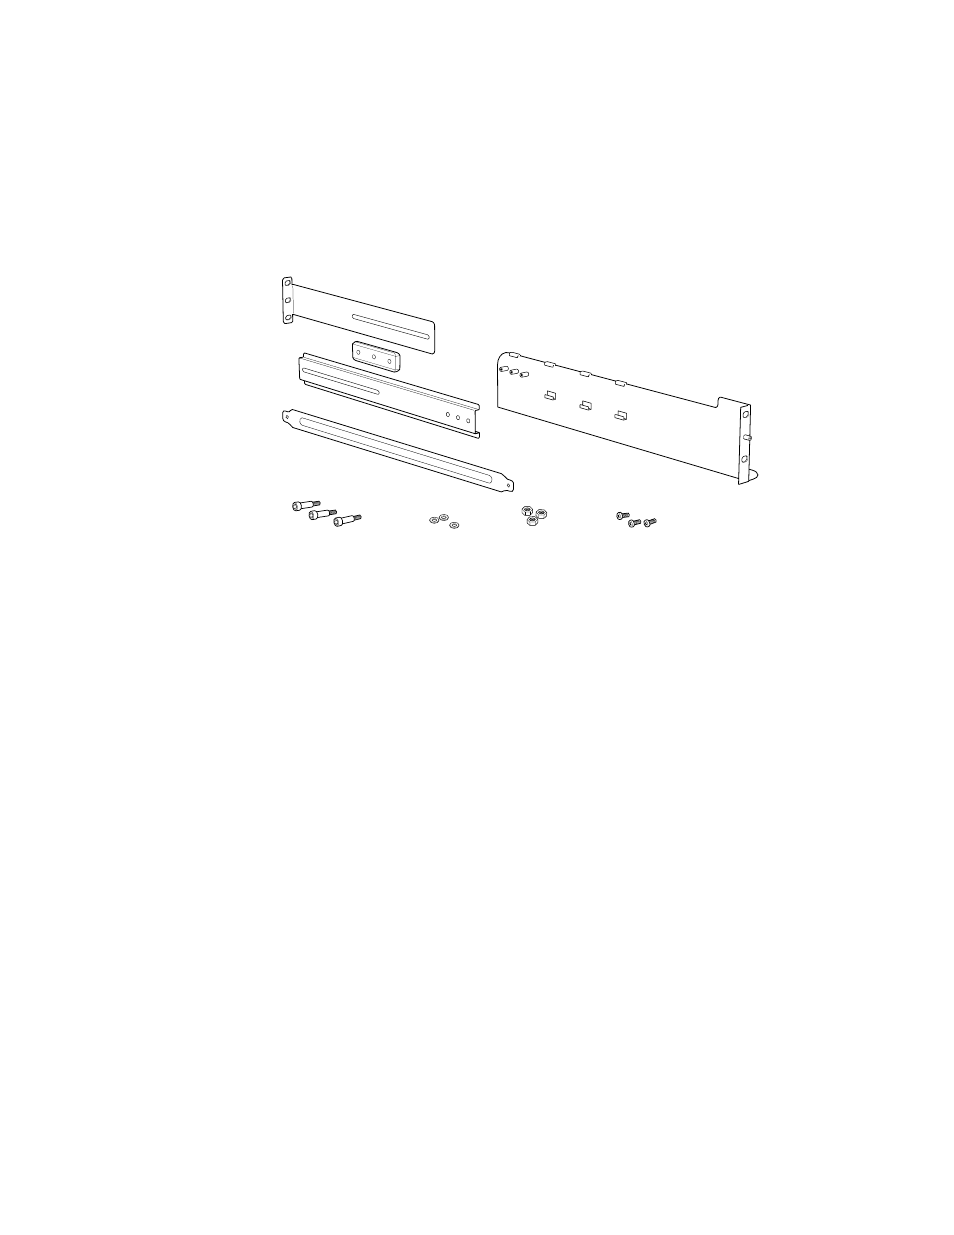
m If your rack is 29 to 36 inches deep, combine the shorter extender with a three-hole lip at
the one end (item C in the illustration below) and the longest piece (with no lip; item D
in the illustration), using the solid bar (item E in the illustration). This combination
creates an extender long enough to reach the rear of a deep rack.
For a rack exactly 29 inches deep, try the A and B combination of bracket and extender; if
that does not fit, use the A, C, D, and E combination.
Prepare the System for Installation
Follow these steps to prepare the system hardware for installation.
1
With a second person, unpack the system from its carton and place it on the table or cart.
Follow the instructions in “Unpacking the System” on page 10.
2
Write down the serial number on the system’s back panel and the two Ethernet MAC
numbers on the RAID controller modules (at the center of the back panel).
You will need these numbers when you set up and use the Xserve RAID software.
Installing the System
To install the system in the rack, you
m assemble the brackets
m attach the brackets to the rack
m rest the system on the brackets and secure it to the rack
C
E
D
A1 and A2
Short screws
Nuts
Washers
Shoulder bolts
Mounting template