Fixed valley, Installation steps (use only with fixed eave), Isometric view – Mueller Snap Lock (MSL) User Manual
Page 19
19
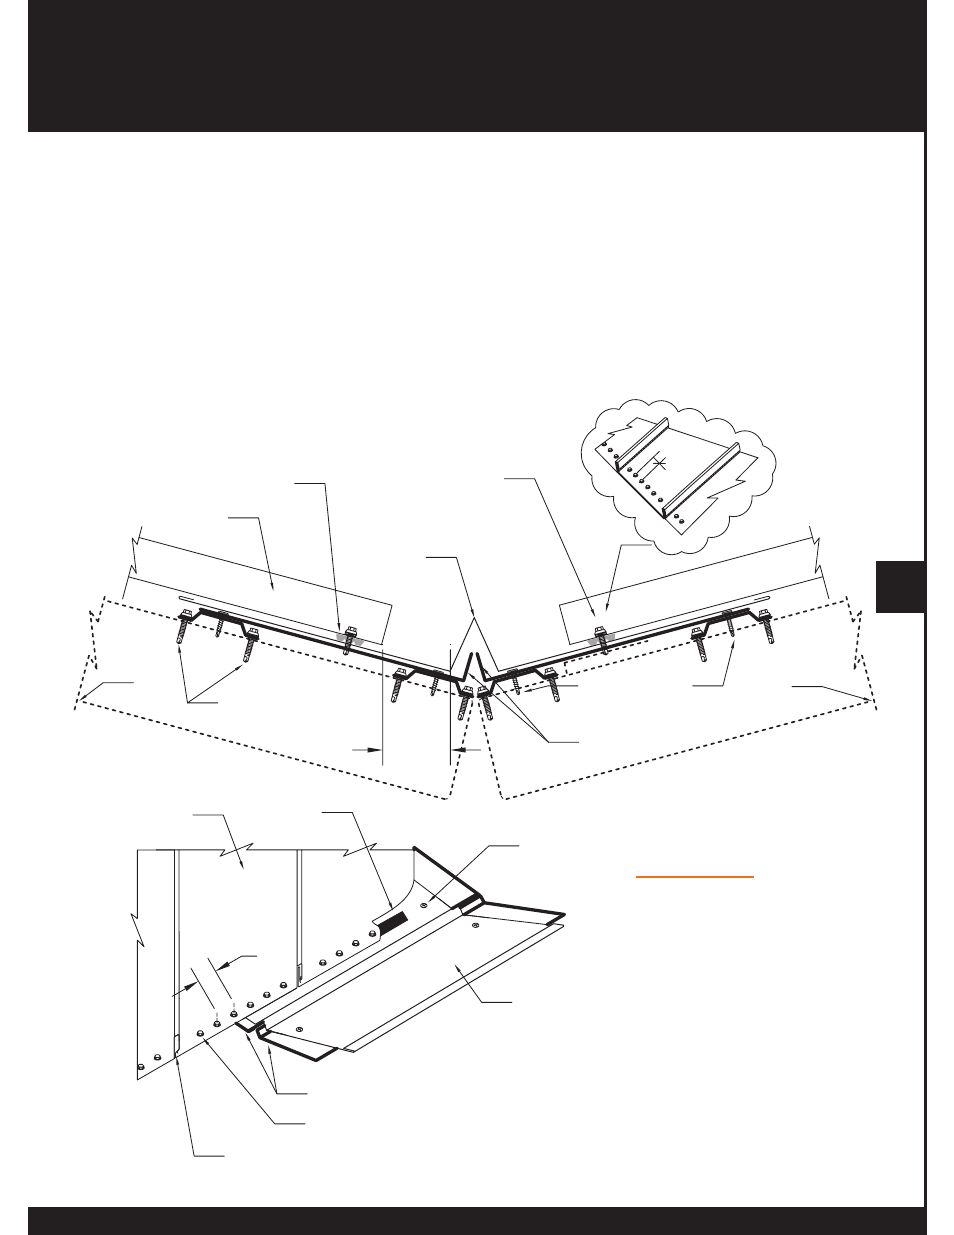
FIXED VALLEY
Installation Steps (use only with fixed eave)
1. If applicable, install insulation before proceeding (insulation omitted for clarity).
2. Install four runs of hat section up the valley as shown, securing to the purlins with # 10 x 1 self drill pan head
screws (this step is applicable when insulation or thermal blocks are specified).
3. Install the two piece 14 ga. Valley Support Plates with #10 x 1 self drill pan head screws.
4. Install Valley trim over the Valley Support Plates. Secure with #10 x 1 self drill pan head screws (5’ centers).
5. Install butyl tape sealant 4” to 5” from center of the valley trim.
6. Attach panel to Valley Support Plate using #12 x 1 ¼ self drill screws, on 4’ centers, through the butyl tape
sealant and the Valley Trim into the Valley Support Plate.
7. Seal the ends of the panel legs using tube sealant.
Mueller Snap
Lock Panel
# 10 x 1"
Pan Head
Self Drill Screw
Valley Trim
Valley Plates
#12 x 1 1/4" Self Drill
Tek Screw with Washer
Tape
Sealant
Fill Panel Ends
With Butyl Tube
Sealant
4" +/-
Mueller Lock
Panel
Valley
Trim
#12 x 1 1/4" Self Drill
Tek Screw with Washer
4" +/-
#12 x 1 1/4" Self Drill
Tek Screw
4" Typical
#10 x 1" Pan Head
Self Drilling Screw
on 24" Center
2 - Piece, 14 ga.,
Valley Plate
Tape
Sealant
Purlin
Purlin
Isometric View