Floating rake details, Installation steps continued, Isometric view – Mueller Snap Lock (MSL) User Manual
Page 16
16
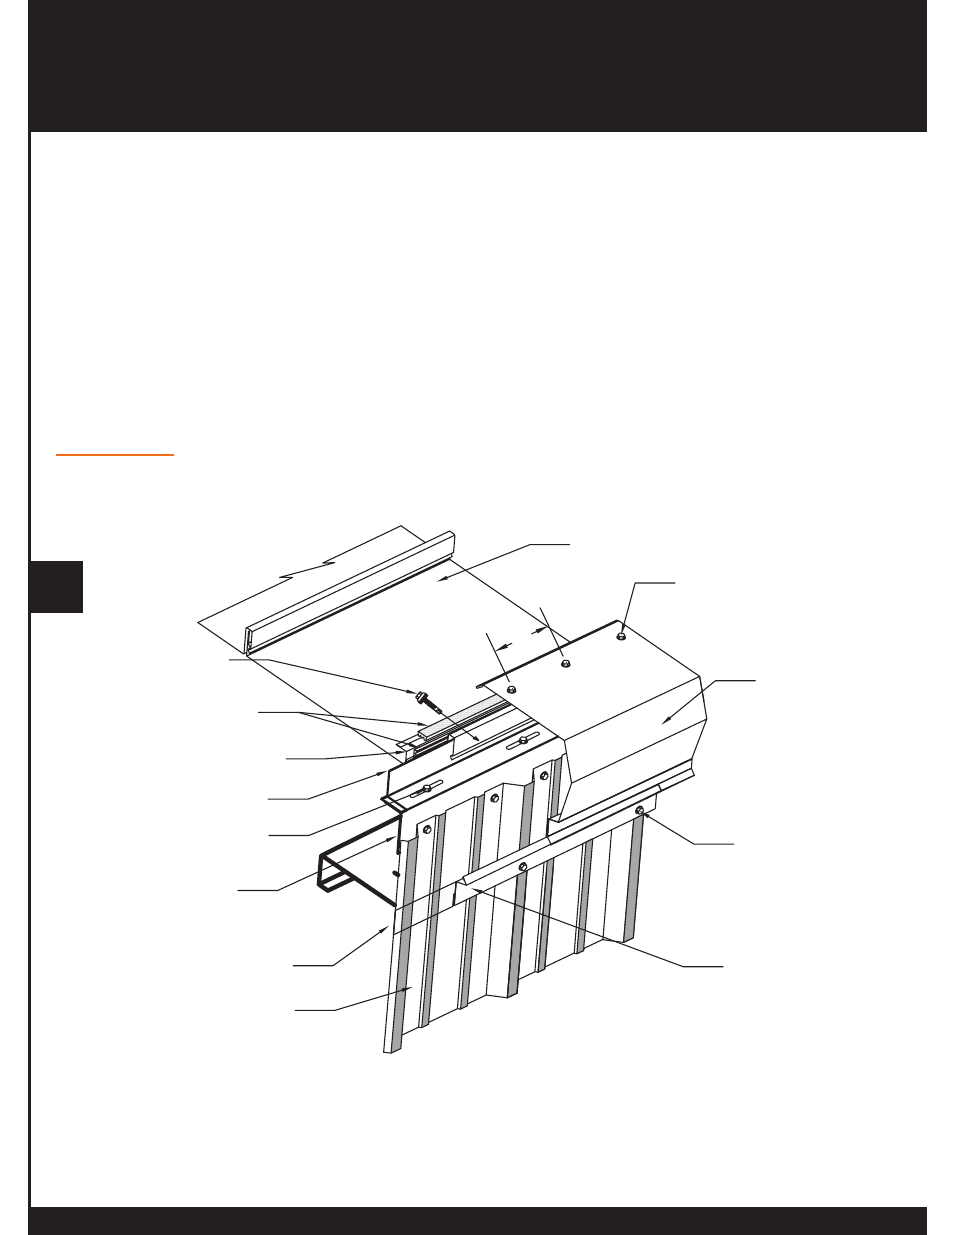
FLOATING RAKE DETAILS
Installation steps continued:
4. Apply tri bead to the top of the Rake Trim Support Angle and install Rake Trim as shown with #14x 7/8” lap
screws on 6” centers.
5. Attach Rake Slide Trim over bottom edge of the Rake Trim securing with #14x7/8” lap screws on 12” centers.
6. For last panel run, field cut the panel if necessary to form a 1 ¾” up turned leg that will position against the
slotted rake angle when installed. Then complete the trim using the above steps.
Mueller Snap Lock Panel
Rake Trim
14ga Slotted Rake Angle
RPN Wall Sheets
#12 x 1 1/4" SD Tek
Hex with Washer
on 12" Centers
#14 x 7/8" Lap
Tek Screw
Rake Slide Trim
#14 x 7/8" Lap
Tek Screw on 6"
Centers
Rake Angle
Rake Trim Support Angle
Sealant
6"
Optional Closure
#14 x 1 1/4" SD Shoulder
Tek Screw on 12" Centers
Isometric View