2 . operating procedure – Brother LK3-B448E User Manual
Page 33
LK3-B448E MARK
II
/BA-16
26
5. Operation
5-2 . Operating procedure
Program No.
X-scale (%)
Y-scale (%)
Speed (rpm)
Factory default
00 *
100
100
2000
Variable range
01 - 49
20 - 200
20 - 200
1,000 - 2,500
S E L E C T
PROGRAM NO.
COUNTER
X-SCALE
Y-SCALE
SPEED
P
S E L E C T
PROGRAM NO.
COUNTER
X-SCALE
Y-SCALE
SPEED
P
S E L E C T
PROGRAM NO.
COUNTER
X-SCALE
Y-SCALE
SPEED
P
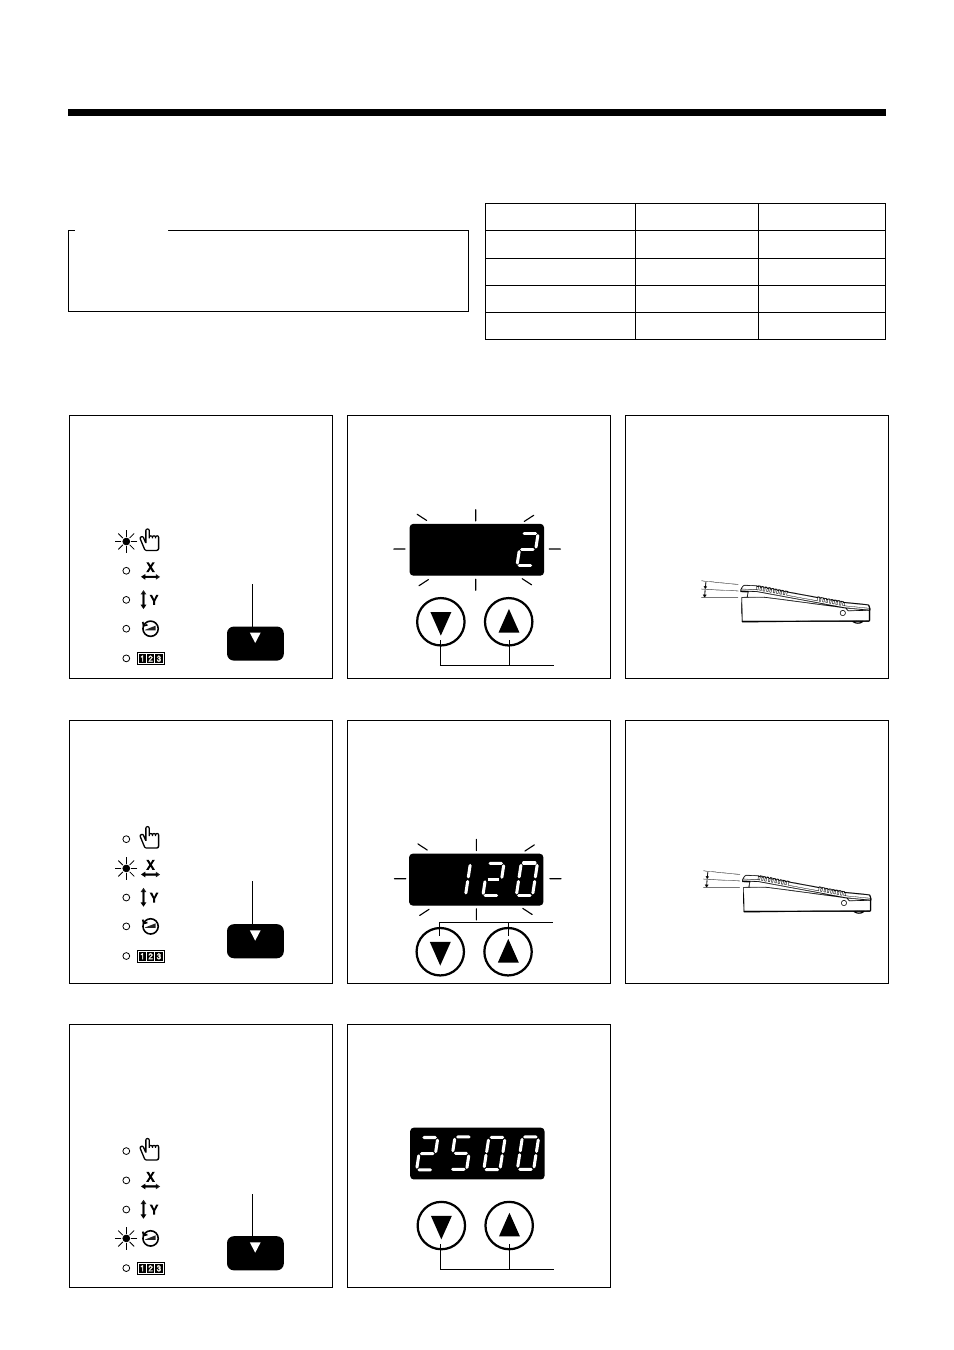
Press the SELECT switch
y
until the PROGRAM NO. in-
dicator illuminates.
Press the DISPLAY SET
switches
!2
until the desired
program number is flashing in
the display window.
Depress the foot switch to the
second step.
* The display will stop flashing and
illuminates steadily, and the feed
mechanism will move to the sew-
ing start position.
This completes the setting of the program
number.
1
2
3
Press the SELECT switch
y
until the X-scale or Y-scale
indicator illuminates.
Press the DISPLAY SET
switches
!2
until the desired
scale setting is flashing in the
display window.
(The setting is
displayed as a percentage.)
Depress the foot switch to the
second step.
* The display will stop flashing and
illuminates steadily, and the feed
mechanism will move to the sew-
ing start position.
1
2
3
Press the SELECT switch
y
until the SPEED indicator il-
luminates.
Press the DISPLAY SET
switches
!2
until the de-
sired speed setting is flashing
in the display window.
1
2
This completes the setting of the X-scale
or Y-scale.
y
y
y
!2
!2
1st step
2nd step
Preparation
Turn on the power switch.
(The POWER indicator
q
will illuminate and the pro-
gram number will flash in the display window
!44
.)
* For checking the origin points for X and Y feed
5-2-1 . Setting the program number
Determine the appropriate program from the program list which is given on pp. 3 - 5.
5-2-2 . Setting the X-scale and Y-scale
5-2-3 . Setting the sewing speed
1st step
2nd step
NOTE:
Be sure to check the sewing pattern (refer to page 20) after setting has been completed to make sure that the needle drops
down into the hole of the button.
!2