Brother HL-1040 User Manual
Page 81
IV-14
I-15
Black spots
Possible cause
Step
Check
Result
Remedy
Drum unit
1
Are the spots at 94mm
intervals?
The problem is not solved after
printing a few pages.
Yes
If toner remains stuck, wipe it
off gently with a cotton swab.
Replace the drum unit if the
OPC drum is scratched or
deteriorated (exposed).
(Refer to the following note.)
Fixing unit
2
Are the spots at 63mm
intervals?
The problem is not solved after
printing a few pages.
Yes
Check and clean the heat roller
with a cloth dampened with
alcohol.
Replace the fixing unit.
High-voltage
power supply
PCB
3
Is the problem solved after the
high-voltage power supply
PCB is replaced?
Yes
Replace the high-voltage
power supply PCB.
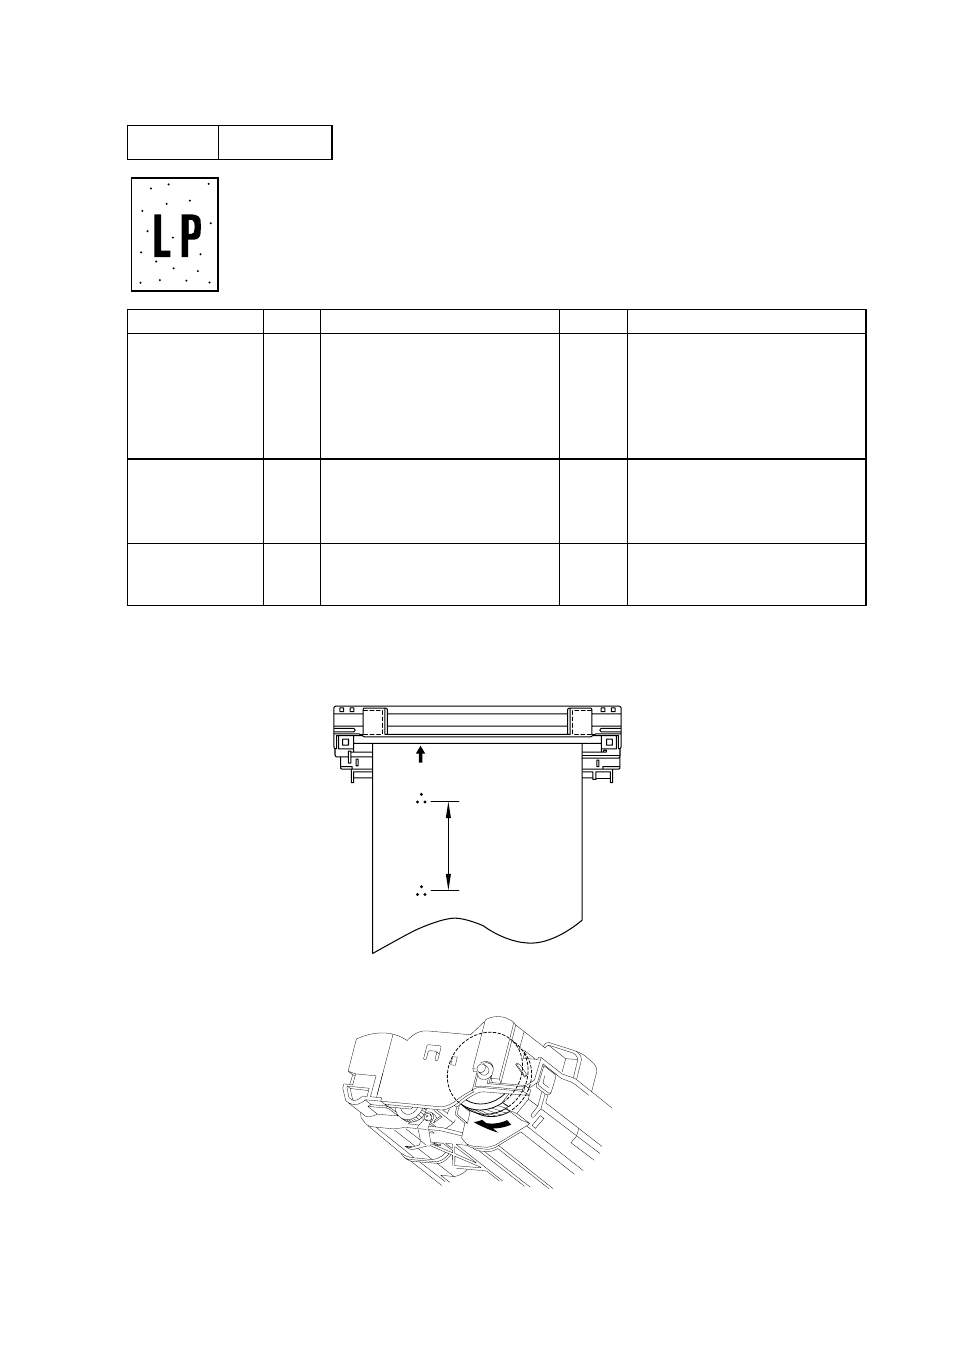
Note: Clean the drum unit as follows:
(1) Place the printing samples in front of the process unit, and find the exact
position of the image defect.
Fig. 4-2
(2) Turn the drum gear by hand while looking at the surface of the OPC drum.
Fig. 4-3
Position of smudge on
the drum
94mm interval