Audio adjustments, Operating this unit, Introduction of audio adjustments – Pioneer DVH-P590MP User Manual
Page 41
6 Repeat indicator
7 Random indicator
8 Scan indicator
9 Title display
Shows the text information of currently play-
ing disc.
— For CD TEXT discs
D.TITLE (disc title), D.ARTIST (disc artist
name),
T.TITLE (track title), T.ARTIST
(track artist name)
— For WMA/MP3/AAC discs
ALBUM (album title), TRACK (track
title),
FOLDER (folder name), FILE (file
name),
ARTIST (artist name)
% Press DISPLAY to switch the informa-
tion display.
Press
DISPLAY repeatedly to switch between
the following display modes:
Information display
—Title display
# Pressing DISPLAY button on the Title display
switches text information on the head unit. In this
case, text information on the Title display remains
unchanged.
# Text information on the Title display does not
scroll.
Audio Adjustments
Introduction of audio adjustments
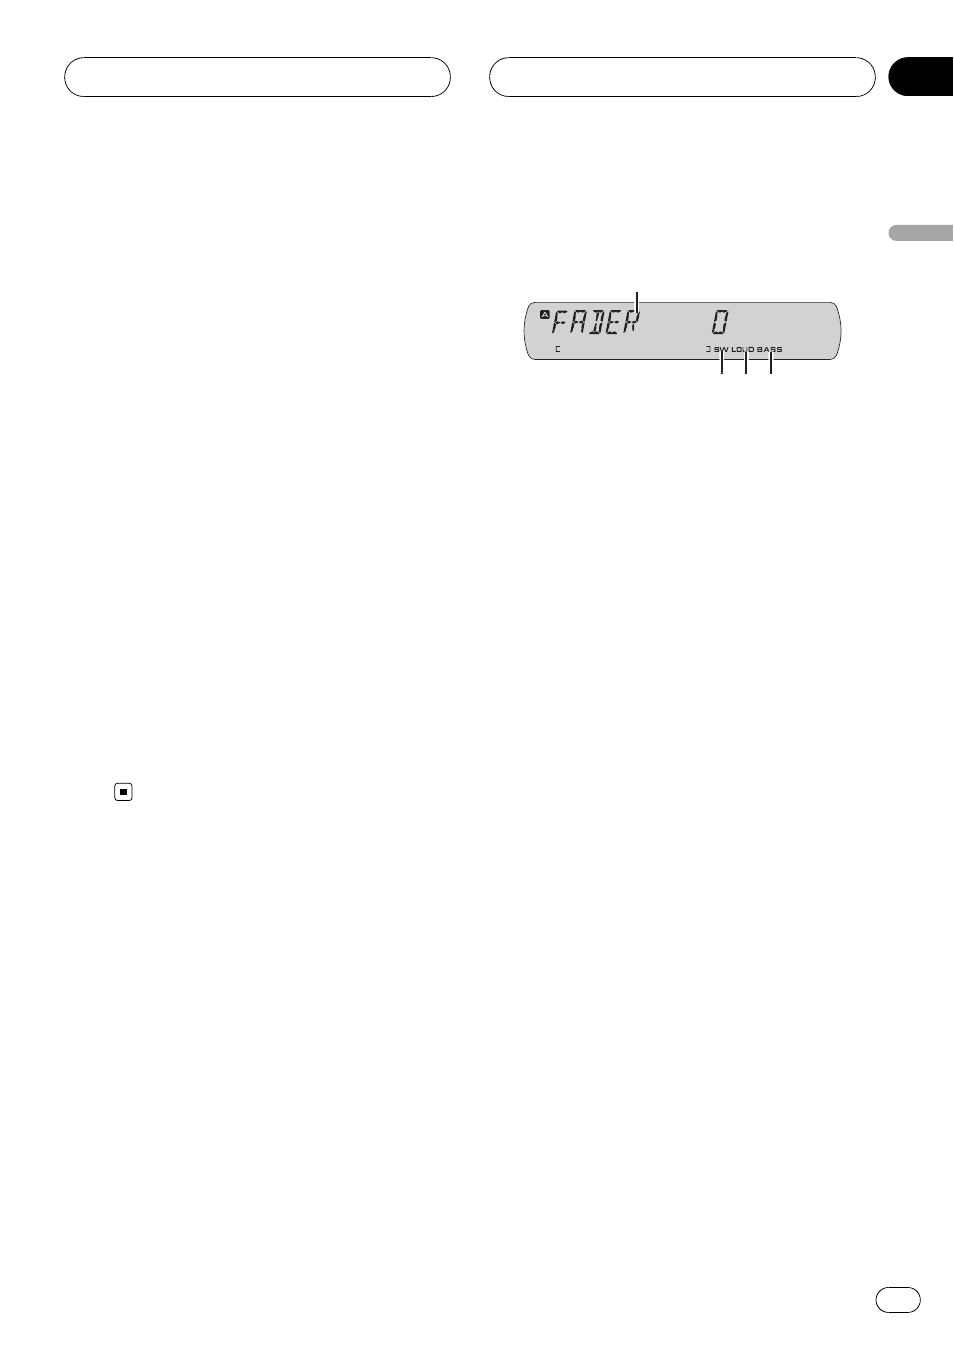
1 Audio display
Shows the audio adjustment status.
2 BASS indicator
Shows when the bass boost is in effect.
3 LOUD indicator
Appears in the display when loudness is
turned on.
4 SW indicator
Shows when the subwoofer output is turned
on.
% Press AUDIO to display the audio func-
tion names.
Press
AUDIO repeatedly to switch between
the following audio functions:
FADER (balance adjustment)
—PWRFL (gra-
phic equalizer adjustment)
—50HZ 0 (7-band
graphic equalizer adjustment)
—LOUD (loud-
ness)
—SUB.W (subwoofer on/off setting)—
80HZ 0 (subwoofer setting)
—BASS (bass
boost)
—HPF (high pass filter)—SLA (source
level adjustment)
# You can also use A.MENU button on the re-
mote control to select an audio menu.
# When the rear output setting is R-SP S/W, you
cannot adjust front/rear speaker balance. Refer to
Setting the rear output and subwoofer controller
on page 53.
# You can select the 80HZ 0 only when subwoo-
fer output is turned on in
SUB.W.
# When selecting the FM as the source, you
cannot switch to
SLA.
# To return to the display of each source, press
BAND.
Operating this unit
En
41
Section
03
Operating
this
unit