Xerox DocuColor 240-250 con Xerox FreeFlow DXP250-14668 User Manual
Page 12
DocuSP Remote Services
Setup Guide
Version 50.XX
10
Note:
If the confirmation message does not appear within one minute, the transfer
was not successful. Refer to Section 5, Troubleshooting.
__3. Select [Close Window]
to close the Transfer window.
__4. At this time, ask the customer for permission to enable Remote Monitoring.
Have the customer determine an appropriate time-of-day for automatic
data transfers. With customer consent, complete the remaining steps.
__5. Select [Settings] to display the Settings window.
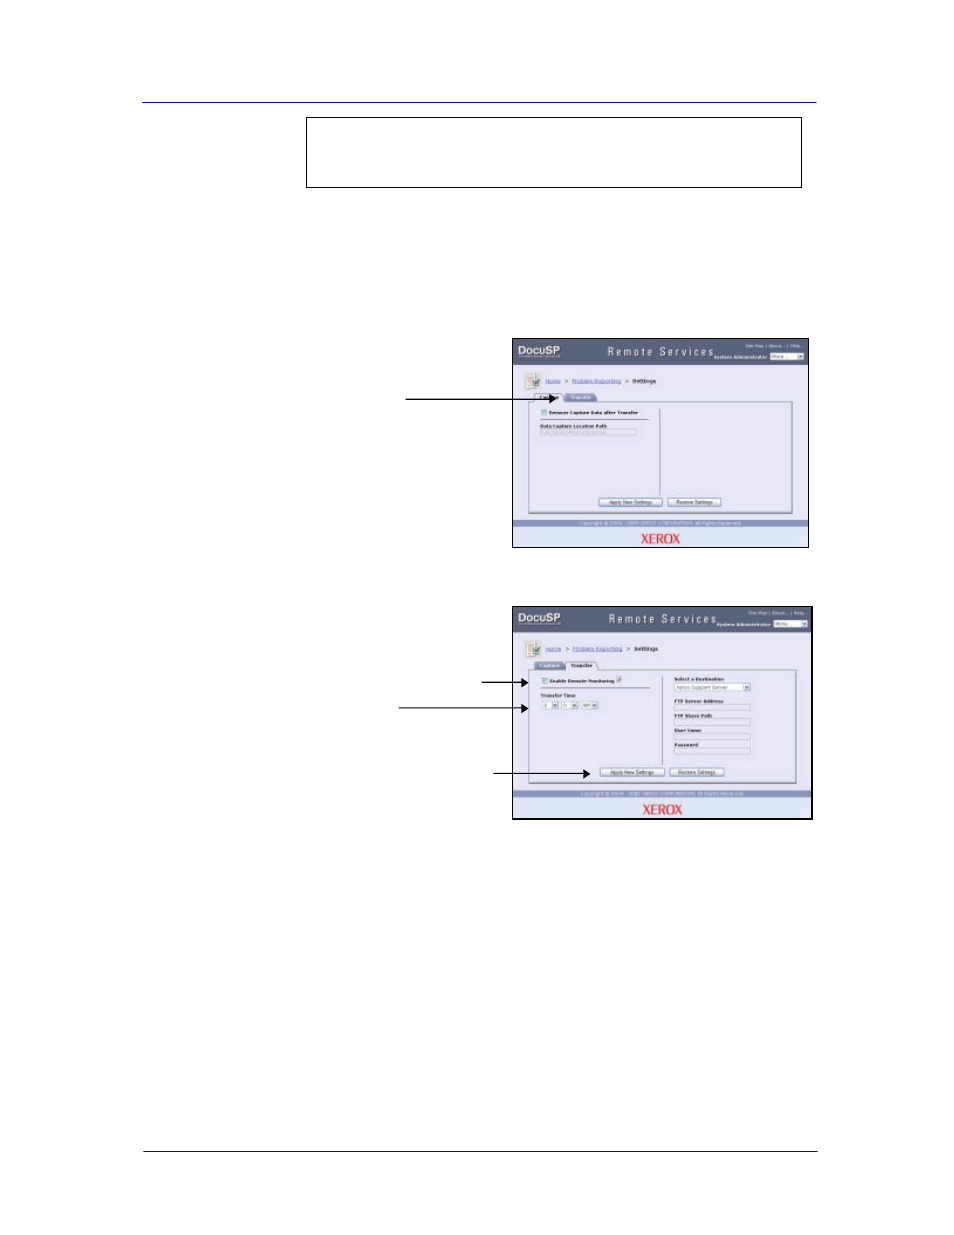
__6. Select the [Transfer] tab (Figure 20).
Figure 20 – Transfer Tab on Settings Window
__7. Place a check in the box for Enable Remote Monitoring (Figure 21).
Figure 21 - Settings to Enable Remote Monitoring
__8. Enter the Transfer Time as specified by the customer (the default transfer
time is 2:00 AM).
__9. Ensure that Select a Destination is set to Xerox Support Server.
__10. Select [Apply New Settings], [Home].
Remote Services is now configured and ready for use.
[Transfer] Tab
Enable Remote Monitoring
Transfer Time
[Apply New Settings] Button
- DocuColor 240-250 con Xerox FreeFlow DXP250-16172 DocuColor 240-250 con Xerox FreeFlow DXP250-15280 DocuColor 240-250 con Xerox FreeFlow DXP250-15622 DocuColor 240-250 avec Xerox FreeFlow DXP250-11463 DocuColor 240-250 avec Xerox FreeFlow DXP250-12092 DocuColor 240-250 avec Xerox FreeFlow DXP250-13073 DocuColor 240-250 avec Xerox FreeFlow DXP250-12472 DocuColor 240-250 mit Xerox FreeFlow DXP250-9928 DocuColor 240-250 mit Xerox FreeFlow DXP250-10544 DocuColor 240-250 mit Xerox FreeFlow DXP250-9612 DocuColor 240-250 mit Xerox FreeFlow DXP250-8964 DocuColor 240-250 con Xerox FreeFlow DXP250-17717 DocuColor 240-250 con Xerox FreeFlow DXP250-18092 DocuColor 240-250 con Xerox FreeFlow DXP250-17110 DocuColor 240-250 con Xerox FreeFlow DXP250-18668