Konica Minolta bizhub C550 User Manual
Page 94
Scanning
2
C550
2-55
3
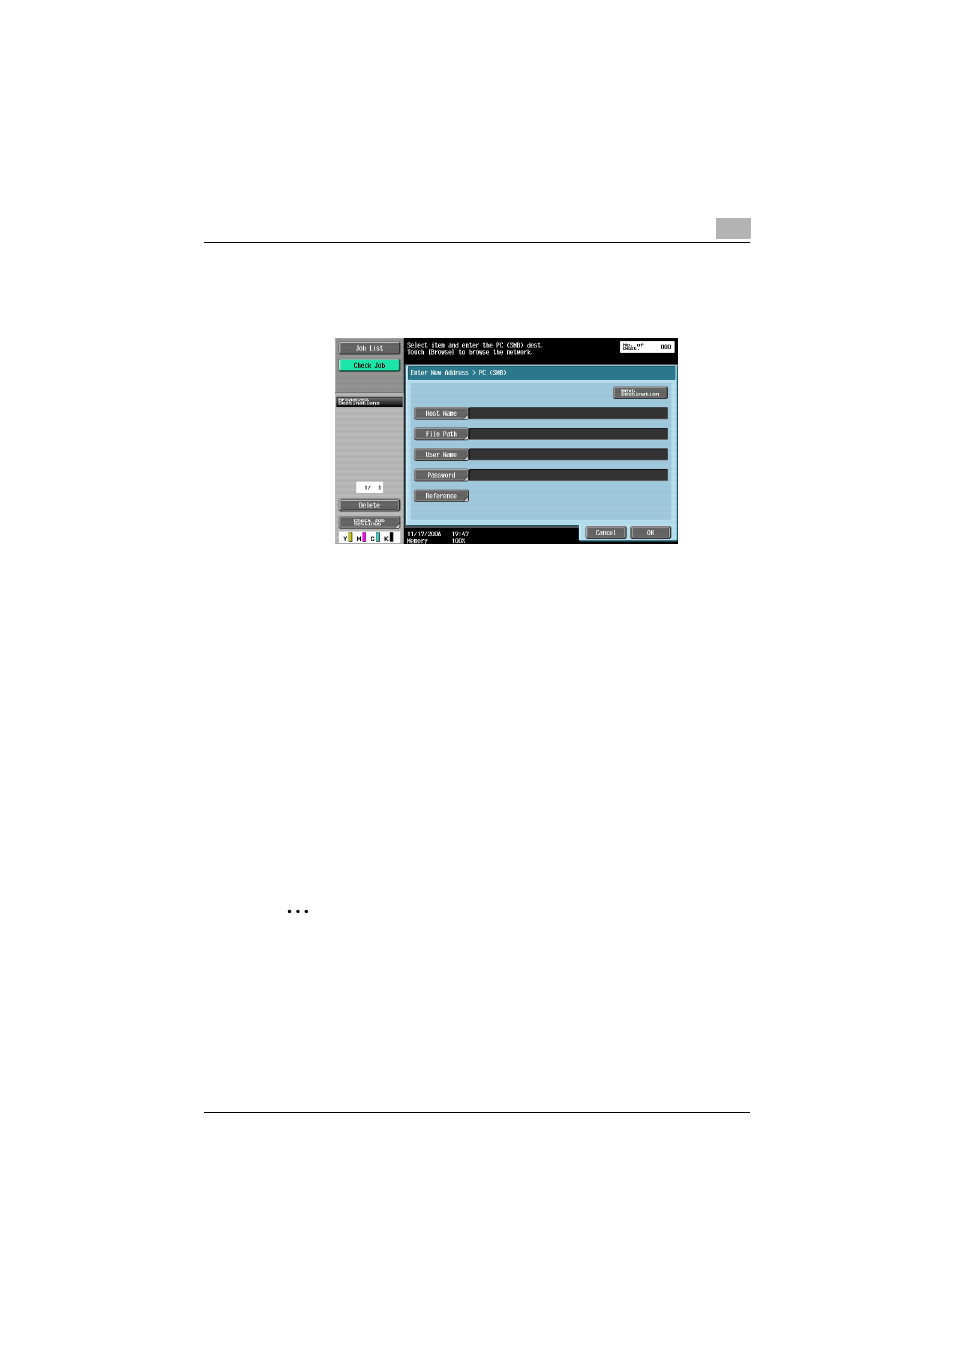
Enter the information for the destination, and then touch [OK].
–
To check the contents of the shared folders, and then touch [Ref-
erence].
–
To specify an additional address, touch [Next Destination], and
then enter the information.
The entered addresses appear under “Broadcast Destinations”.
4
Touch [Scan Settings], [Original Settings] or [Communication Settings],
and then specify the desired scan settings.
–
For details on the scan settings, refer to “Specifying scan and
transmission settings (Scan Settings/Original Settings/Communi-
cation Settings)” on page 2-75.
5
Load the document into the ADF or place it on the original glass.
6
If desired, press the [Proof Copy] key to check a preview image.
–
For details, refer to “Sending after previewing” on page 2-20.
7
Press the [Start] key in the control panel.
Scanning of the document begins, and the data is sent.
2
Note
Do not turn off the machine until the scan job is deleted from the Job List
screen.