2 transmission to an e-mail address – Konica Minolta bizhub PRO 920 User Manual
Page 104
Using the Network Scanner Features
7
bizhub PRO 920 Scanner
7-5
7.2
Transmission to an E-Mail Address
When you send the scanned data as an attached file of an E-Mail, necessary
procedures depend on whether the addresses are registered in advance or
they are input manually.
!
Detail
Refer to the following pages.
"When an E-Mail Address is Already Registered"................. p.7-5
"When an E-Mail Address is Input Manually"........................ p.7-8
When an E-Mail Address is Already Registered
1
Press the [Scan] on the control panel.
The Select Destinations/Storage Locations screen appears.
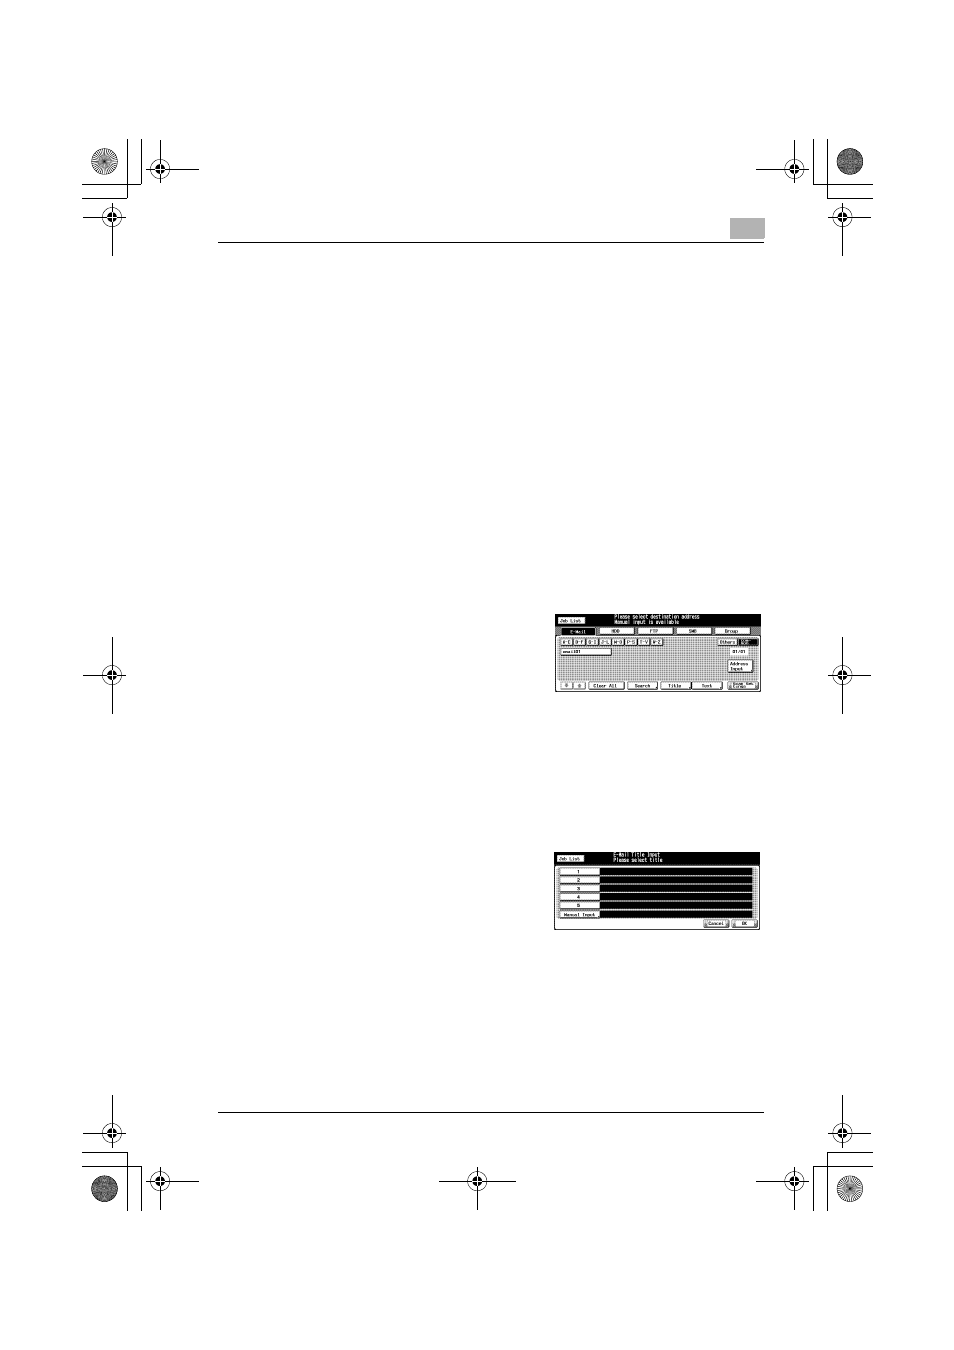
2
Make sure that the [E-Mail] key is
selected.
–
In the initial settings, the Select
Destinations/Storage Locations
screen (E-Mail) is displayed. For
information on the initial settings
of the [Scan] screen, contact your administrator of the copier.
3
If you want to put a Title on an E-Mail, press the [Title] key.
–
Not putting any Title will not cause any problem. An E-Mail without
a Title will be sent with the scanned data being attached.
4
Press [1] - [5] or the [Manual Input]
key to determine the Title and press
the [OK] key.
–
Pressing the [Manual Input] key
displays the character input
screen.
–
For more information on how to input characters, refer to "How to
Input Characters" on Page 3-7.
–
Input a Title is within 64 characters in alphameric characters and
signs.
–
The standard titles, [1]-[5] are configured and modified by your ad-
ministrator. Contact your administrator for more information.
00_920_scan_e.book Page 5 Thursday, April 28, 2005 5:04 PM