Step 3: printing the job after calibration – Konica Minolta bizhub PRO C500 User Manual
Page 25
Calibrate the IC-301 Print Controller
IC-301 Print Controller for the bishub PRO C500 Printer
19
9.
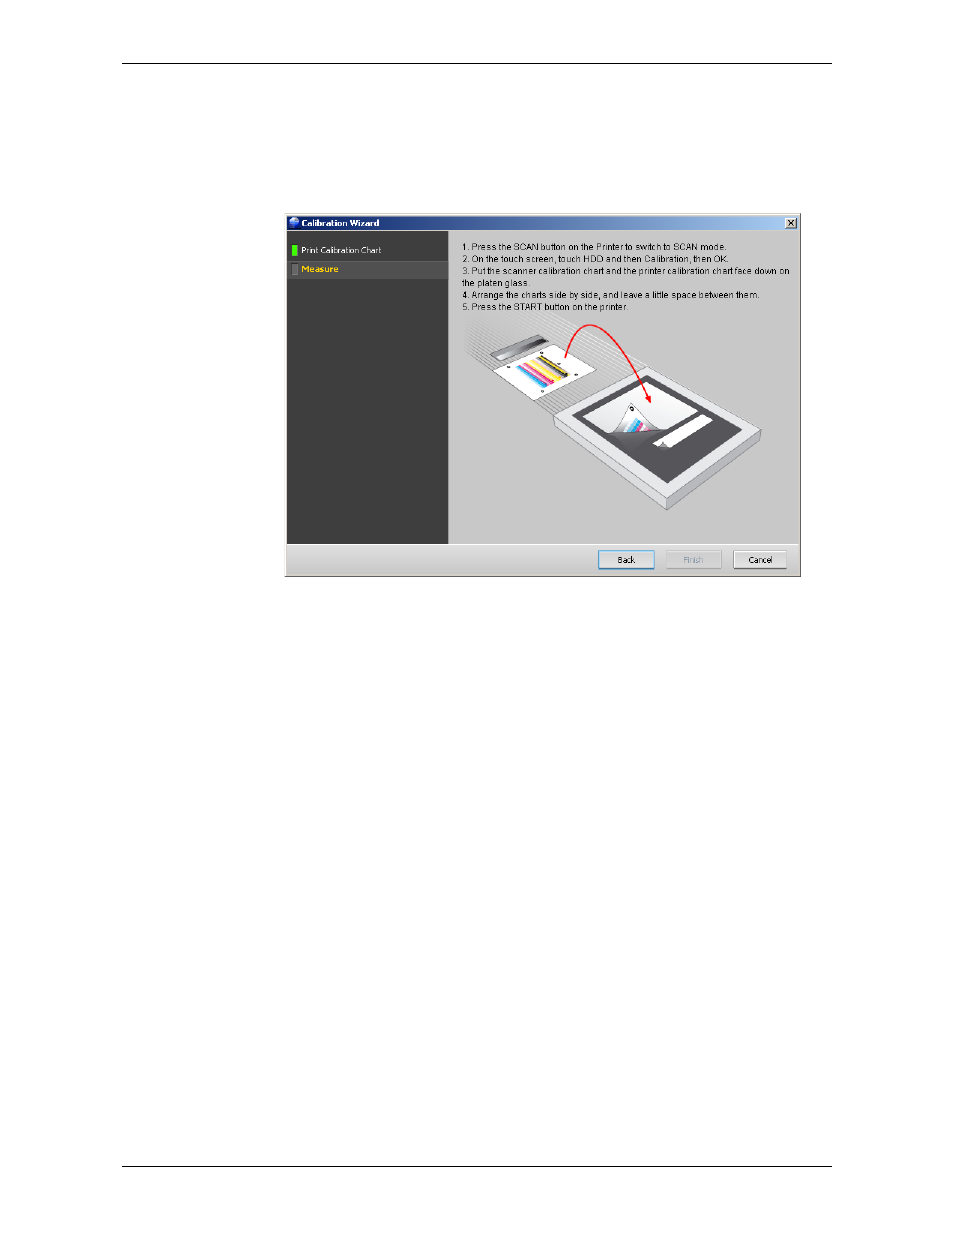
Collect the off-the-glass calibration chart from the printer.
10.
On the platen glass of the printer, place the off-the-glass calibration chart that
you just printed and the scanning calibration chart next to each other, facing
down. The wizard explains how to place and measure the charts.
11.
On the printer's control panel, press the SCAN key.
12.
On the printer's touch screen, touch the
HDD
button.
13.
In the list of scan boxes that appears, select the
Calibration
scan box.
14.
Touch
OK
.
15.
To start the scan, press the START key.
16.
When the scanning is completed, go back to the IC-301 print controller. In the
Calibration Wizard, click
Finish
.
The software informs you whether the calibration was successful or a problem
occurred.
Step 3: Printing the Job After Calibration
Now you will print the job
Pencils_Letter
, but this time the server will use the new
calibration settings.
To print a job:
1.
In the
Process Queue
area, click the
suspend
button to temporarily suspend the
Process Queue
.
2.
On the toolbar, click
Import
.
3.
In the
Look in
list, select
D:\Local Disk
.
4.
Find the folder
IC301_Activities_2
, and double-click it.