Step 2: calibrating the server and the printer – Konica Minolta bizhub PRO C500 User Manual
Page 24
Module 2: Calibration and Color
18
Advanced Activity Guide
Go to the printer and collect the printout. Examine the image, and write at the
bottom of the printout “Without Calibration.”
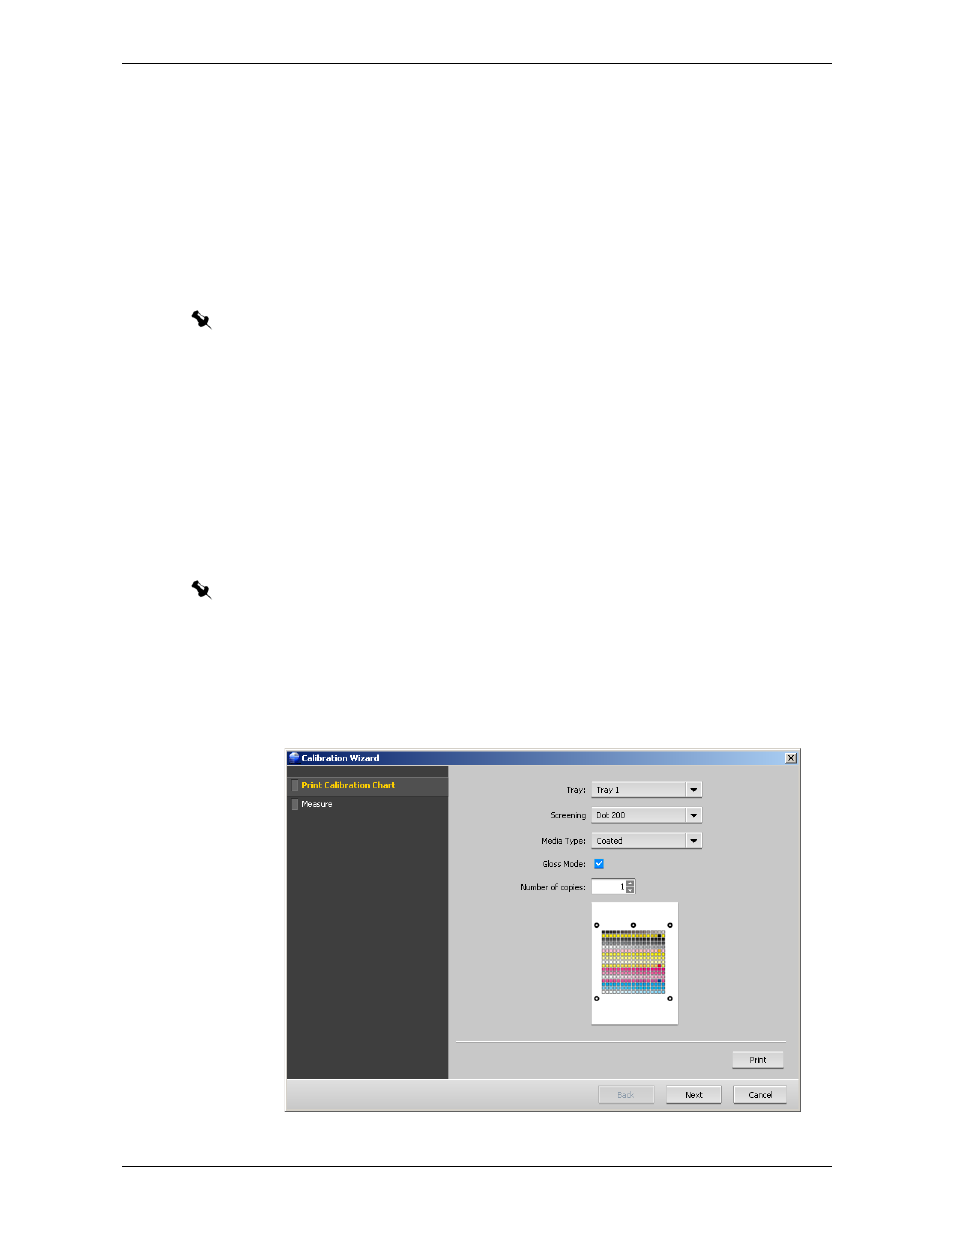
Step 2: Calibrating the Server and the Printer
The first step in the calibration process is to print the off-the-glass calibration chart.
Then you scan it along with the scanning calibration chart to measure its color
values and create a calibration table.
To calibrate the server and the printer:
1.
On the toolbar, click
Calibration
.
2.
In the Calibration Wizard, make sure that the
tab is selected.
3.
In the
Tray
list, leave
Tray 1
as your option.
4.
In the Screening list, leave
Dot 200
as your option.
5.
In the
Media Type
list, select
Coated
.
6.
If you want to create a calibration table that will produce a glossy look in your
printed output, select the
Gloss Mode
check box.
7.
In the
Number of copies
list, leave
1
as your option.
8.
Click the
button.
Note: If you use coated and uncoated media at your site, you should create a calibration table
for each type of paper.
Note: If you select
Coated for the Media Type setting, the calibration table that is created is
for all coated media. If you select any of the other
Media Type settings, the resulting calibration
table is for uncoated media.