Front panel i/o connectivity design guide, Jfp1, Cpufan – MSI 760GM-P33 User Manual
Page 17: Sysfan1
17
MS-7623
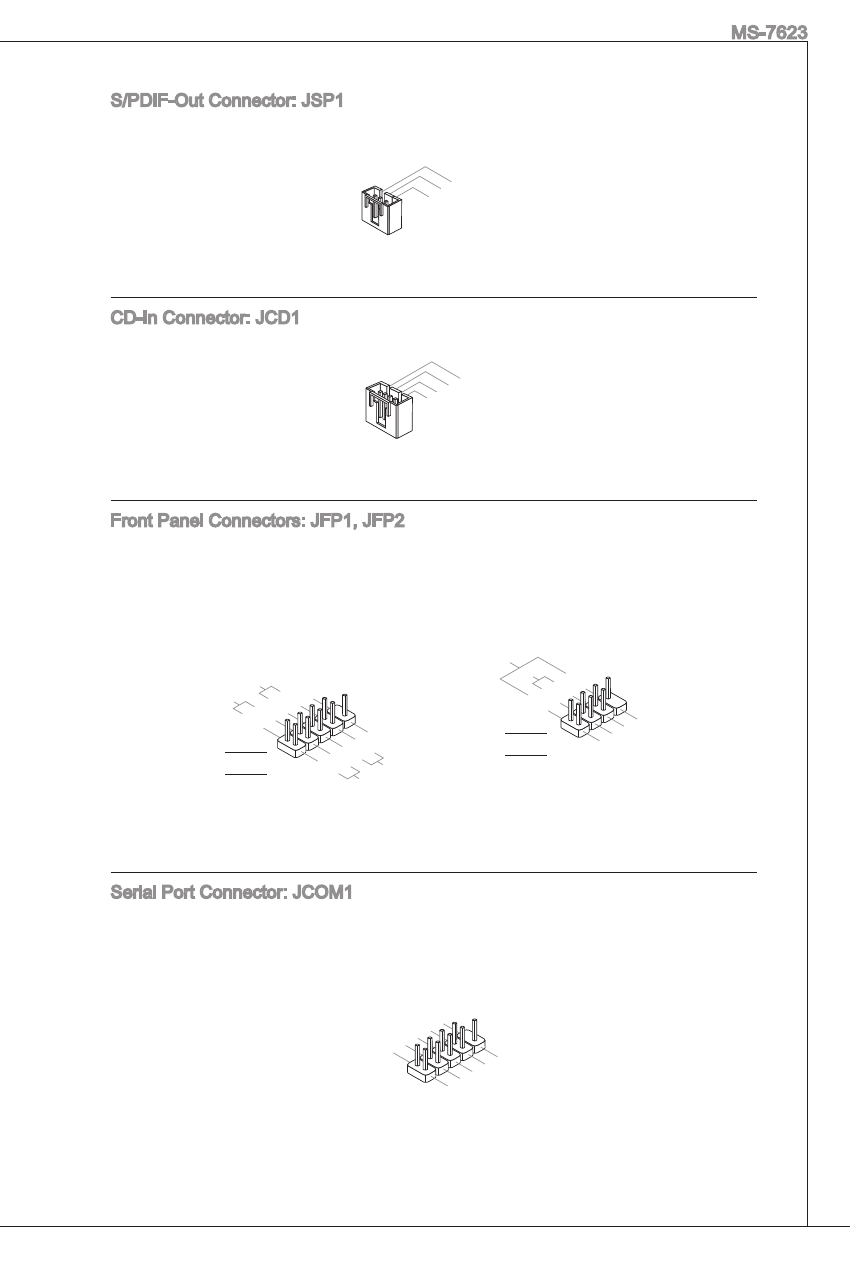
S/PDiF-Out Connector: JSP1
this connector is used to connect S/PDiF (Sony & Philips Digital interconnect
Format) interface for digital audio transmission.
1.VC
C
2.SP
DIF
3.Gro
und
CD-in Connector: JCD1
this connector is provided for external audio input.
4.R
3.Gro
und
2.Gro
und
1.L
Front Panel Connectors: JFP1, JFP2
these connectors are for electrical connection to the front panel switches and
lEDs. the JFP1 is compliant with intel
®
Front Panel i/O Connectivity Design
guide.
1.+
3.-
10.N
o Pin
5.-
Rese
t Sw
itch
HDD
LED
Pow
er Sw
itch
Pow
er LE
D
7.+
9.Re
serve
d
8.-
6.+
4.-
2.+
JFP1
1.Gro
und
3.Su
spen
d LE
D
5.Po
wer L
ED
7.No
Pin
8.+
6.-
4.+
2.-
Buzz
er
Spea
ker
JFP2
Serial Port Connector: JCOM1
this connector is a 16550a high speed communication port that sends/receives
16 bytes FiFOs. You can attach a serial device.
1.DC
D
3.SO
UT
10.N
o Pin
5.Gro
und
7.RT
S
9.RI
8.CT
S
6.DS
R
4.DT
R
2.SIN
iDE Connector: iDE1
this connector supports iDE hard disk drives, optical disk drives and other iDE
devices.
iMPOrtant
if you install two iDE devices on the same cable, you must configure the drives
to cable select mode or separately to master / slave mode by setting jumpers.
refer to iDE device documentation supplied by the vendors for jumper setting
instructions.
Serial ata Connector: Sata1 ~ 6
this connector is a high-speed Serial ata interface port. Each connector can
connect to one Serial ata device.
iMPOrtant
Please do not fold the Serial ata cable into 0-degree angle. Otherwise, data loss
may occur during transmission.
Fan Power Connectors: CPUFan, SYSFan1
the fan power connectors support system cooling fan with +12V. When connect-
ing the wire to the connectors, always note that the red wire is the positive and
should be connected to the +12V; the black wire is ground and should be con-
nected to gnD. if the mainboard has a System hardware Monitor chipset on-
board, you must use a specially designed fan with speed sensor to take advantage
of the CPU fan control.
1.Gro
und
2.+1
2V
3.Se
nsor
4.Co
ntrol
CPUFan
1.Gro
und
2.+1
2V
3.No
Use
SYSFan1