Setting the program port dip switch, Program port connections/wiring, Preparing/connecting captive wires – AMX NETLINX MASTER NXC-ME260 User Manual
Page 12: Db-9 program port (front panel)
Installation and Wiring
8
NXC-ME260 NetLinx Master-Ethernet Card/Module
Setting the Program Port DIP switch
1.
Disconnect the power supply from the 2-pin PWR (green) connector on the Master Card.
2.
Remove the front faceplate and four mounting screws from the Master Card's front panel.
Then, locate the Program Port DIP switch (to the left of the Program port).
3.
Set DIP switch positions according to the information listed in the Baud Rate Settings and
PRD Mode Settings tables above.
4.
Replace the front panel and faceplate back onto the Master Card and reconnect the 12 VDC
power supply to the 2-pin PWR connector.
Program Port Connections/Wiring
Master Cards are equipped with two Program ports. One is located on the front panel and the other
is on the rear for easy access. The port on the front panel is a DB-9 (male) connector, and the rear
port is a 5-pin (male) connector. Use a Programming cable to connect the Program port to your PC's
COM port to communicate with the Master Card. Then, you can download NetLinx programs to
the Master Card with the NetLinx Studio software program. Refer to the NetLinx Studio instruction
manual for programming instructions.
Preparing/connecting captive wires
1.
Strip 0.25 inch of wire insulation off all wires.
2.
Insert each wire into the appropriate opening on the connector according to the wiring
diagrams and connector types described in this section. Do not tighten the screws excessively;
doing so may strip the threads and damage the connector.
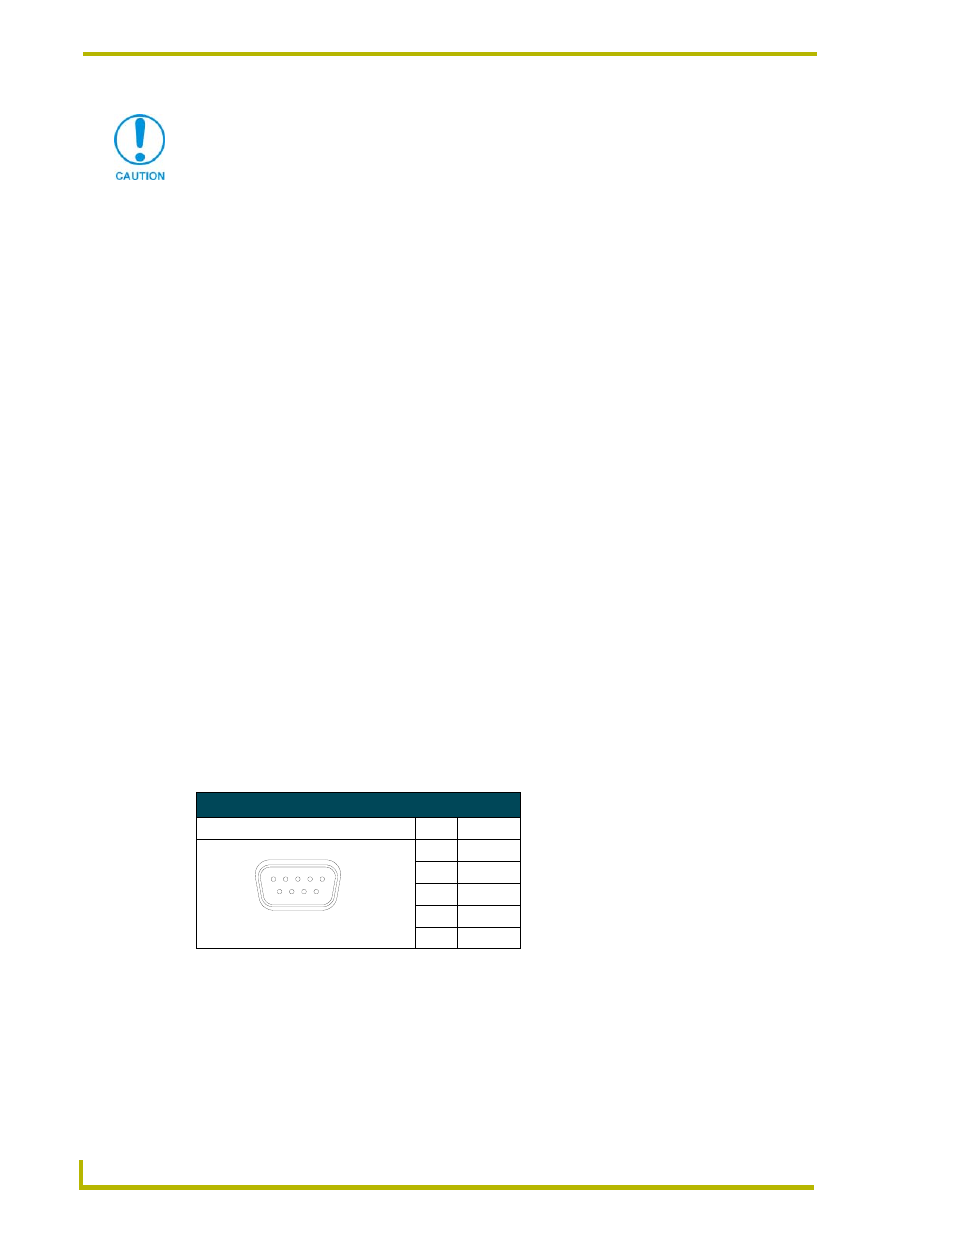
DB-9 Program port (front panel)
The following table shows the front panel DB-9 Program port connector, pinouts, and signals.
DIP Switch positions 2,3 and 4 must remain in the OFF position at all times.
DB-9 Program Port, Pinouts, and Signals
DB-9 Program Port Connector
Pin
Signal
2
RX
3
TX
5
GND
7
RTS
8
CTS