3 configuring several units via the ethernet port, 5 setting the dip-switches, 1 setting the delay – Kramer Electronics VP-4x8 User Manual
Page 17: Setting the dip-switches, Figure 9, Vp-4x8, Dip-switches, Section 5.5, Section
14
VP-4x8 - Connecting the VP-4x8
5.4.2
Connecting the Ethernet Port to a Network Hub (Straight-
Through Cable)
You can connect the Ethernet port of the VP-4x8 to the Ethernet port on a network
hub or network router, via a straight-through cable with RJ-45 connectors.
5.4.3
Configuring Several Units via the Ethernet Port
To control several units via the Ethernet, connect the Master unit
(Machine # 1) via the Ethernet port to the LAN port of your PC. Use the PC to
initially configure the settings (see
5.5
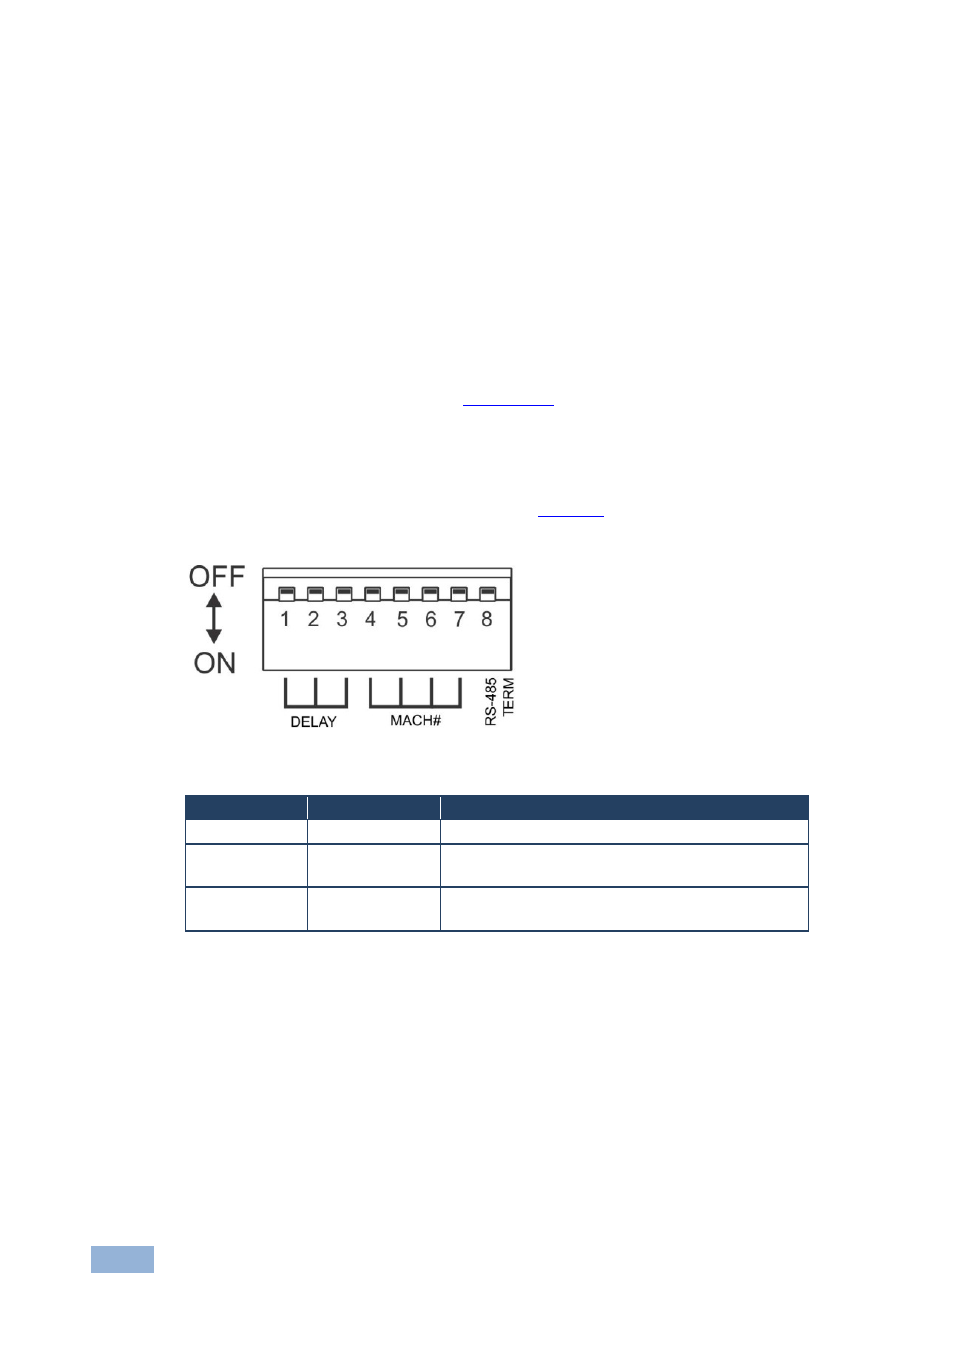
Setting the DIP-Switches
By default, all DIP-switches are set to OFF.
DIP-switches:
Figure 9: VP-4x8 DIP-switches
DIPS
Function
Description
1, 2, 3
DELAY
Determines switching delay time
4, 5, 6, 7
Machine #
Determines the machine number (address) of
multiple units
8
RS-485 TERM
ON for RS-485 line termination with 120
Ω;
OFF for no RS-485 line termination
5.5.1
Setting the Delay
You can achieve clean transitions when switching between non-genlocked
sources by setting the delay time—ranging from 0 sec to 3.5 sec (In increments of
0.5 sec )—via the DELAY DIP-switches, as listed in the following table. The
VP-4x8 unit is shipped (its factory default state) with no delay, that is, the DELAY
DIP-switches are set up for a 0 sec delay.