4 motor removal & reinstallation, Motor removal & reinstallation – Pulsafeeder Pulsa GLM DM1-6 User Manual
Page 17
13
4.4
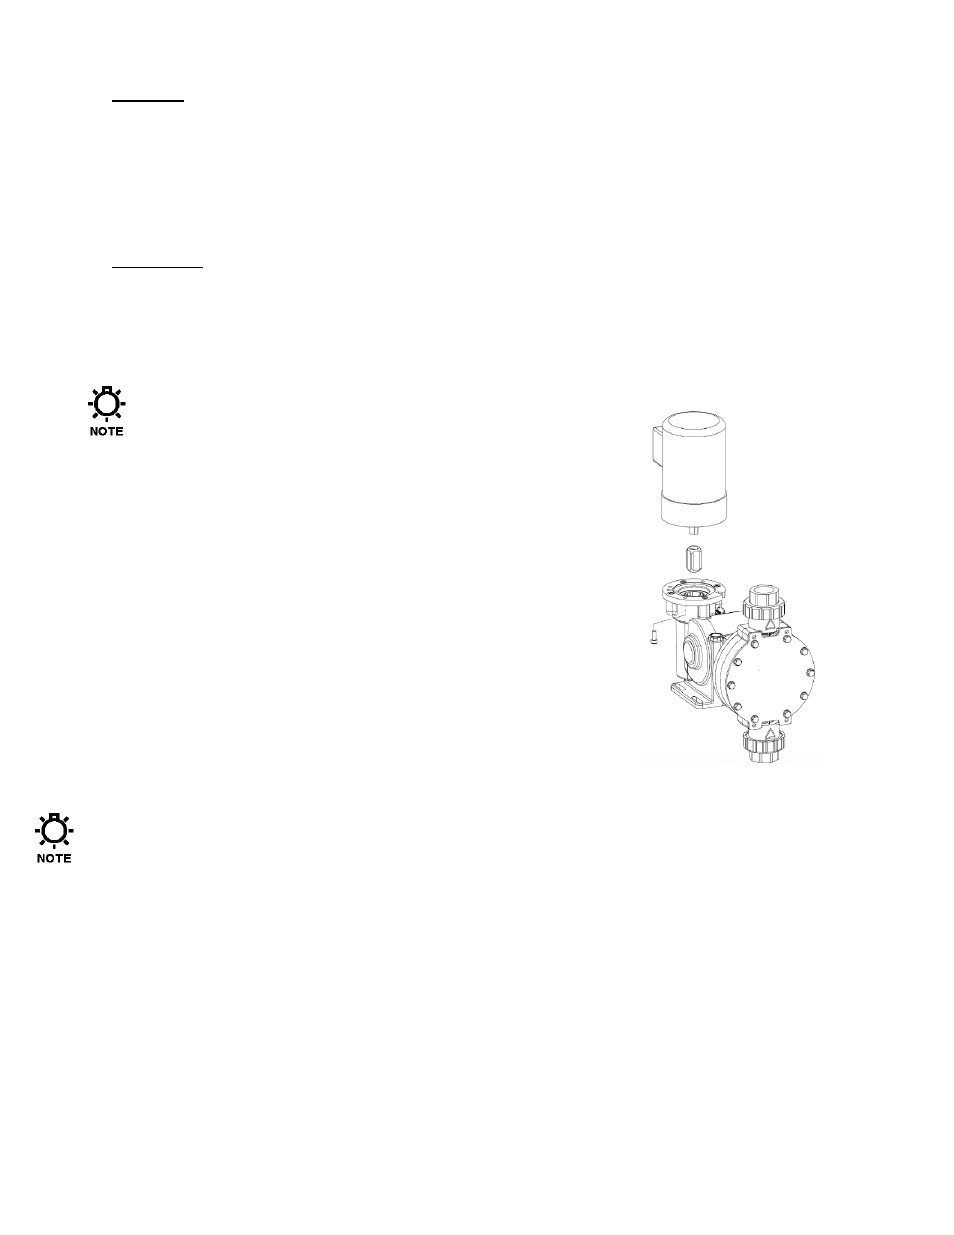
Motor Removal & Reinstallation
Removal
1. Disconnect and Lockout the power supply to the drive motor.
2. Disconnect the motor wiring from the motor.
3. Remove the four bolts retaining the motor to the motor adaptor.
4. The motor shaft is keyed to a plastic coupling that slides into a splined bore in the pump input shaft.
Lift the motor straight up to slide the motor shaft coupling out of the pump input shaft.
Installation
1. Install the plastic coupling over the motor key onto the motor shaft. For
the 56C frame motor the coupling should be even with the end of the
shaft. For the 71 frame motor the coupling should be installed over the
shaft up to the collar (the end of the shaft will be slightly recessed into
the coupling).
Note: Assure the motor key is
fully covered by the motor
coupling.
2. Reinstall the motor by sliding the motor vertically into the pump
input shaft.
3. Align the motor bolts holes to the motor adaptor plate.
4. Install the 4 motor retaining bolts. Torque to 4.5 N-M (40 IN-
LBF).
5. Connect the motor wiring to the motor in accordance with Local,
National and Motor Manufacturer requirements.
6. Restore power.
Figure 16: Motor Mounting
The PULSA GLM® is designed to operate with any Motor rotation direction (clockwise or counter
clockwise).