Fan installation – COOK Gemini User Manual
Page 2
2
Start
Remove Parts
Replace Parts
Outlet
Outlet
Inlet
Inlet
x2
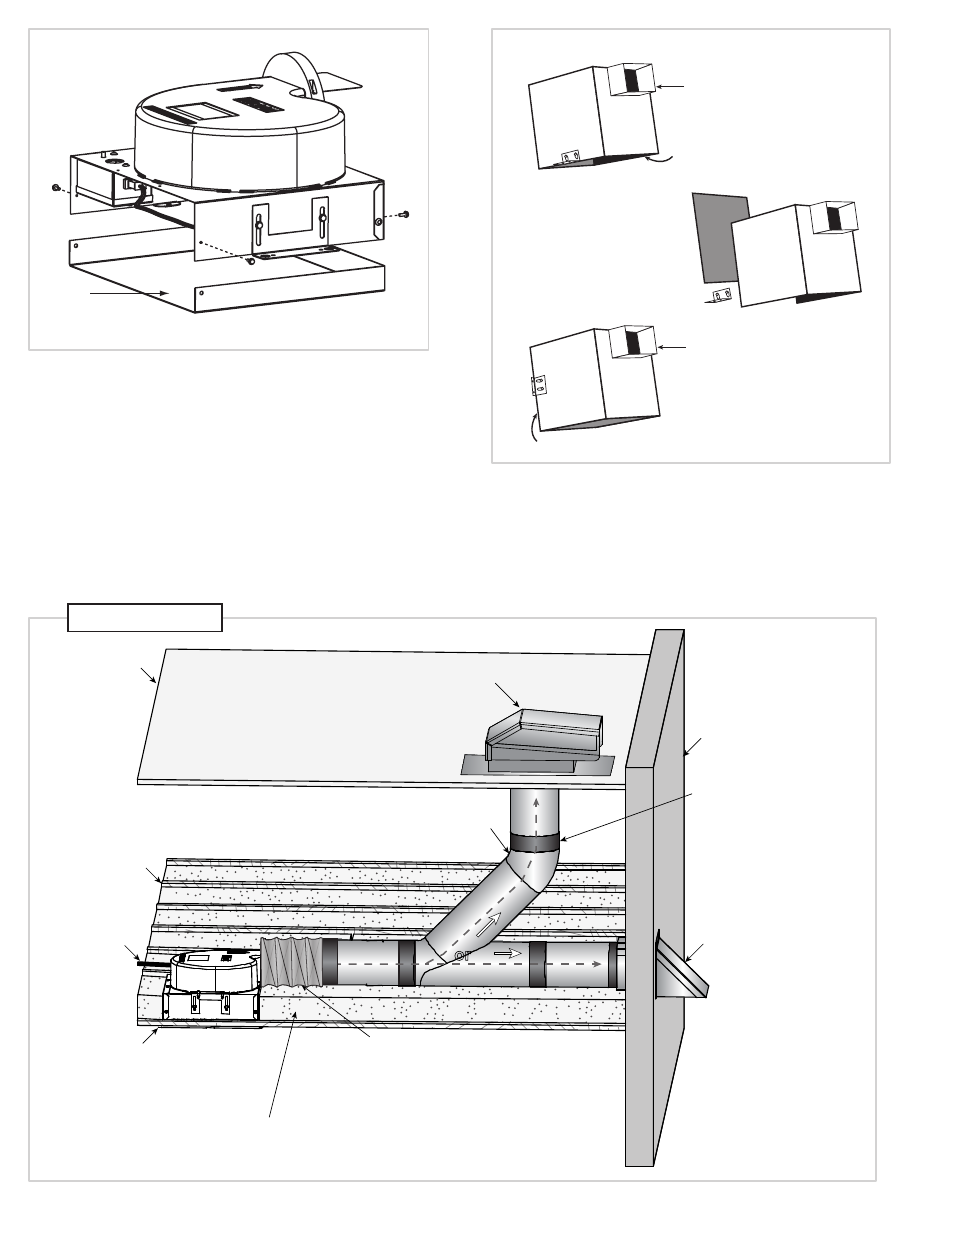
Fan Installation
1. Use the mounting bracket slots to lower the
unit housing by a distance equal to the ceiling
thickness. Refer to figure 2.
2. Raise the unit, as needed to accommodate
accessories and options: If filter present, raise
Inline
Cover
Panel
Direction of Discharge (200-900 Series)
Discharge direction can be converted from right angle to
straight line, without a kit, by swapping outer panel and
the inlet/grille: See Figure 1.
1. Remove the side panel, mounting brackets (2) and
grille (if present).
2. Place the side panel where the inlet/grille had
been. Place the mounting brackets on the edge
where the side panel had been. Holes are
prepunched for this procedure.
3. Rotate unit so that the outlet is on top.
Figure 1
Roof jack with damper
or roof cap
Wall cap
with damper
Exterior
Wall
Roof
Joists
Power
cord
Seal around the
unit with caulk.
Insulation around unit.
Also, cover the fan with insulation.
Short (1’) piece of flexible duct
will absorb vibration & noise.
6” round duct. Insulated duct will help
absorb vibration. Use the shortest runs
possible & long radius elbows.
or
Use foil tape on the joints
to ensure a good seal.
Typical Installation