Figure 18, advanced ethernet setup – Avaya S8500 User Manual
Page 43
Using the Avaya Remote Supervisor Adapter
Alerts
Avaya Remote Supervisor Adapter User Guide
43
November 2003
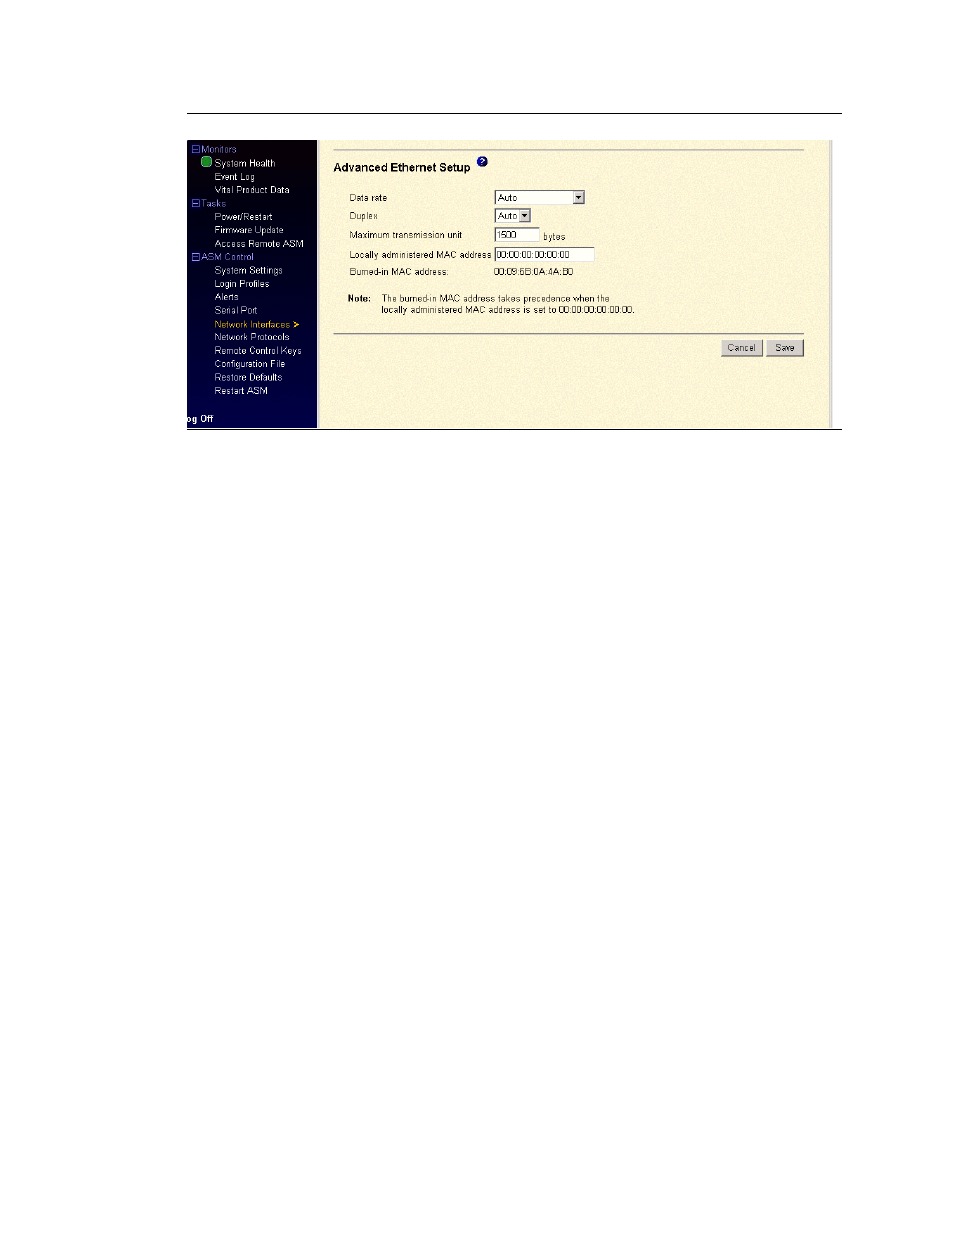
Figure 18: Advanced Ethernet setup
1
In the Data Rate field [default: Auto]: Used to specify the amount of data to be transferred per
second over a LAN connection. Possible selections from the drop-down menu are: Auto, 10 Mb,
and 100 Mb.
2
In the Duplex field [default: Auto]: Used to enter the type of communication channel that is used
in your network. From the drop-down menu, select one of the following:
•
Full: Data is carried in both directions at one time.
•
Half: Data is carried in one direction at a time.
•
Auto: This option allows automatic detection of the duplex type.
3
In the Maximum transmission unit field [default: 1500 bytes]: Used to specify the maximum
packet size, in bytes, for your network interface.
4
In the Locally administered MAC address field
[0.0.0.0]
: A locally administered MAC
overrides the burned-in MAC address. The locally administered MAC address must be in the
following format:
•
Hexadecimal value from 000000000000 through FFFFFFFFFFFF.
•
In the form of XX:XX:XX:XX:XX:XX where X is a number between zero and nine.
5
In the Burned-in MAC address field: This is a read-only field that contains the unique factory
MAC address burned-in at the factory.
NOTE:
The RSA does not support the use of a multicast address. When a multicast address is used
the least significant bit of the first byte is set to one.
6
Click Save to save the changes.
7
In the navigation panel, click Restart ASM under the ASM Control heading to activate the
changes.