Login profiles, Creating a login profile – Avaya S8500 User Manual
Page 28
Using the Avaya Remote Supervisor Adapter
Login profiles
28
Avaya Remote Supervisor Adapter User Guide
November 2003
3
Date: Type the current month, day, and year.
4
Time: Type the current hour (hh), minutes (mm), and seconds (ss). The hour must be a value from
00 to 23. The minutes and seconds must be a value from 00 to 59.
5
GMT offset [default: +0:00]: Type the number of the offset in hours that corresponds to the time
zone where the server is located.
6
Automatically adjust for daylight saving changes (DST) [default: not checked/Disabled]:
Check if the location where the server resides uses DST.
7
Scroll to the bottom of the page and click Save.
8
The main System Settings window opens. Scroll to the bottom of the screen and click Save.
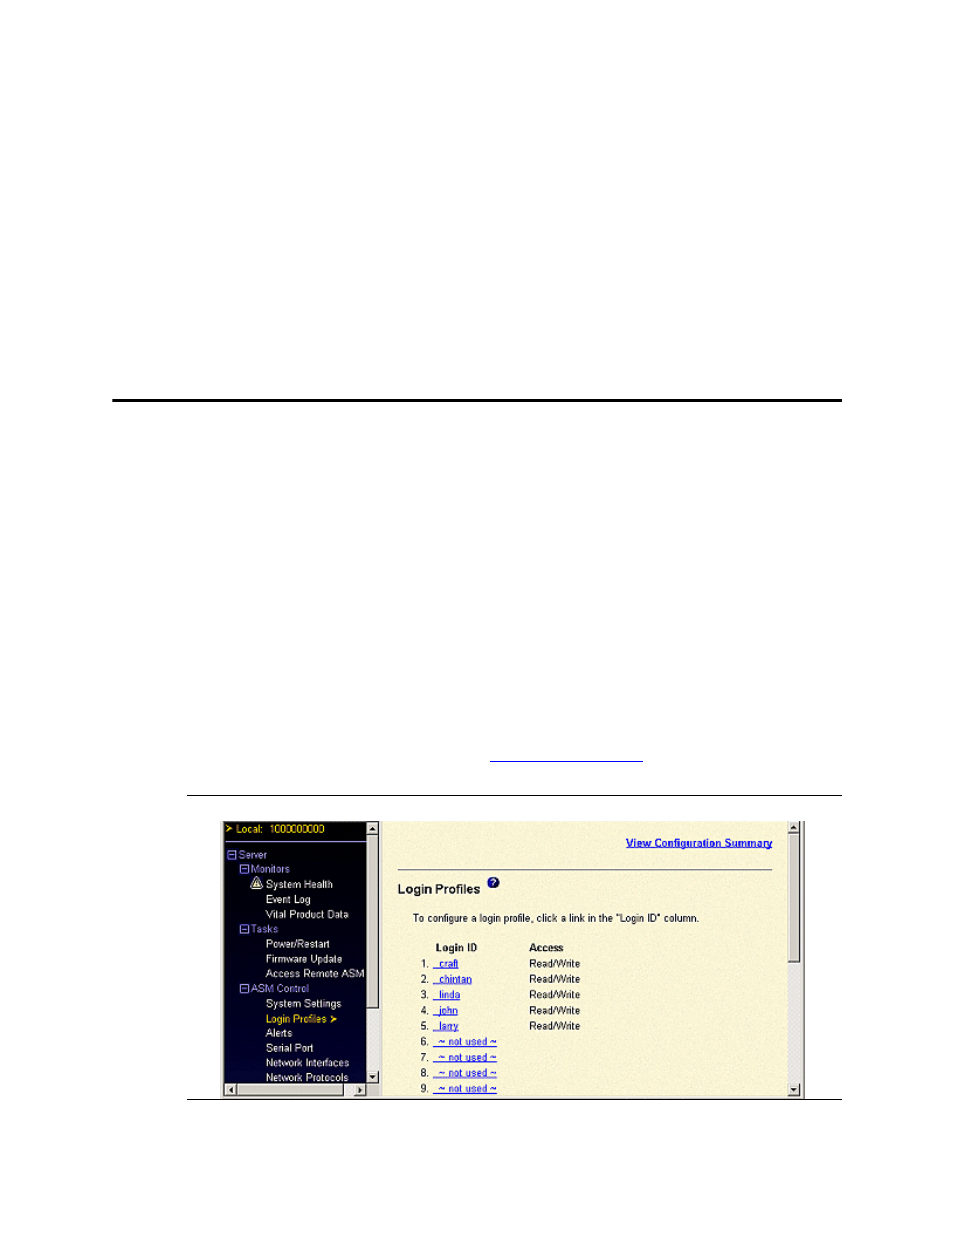
Login profiles
From the Login Profiles window, you can:
•
View, configure, or change individual login profiles.
•
Configure modem and dial-in settings.
Each link in the Login ID column contains the configured login ID for that particular profile. If you have
not configured a profile, the name of the link shows "not used."
Creating a login profile
NOTE:
You can create up to 12 login profiles.
To create a login profile:
1
In the navigation pane, select Login Profiles under the ASM Control heading.
The Login Profiles window appears (see
Figure 7: Login profiles