Wall mounting, Figure 5, Wall mounting the netvanta 300 series unit – ADTRAN NetVanta 300 Series User Manual
Page 25
NetVanta 300 Series Hardware Installation Guide
Unit Installation
61200422L1-34D
Copyright © 2006 ADTRAN, Inc.
25
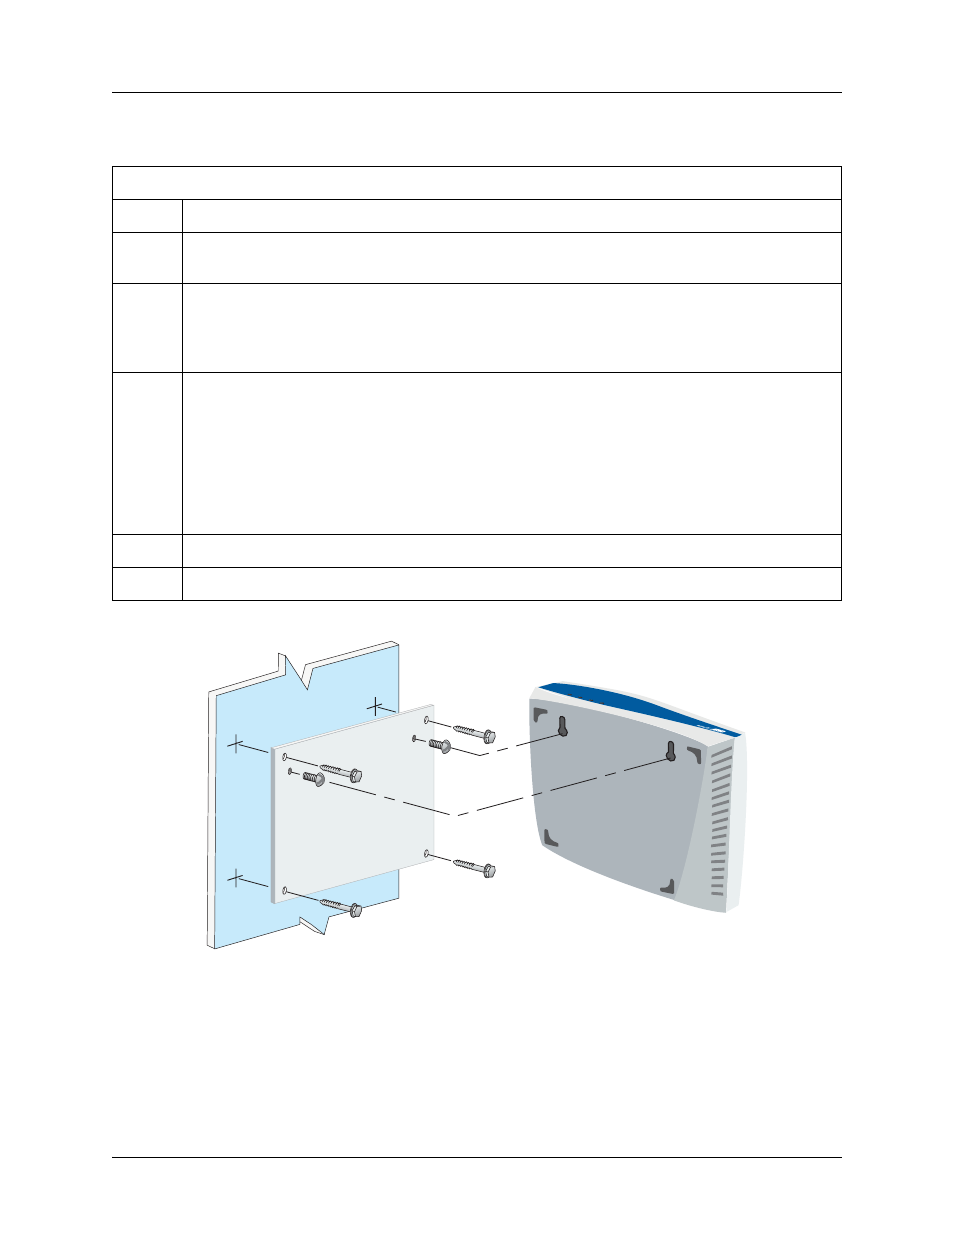
Wall Mounting
Figure 5. Wall Mounting the NetVanta 300 Series Unit
Instructions for Wall Mounting
Step
Action
1
Decide on a location for the NetVanta 300 Series unit. Keep in mind that the unit needs to be
mounted at or below eye-level so that the LEDs are viewable.
2
Prepare the mounting surface by attaching a board (typically plywood, 3/ 4-inch to 1-inch thick)
to a wall stud.
Important! Mounting to a stud ensures stability. Using sheetrock anchors may not
provide sufficient long-term stability.
3
Install two #8 PAN headscrews (1 1/ 2-inch or greater in length) wood screws into the mounted
board, following these guidelines and referring to Figure 5:
•
Screws should be spaced horizontally, approximately 5 inches apart. Find exact positioning
by using the location of the two keyed insets on the bottom of the NetVanta 300 Series unit
as a guide.
•
Screws should be horizontally level with each other.
•
Leave approximately 1/4 inch of the screws protruding from the board to allow the heads of
the screws to slide into place in the unit’s keyed insets.
4
Slide the keyed insets on the bottom of the unit’s chassis securely onto the screws.
5
Proceed to the steps given in Getting Started on page 26.
STAT
WAN
DBU
TD