Caution, Installing the unit, Step 1: position unit near installation area – Alliance Laundry Systems Washer/Dryer User Manual
Page 11: Step 2: connect water inlet hoses
Installation
9
801504
© Copyright, Alliance Laundry Systems LLC – DO NOT COPY or TRANSMIT
Installing the Unit
Step 1: Position Unit Near Installation
Area
NOTE: If the unit is delivered on a cold day (below
freezing), or is stored in an unheated room or area
during the cold months, do not attempt to operate
it until the washer has had a chance to warm up.
Move unit so that it is within 4 ft. (1.2 meters) of the
desired area of installation.
Figure 3
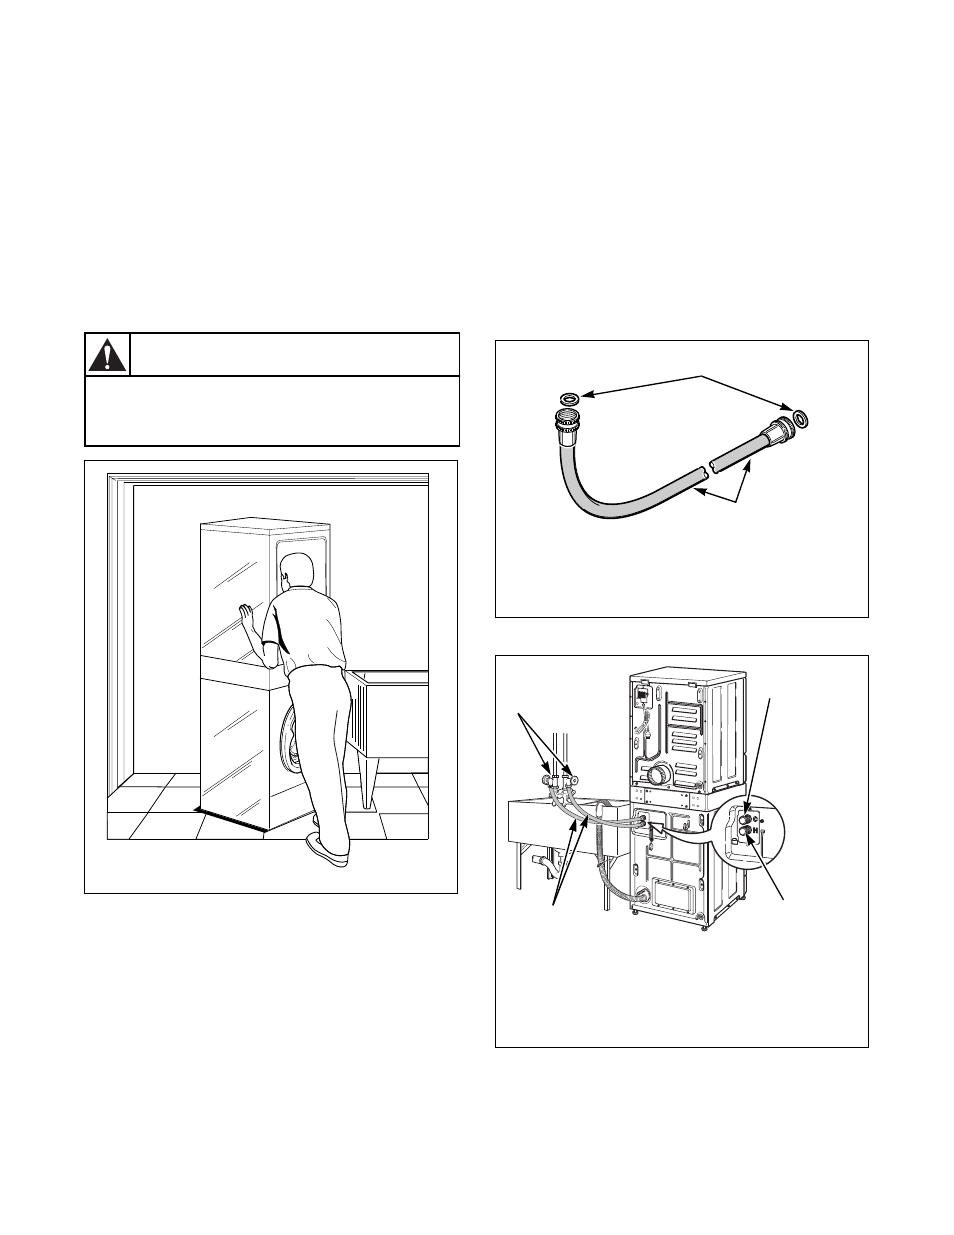
Step 2: Connect Water Inlet Hoses
NOTE: Refer to section on Water Supply
Requirements before connecting water inlet hoses.
Remove the four plain rubber washers from
accessories bag, and install them according to Figure 4.
Turn on the water supply faucets and flush the lines for
approximately two minutes to remove any foreign
materials that could clog the screens in the water
mixing valve.
NOTE: When installing in newly constructed or
renovated building, it is very important to flush the
lines since build-up may have occurred during
construction.
IMPORTANT: Thread hose couplings onto valve
connections finger-tight, then approximately
1/4 turn with pliers. DO NOT cross thread or
overtighten couplings.
Turn water on and check for leaks. If leaks are found,
retighten the hose couplings. Continue tightening and
rechecking until no leaks are found.
Figure 4
Figure 5
SWD443N
Washer and dryer are not designed to be
operated as separated, side-by-side units.
W187
CAUTION
SWD443N
H091I
1
Rubber Washer (Plain)
2
Inlet Hose
SWD596N
1
Water Supply Faucets
2
Cold Water Connection
3
Hot Water Connection
4
Water Inlet Hoses
H091I
1
2
SWD596N
1
2
3
4
WATER MIXING
VALVE