Swiftech EPSILON HD6990 WATERBLOCK User Manual
Page 2
Copyright Swiftech® 2009
– All rights reserved – Last revision date: 5-4-11 – One or more Patents Pending - Rouchon Industries, Inc., dba Swiftech® –151 West Victoria St.,
Long Beach, CA 90805
– Toll free (US) 888-857-9438 – Tel. (310) 763-0336, Fax (310) 763-7095 - E Mail: [email protected] – URL: http://www.swiftech.com - Information
subject to change without notice
. PREPAREZ LA CARTE GRAPHIQUE
Tout d’abord, démontez le ventirad d’origine ; ensuite, nettoyez soigneusement les modules de mémoire et régulateurs de voltage. Finalement
appliquez la graisse thermique Arctic Céramique fournie sur le GPU et les régulateurs de voltage comme indiqué ci-dessus.
1. PREPARE LA TARJETA GRAFICA
En primer lugar, desmontar el disipador de origen y a continuación, limpiar cuidadosamente los módulos de memoria y reguladores de voltaje.
Finalmente aplicar la grasa térmica Arctic Cerámica como se como se muestra en el diagrama anterior.
2. PREPARING THE WATERBLOCK
Peel-off the protective plastic sheet from ALL pre-applied thermal pads.
2. PREPAREZ LE BLOC DE REFROIDISSEMENT LIQUIDE
Décollez le film protecteur de tous les pads thermiques. Attention à ne
pas en oublier un afin de vous assurer un refroidissement de qualité !
2. PREPARAR EL WATERBLOCK
Despegue la película de protección de todos los pads térmicos. ¡No
olvidarlo ninguno! Así obtendrá una refrigeración de calidad.
3. FASTENING THE WATERBLOCK TO THE GRAPHICS
CARD
– Step 1
Remove the springs and screws from the stock cross-bracket. Longer
M2x6mm replacement screws are provided and will be used instead
(without the springs) for installation of the Epsilon waterblock to the
card.
3. INSTALLEZ LE BLOC DE REFROIDISSEMENT LIQUIDE
SUR LA CARTE GRAPHIQUE- Etape 1
Démontez les ressorts et vis de la plaque d’origine. Des vis M2x6mm
plus longues sont fournies et seront utilisées (sans les ressorts) pour
l’installation du bloc Epsilon.
3.
INSTALAR EL BLOQUE DE ENFRIAMIENTO LÍQUIDO
SOBRE LA TARJETA GRÁFICA - Etapa 1
Desmontan los resortes y tornillo de la placa original. M2x6mm tornillos
más largos se prestan y se utilizan (sin resortes) para la instalación del
bloque Epsilon.
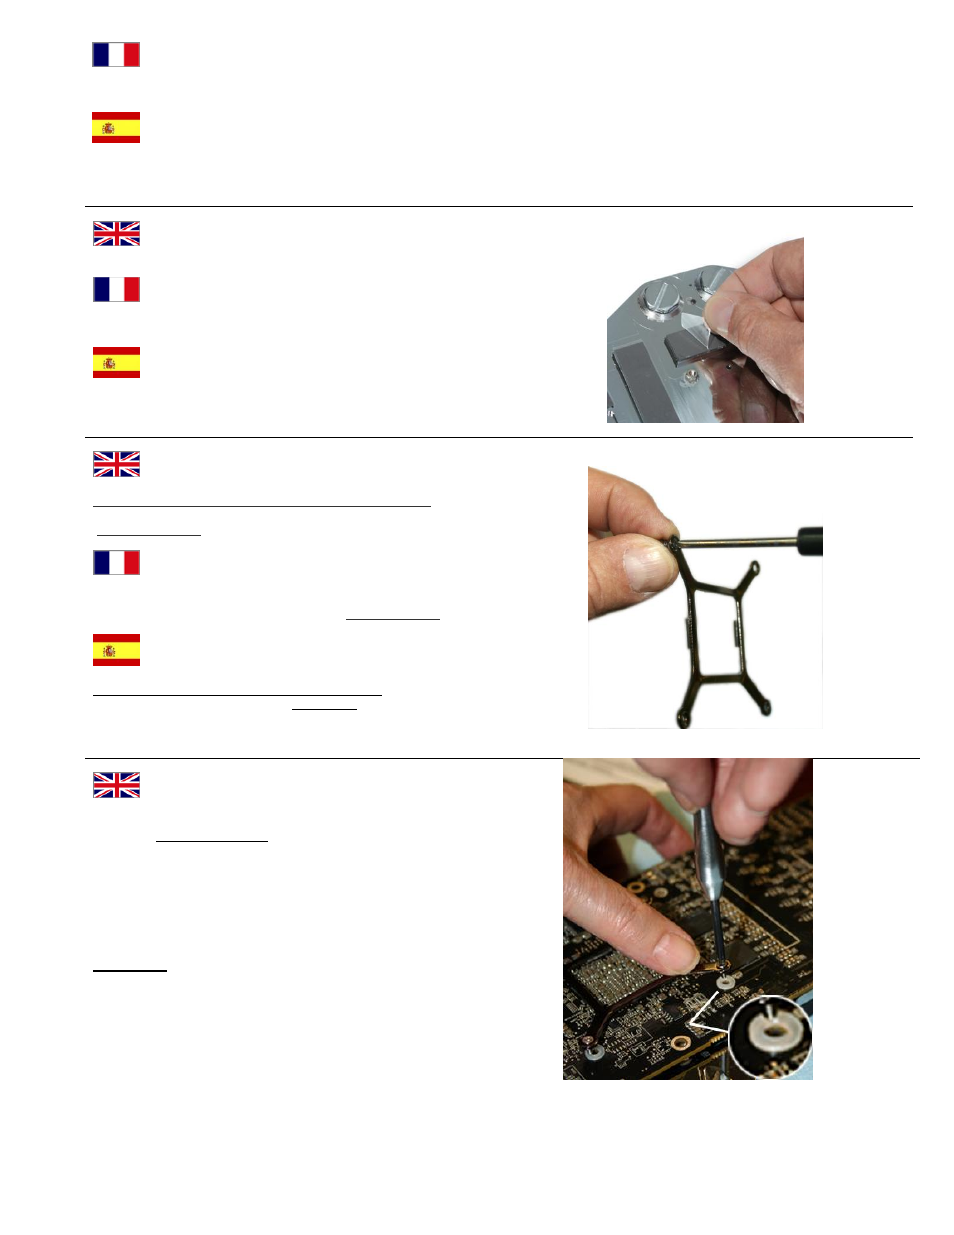
3. FASTENING THE WATERBLOCK TO THE
GRAPHICS CARD
– Step 2
Install the cross bracket with the supplied Philips screws
(M2x6mm) and nylon washers: engage the first screw and
fasten it by no more than (1) full turn; then engage the second
screw at the opposite corner and while firmly pressing on the
leg of the bracket with your thumb, fasten it also by no more
than (1) full turn. Engage and fasten the remaining (2) screws,
following the same procedure; now you may complete fastening
of all (4) screws while always helping by placing pressure on
each leg with your thumb; fasten gradually and in a cross
pattern until each leg of the bracket bottoms out. **
IMPORTANT ** : these are fine screws and cross-threading
them is easy. Do not force the screw if you feel abnormal
resistance. Simply back it off completely, make sure that the
screw is straight, and only then resume fastening.