Swiftech MCW5002 AT User Manual
Page 3
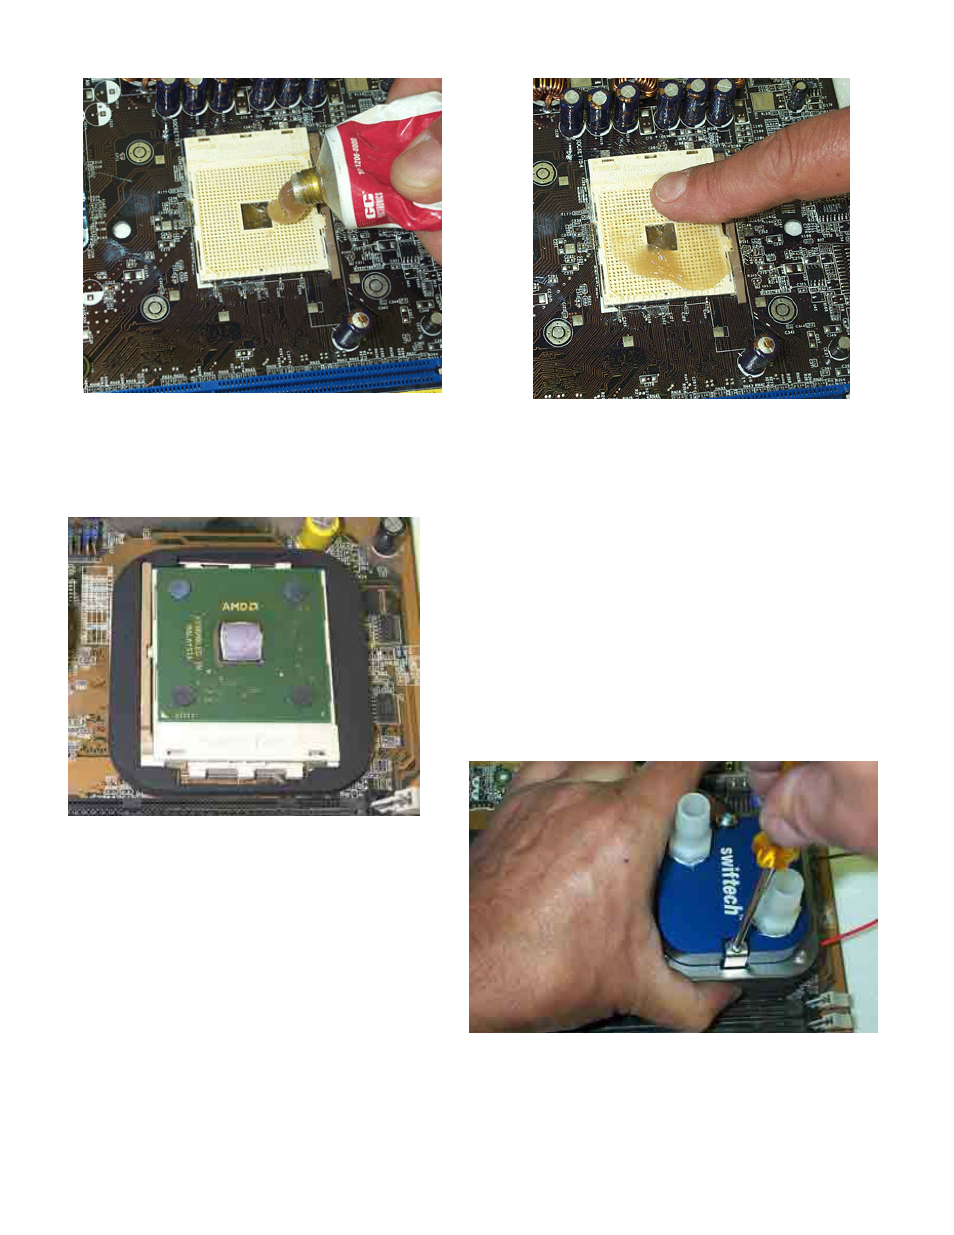
Figure 4
Figure 5
Squirt a generous amount of grease onto the socket.
Force the grease inside of the pin-holes with your finger. Make sure that
the central area of the socket is completely filled with grease.
b. CPU and cooler installation:
Figure 6
Remove the peel-off paper back from the motherboard gasket,
and install it as shown above. The sticky side should be
towards the motherboard.
Insert the processor into the socket. Since you have grease
inside the socket, some hydraulic pressure lift may occur: for
this reason, make sure that the processor sits perfectly flat,
and is inserted all the way into the socket.
Then, drop a small amount of high quality thermal compound
into the center of the processor core.
Securing the MCW5002-AT cooler to the motherboard:
Initial check: make sure that the retention clips are at their lowest position by
tightening the 2 spring loaded Philips screws until the springs are fully
compressed (do not over-tighten)
Engage one side of the clip under the CPU socket retention lugs
Gently pull the water-block in the opposite direction and push it down to
catch the opposite set of socket lugs. The clip will snap underneath the
socket lugs.
Firmly press the base of the clips (through the gaskets) between middle
finger and thumb as shown in Figure 7 to compress them against the socket
(this will prevent the clips for disengaging themselves from underneath the
tabs at start-up) then gradually and alternatively loosen the two spring
loaded Philips screws to secure the water-block.
Continue backing off the screws until the head of each screw completely
clears the top of the bracket, as shown figure 8.
Figure 7
Page 3 of 5 - Created 7-10-04 - Copyright
Swiftech – All rights reserved – Subject to change without notice