Inlet outlet, Fig. 3a – Swiftech MCW462AMD User Manual
Page 2
Copyright Swiftech 2001 – All rights reserved – Last revision date: Feb 1, 2002
Rouchon Industries, Inc., dbA Swiftech – 1703 E. 28
th
Street, Signal Hill, CA 90806 – Tel. 562-595-8009 – Fax 562-595-8769
E Mail: Swiftech @swiftnets.com – URL:
http://www.swiftnets.com
Information subject to change without notice
Page 2
•
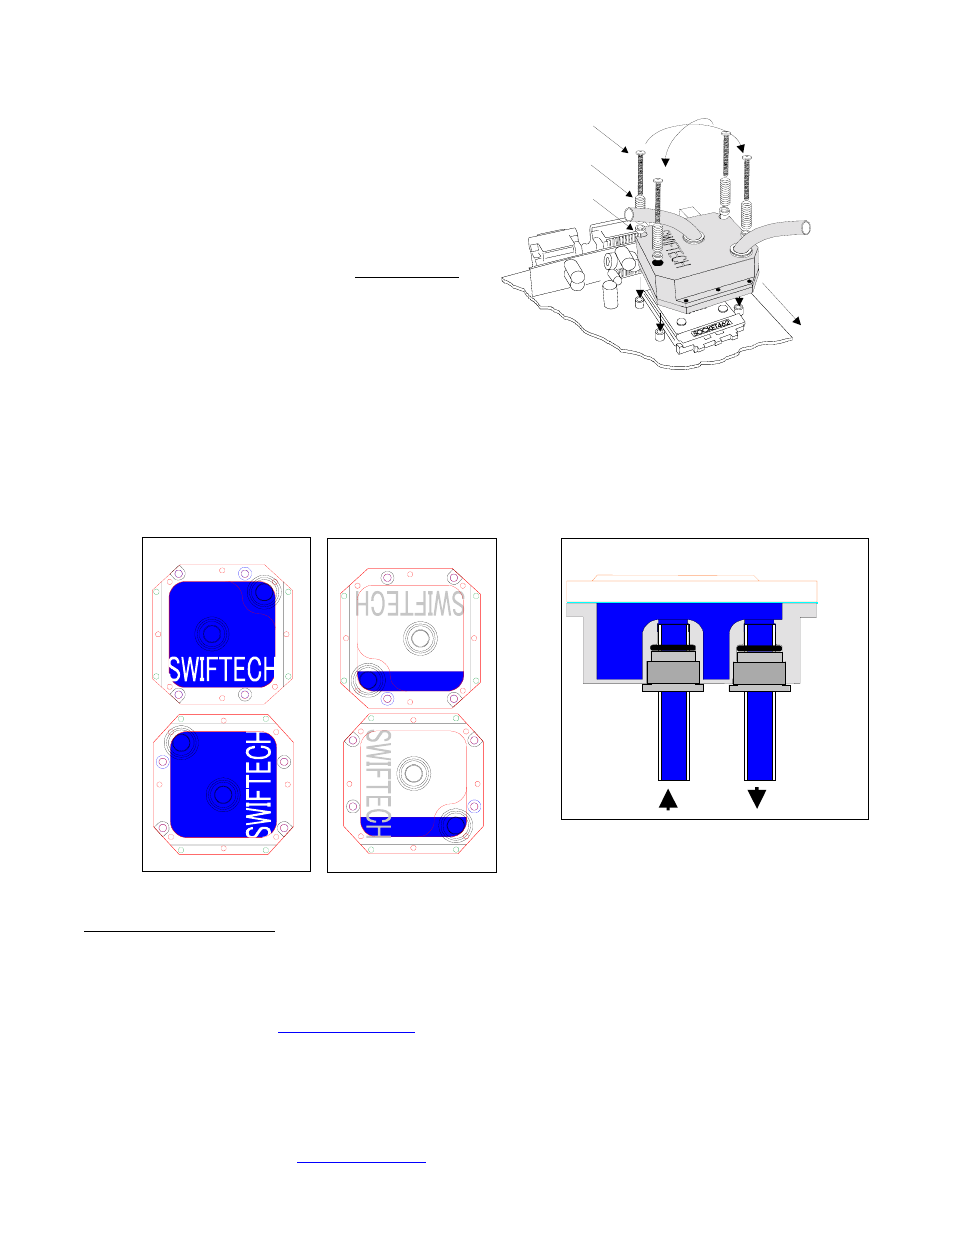
Orientation of the block is important for bleeding
purposes. Please look-up the critical bleeding instructions
paragraph below prior to installing the block on the CPU.
•
Install the MCW462-U block on the CPU. The copper base
of the MCW462-U features a large step for clearance with the
socket cam box. Make sure to respect this orientation. Keep
the heat sink mounting holes lined up with the standoffs.
Avoid twisting the block to prevent smearing the thermal
compound.
•
Gradually tighten the screws in a crisscross pattern until
you feel that they reach the bottom of the standoff. A “finger-
tight” lock is sufficient. Over tightening may result in stripping
the nylon hex nut. Conversely, adjustments such as
tightening the screws only partially are strictly prohibited.
Such attempts will result in improper contact between the
CPU core and the heat sink, and result in CPU overheating.
CRITICAL BLEEDING INSTRUCTIONS:
The following applies mostly to dual processor installations.
Depending on the orientation of the socket, it is critical to
observe the position in which your water-block is oriented for
bleeding purposes. Assuming that the computer is standing
up, and that the water-block is facing you as shown in Fig.1A
and Fig 2A. below, Fig. 1A shows the two positions in which
the MCW462-U will bleed correctly, and Fig. 2A shows the
two positions in which the MCW462-U will not bleed.
Large step side
over cam box
Crisscros
tightening
pattern
1 1/2“ Philips
screw
Spring
.230x.096
Nylon spacer
It is preferable to have the tubes already
inserted into the block prior to installing
the MCW462-U onto the CPU.
Figure 2
Two solutions are available to bleed the water-block correctly:
1.
Bleed the water-block prior to installing on the CPU. Simply rotate the block in the position shown in Fig. 1A.
2.
If you prefer to install the block first, then bleeding should be done with the computer laying down flat so that the Swiftech
logo is facing downwards, as shown in Fig. 3A
C O R R E C T B L E E D
N O B L E E D
Fig. 1A
Fig. 2A
C O R R E C T B L E E D
Inlet
Outlet
Fig. 3A
III. Temperature troubleshooting
IMPORTANT WARNING: AMD compatible motherboards measure the CPU temperature via a thermal probe located inside the socket. The
probe only measures the air temperature underneath the CPU. Motherboard manufacturers use mathematic formulas to extrapolate the actual
CPU temperature. Such formulas use correction factors to account for airflow around the socket generated by a conventional heatsink fan
cooler. In a liquid cooling environment, there is no airflow at all around the socket, since there is no fan attached to the water-block. This
leads to erroneous readings from the motherboard thermal probe, which reports much higher CPU temperatures than actual. Troubleshooting
help is available on our web site at
http://www.swiftnets.com
in the Service & Support section, Troubleshooting sub-section.
DISCLAIMER: Swiftech assumes no liability whatsoever, expressed or implied, for the use of these products.