Iii. installation for amd platforms – Swiftech MCW20 R User Manual
Page 3
Swiftech Inc., 1703 E. 28
th
St., Signal Hill, CA 90755 T. (562) 595-8009 F. (562) 595-8769
Page 3 of 2
3.
Connect the block to the rest of the cooling circuit.
4. Type of Coolant:
a.
For best performance, use 95% distilled water, and 5% Swiftech brand “HydrX” corrosion inhibitor (available here:
“accessories” section).
b.
In ALL cases, you MUST use Distilled water AND a corrosion inhibitor with the MCW5002 water-block. Regular
automotive anti-freeze is acceptable. Automotive manufacturers recommend that not less than 25% is used.
c.
NEVER use tap water, even for a short-term test.
d.
Not following paragraphs b and c above constitutes misuse (*) of the product, and will void your warranty.
4.
Final inspection
Once the installation is completed, it is always a good idea to test the circuit for leaks, prior to powering up the computer. If
using Swiftech’s fill-and-bleed kit, such test can be done without any liquid into the circuit. Please refer to the FBK525
installation
guide for details. Troubleshooting help is available on our
, or by calling customer support at 562-595-
8009.
III. Installation for AMD
platforms
1. Preparing
your
Motherboard
Remove the motherboard from the chassis
Remove the existing heat sink
Carefully clean the microprocessor, using alcohol
2. Installing
MCW20-A™
water-block
Install the provided screws through the motherboard,
using a black fiber washer on both sides of the
motherboard, and tighten the nuts.
Install the motherboard back into the chassis
Lightly coat the microprocessor with the provided
thermal compound. Only a paper-thin coat is necessary. It
should be applied using preferably a razor blade, or a credit
card, held between thumb and index at a 45-degree angle.
TIP! It is preferable to have the tubing inserted into the
water-block BEFORE you install the block onto the
motherboard. This is because pushing the tubes into the
block while it is already installed could exert undue
pressure onto the microprocessor.
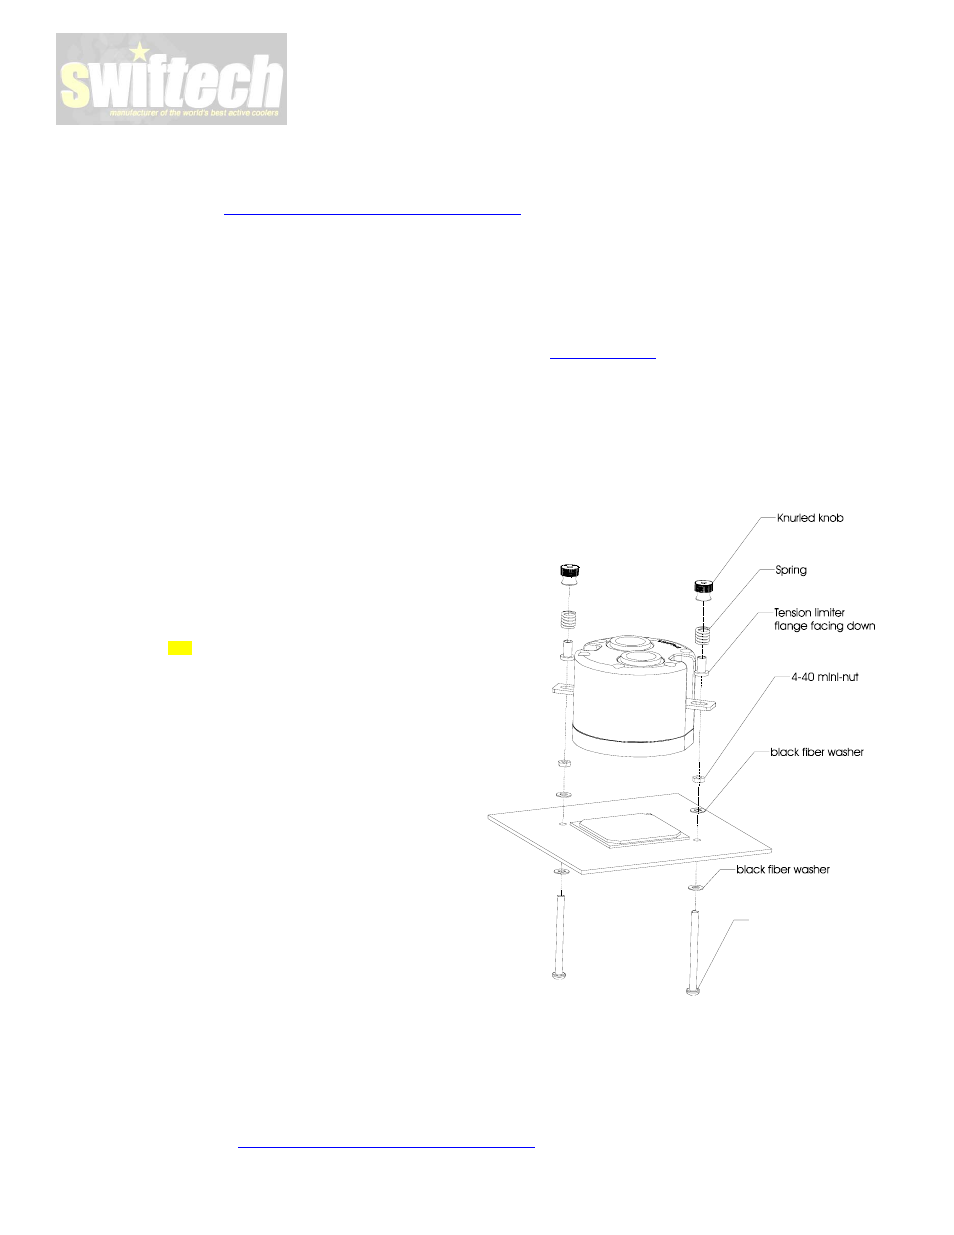
Slide down the MCW20-A over the retention screws,
as shown figure 10, then install the nylon tension limiters
(flange facing down), the springs, and tighten the assembly
with the knurled knobs. Over tightening of the assembly is
prevented by the tension limiter. Users should be cautious
nonetheless, as nylon can be easily crushed.
4-40 x 1 1/2“ philips screw
Figure 10
3.
Connect the block to the rest of the cooling circuit.
The block is designed in such a way that it will bleed itself automatically in any vertical orientation (computer standing-up).
4.
Type of Coolant:
a.
For best performance, use 95% distilled water, and 5% Swiftech brand “HydrX” corrosion inhibitor (available here:
“accessories” section).