Swiftech QPOWER P180 User Manual
Page 2
Copyright Swiftech 2006 - While all efforts have been made to provide the most comprehensive tutorial possible, Swiftech assumes no liability expressed or implied for any damage(s) occurring to your components as a result of using Swiftech cooling products, either due to mistake or omission on our part in the above instructions, or due to failure or defect in the Swiftech™
cooling products. In addition, Swiftech assumes no liability, expressed or implied, for the use of this product, and more specifically for any, and all damages caused by the use of this product to any other device in a personal computer, whether due to product failure, leak, electrical short, and or electro-magnetic emissions.
Snap out the fan & duct assembly.
Unfasten the 4 screws holding the fan to the fan
duct, and discard the duct as it will no longer be
needed.
Unfasten the 2 nuts holding the pump to the case
floor, lift the pump from its posts, and set the pump
out of the way.
Unfasten the two posts, and relocate them as
shown to the right.
Power-on the power supply, keeping your
finger on the button. The pump will start after 1
second delay and immediately syphon-off all the
fluid from the reservoir. Promptly power-off the
power supply to prevent damage to the pump:
W
W
arning!
arning! the pump cannot run “dry” for more than
a few seconds or this will damage its bearing per-
manently and void your warranty. Now refill the
reservoir, and repeat this procedure: normally only
one more time is needed until the reservoir is at
about half-level and the pump can run without
interruptions.
While the pump is running at first, the fluid will be
full of micro-bubbles, and appear milky and foamy
as shown below. Simply allow the pump to run
10~15 minutes for all the bubbles and foam to
At this point, you need to be able to start-
up the pump in order to complete the fill-up proce-
dure.
For safety reasons, you must be able to power
on the PSU without connecting it to the mother-
board. The Internet contains numerous references
on how to use a paper-clip to short-out pins 14
(PS-ON, green wire) and 13 (GND, black) of the 20
pin ATX connector (shown to the right) but we rec-
ommend instead using a power-supply tester.
These common devices are widely available on the
Internet (Google key word: "PSU tester"), and
among Swiftech resellers.
Use “elbow” power and SATA connectors
for your hard drives.
16
17
19
18
20
21
A
B
C
D
Tilt the case backwards: this will allow more fluid to
fill-up the system, then top-off the reservoir again.
clear up.
Place the fill-cap back, and gently tighten it, prefer-
ably with a wide tip screw driver.
Push the reservoir as far back as
possible, and tighten both
screws; finally connect the LED
Molex connector to the power
supply.
This completes the installation of
your Swiftech liquid cooling sys-
tem. Please allow your system to
run for a few hours and inspect it
for leaks before you complete the
electrical connections to mother-
board and other components.
~
Please refer to Antec’s installa-
tion guide for the chassis electri-
cal connections.
Now, connect the pump 4-pin molex connector to
the power supply.
Inspect the bench area to make sure that there is
no moisture anywhere.
Verify that the power button of the power supply
is off .
Finally Connect the power supply to an A/C out-
let.
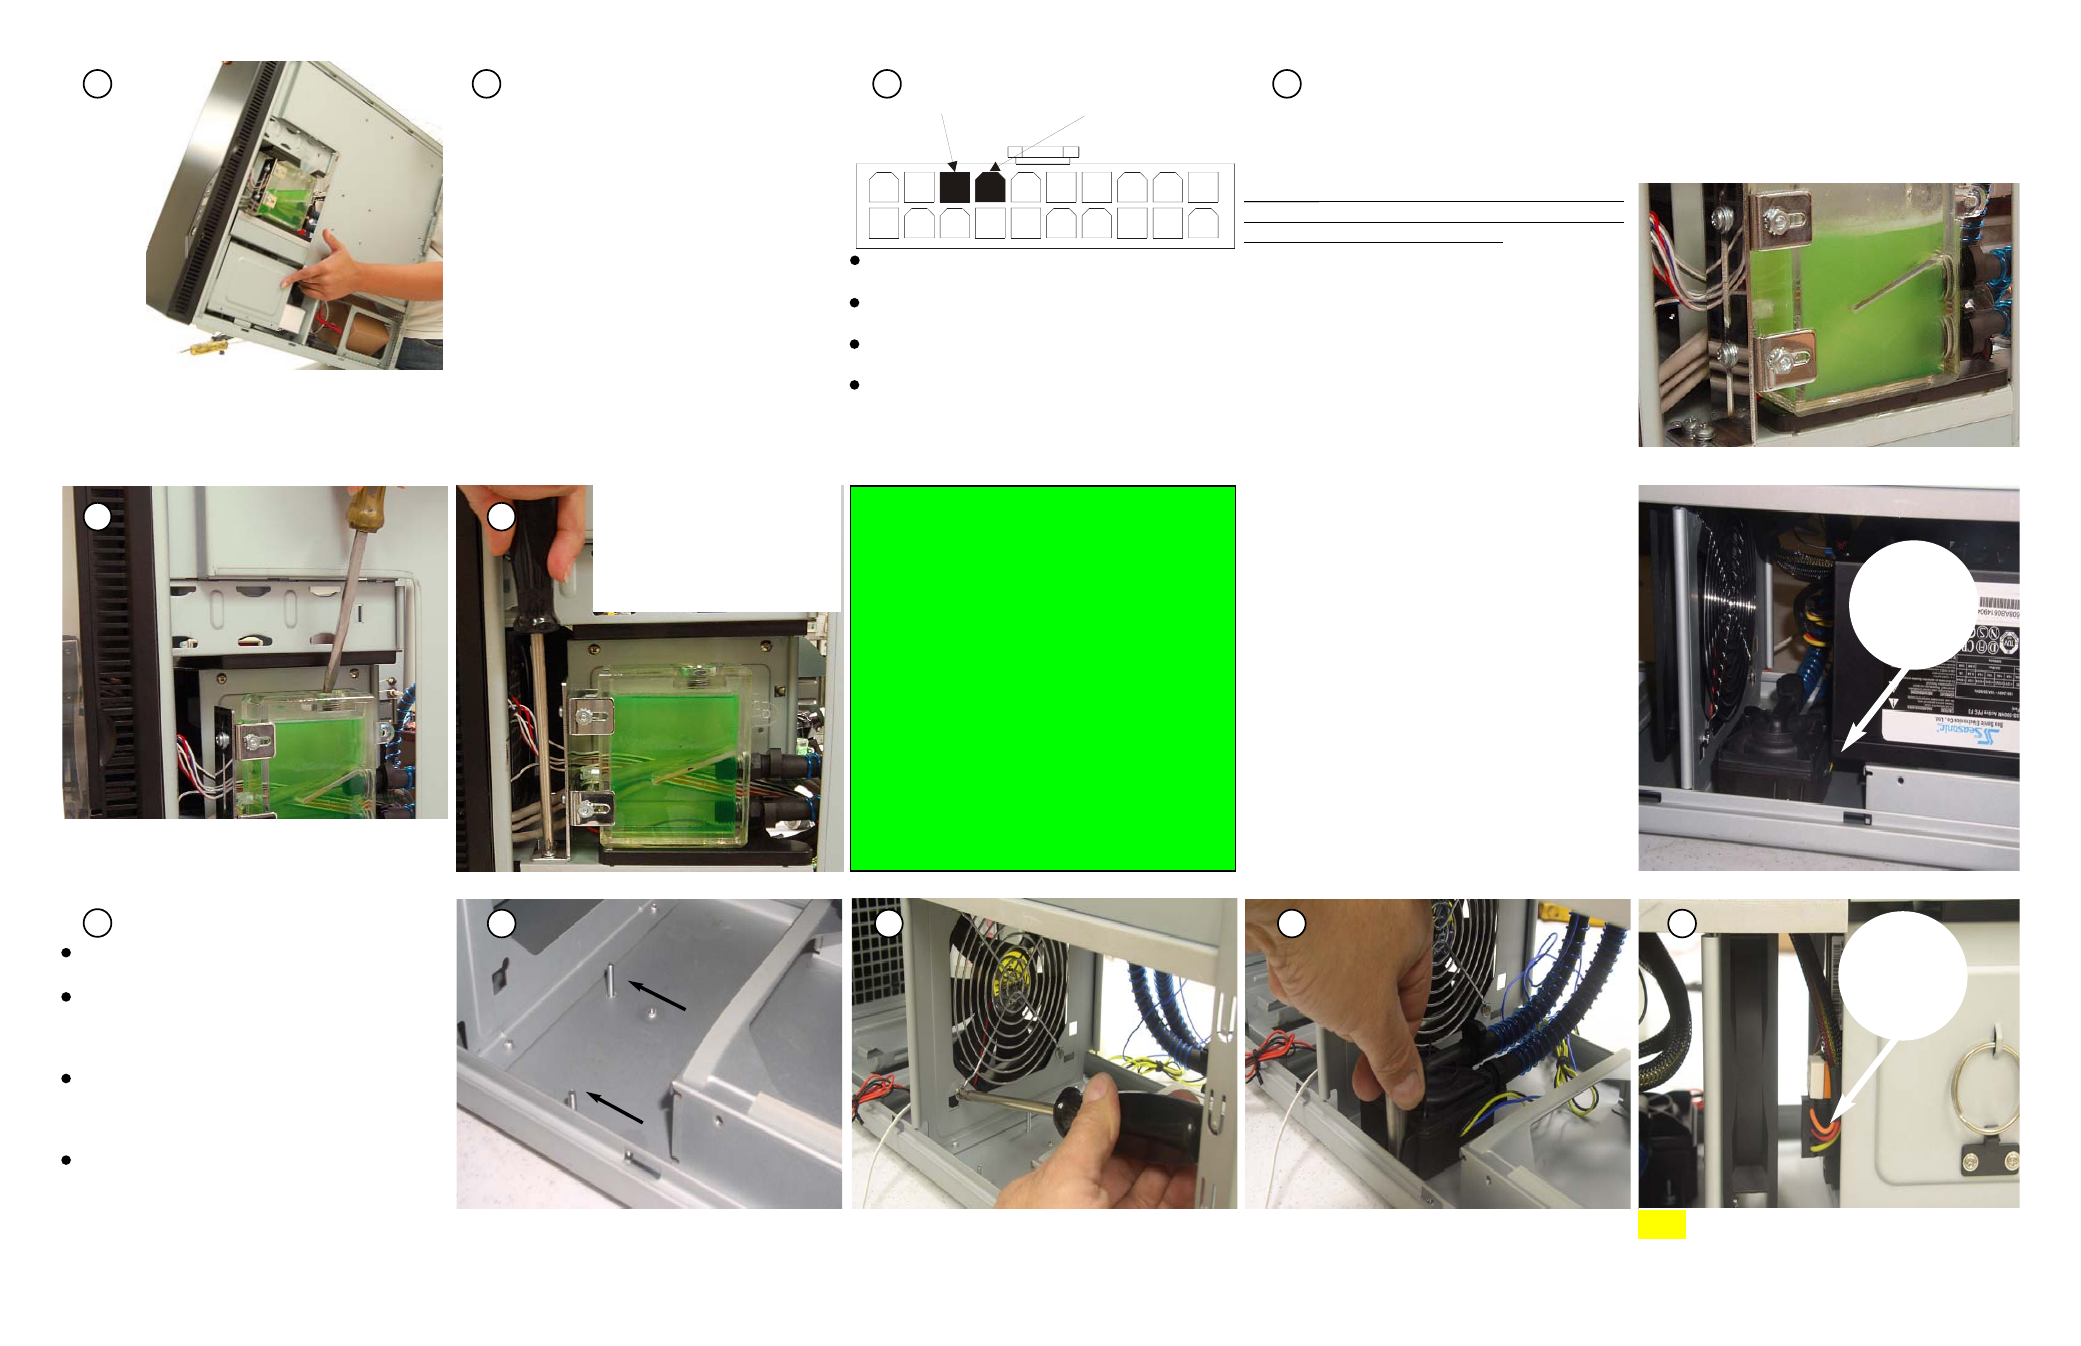
MODULAR POWER SUPPLIES
STEPS A THRU E
The following steps are only required when a mod-
ular power supply is used.
In effect, Modular Power Supplies are longer than
standard. The pump and the lowermost 120mm fan
and duct assembly need to be relocated - as shown
to the right, in order to allow the additional clear-
ance needed for the power suppply and cables.
Relocate the pump mounting posts as shown
above.
Re-install the fan as shown, the fan label should be
facing the power supply.
Fasten the pump back to its new location. A 5/16
“deep” socket is ideal to tighten these nuts. “Finger
tight” is only needed.
E
Longer than
standard
Elbow
Connectors
TIP:
13
14
(GND) BLACK
(PS-ON) GREEN