Swiftech MCX159 CU User Manual
Page 3
2. Heatsink fan installation thru motherboard holes (mostly AMD
, some Intel platforms)
2.1 Pre-installation steps
Installation of the heatsink always necessitates removal of the motherboard from the chassis.
Remove the existing heatsink and carefully clean the microprocessor with alcohol
Apply the provided neoprene pads onto the chipset if applicable (see figures 1 and 2 page 1)
2.2 Installation of the mounting posts
Follow Figure 6 below to install the retention posts: install two 4-40 x 1.25” Philips screws with fiber washers on both sides of the
motherboard, and secure them with the provided 4-40 mini-nuts.
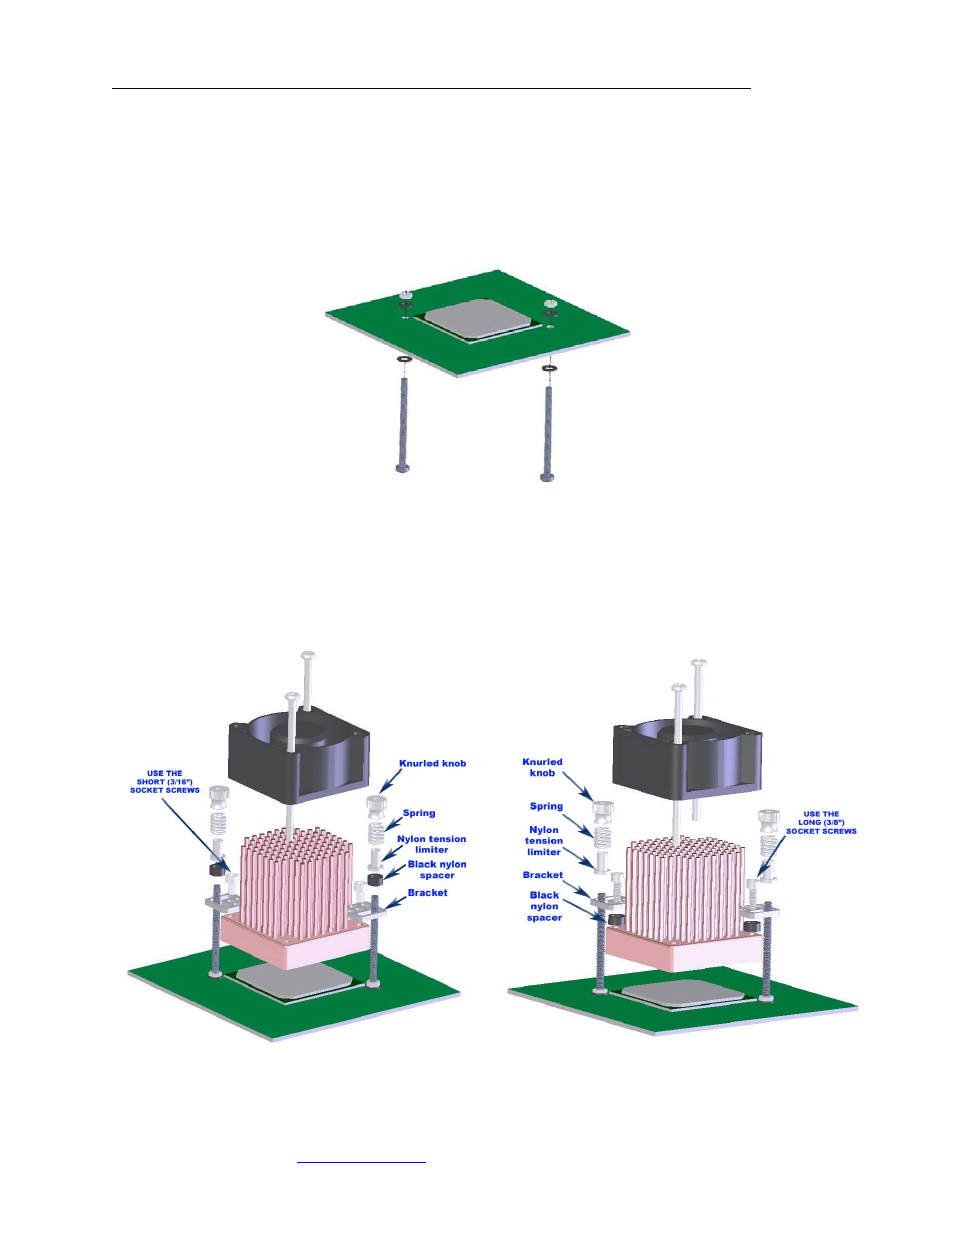
Figure 6
2.3 Heatsink assembly
Please refer to figure 3 page 1 to identify the adequate mounting holes for the brackets.
The heatsink brackets can be installed in two different fashions to allow more or less clearance with neighboring components:
a.
Bracket will be attached directly onto the heatsink as shown in figure 7.
b. A spacer will be placed between the bracket and the heatsink to position the bracket higher, and allow clearance for capacitors
in some motherboards (Asus A8N-SLI for example), as shown in figure 8.
c.
To determine which of the above will be used, simply place the heatsink on the chipset, and visually identify possible clearance
issues.
Figure 7
Figure 8
Page 3
Copyright Swiftech 2005 – All rights reserved – Last revision date: 8-16-05
Rouchon Industries, Inc., dba Swiftech – 1703 E. 28
th
Street, Signal Hill, CA 90755 – Tel. 562-595-8009 – Fax 562-595-8769
E Mail: Swiftech @swiftnets.com – URL:
http://www.swiftnets.com
Information subject to change without notice